식물 컬렉션
식물 식별 및 병해충 진단 결과를 모아볼 수 있습니다
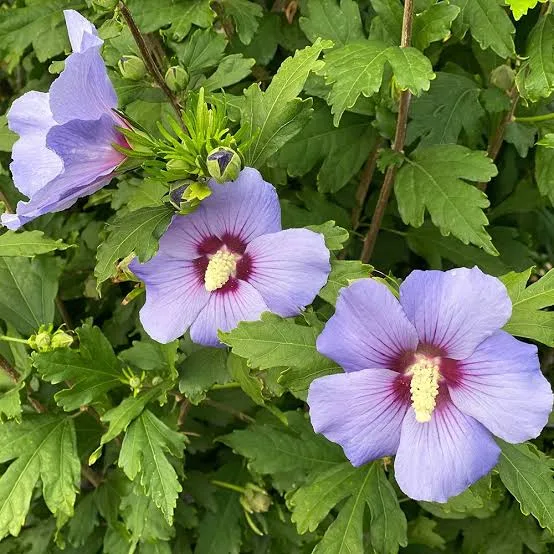
무궁화
95% 일치무궁화는 관상용으로 넓게 재배되는 관목성의 다년생 식물로, 꽃잎 다섯 장이 두껍고 넓게 펴지며 중앙에 노란 수술이 길게 돌출되는 특징이 있습니다. 꽃 색깔은 연보라에서 밝은 보라에 이르며, 꽃마다 중앙에 짙은 자색 눈(for eye) 같은 부위가 있습니다. 잎은 어긋나고 손바닥 모양으로 갈라진 형태가 많으며, 가장자리는 거친 톱니 모양으로 뚜렷합니다. 키는 보통 1~3미터 정도로 자라며, 봄부터 가을까지 번갈아 꽃이 피어 화단이나 도로변, 정원에서 화려한 경관을 연출합니다. 성장 속도가 빨라 관리가 비교적 쉬운 편이고, 내한성도 비교적 양호하여 한국의 기후에서도 넉넉히 재배 가능합니다. 다만 극심한 한파나 과습은 피해주어야 하며, 겨울에는 잎이 떨어지거나 휴면기에 들어갈 수 있습니다. 재배 환경은 햇빛을 충분히 받는 곳이 좋고, 배수 좋은 토양에서 잘 자랍니다. pH는 대략 5.5~6.5 정도를 선호합니다. 물 관리는 표토가 마를 때 깊게 주되 뿌리 주변이 물에 잠기지 않도록 주의합니다. 비료는 봄철에 균형비료를 소량 주고 여름에는 과도한 질소를 피하는 것이 좋습니다. 가지치기는 겨울~초봄에 실시해 형태를 다듬고 새 가지의 발달을 촉진합니다. 질병으로는 진딧물이나 응애가 나타날 수 있으며, 필요 시 적절한 방제제를 사용합니다. 번식은 가지치기 꺾꽂이로 비교적 쉽게 가능하며, 씨앗 번식은 품종 보존에 덜 안정적일 수 있습니다. 활용으로는 정원 수목의 포인트 제공, 화단 구성의 중심 요소, 경관 디자인의 한 축으로 자주 쓰이며, 주변 식물과의 조합에 따라 색감 변화와 공존 효과를 높일 수 있습니다.
2026년 5월 25일
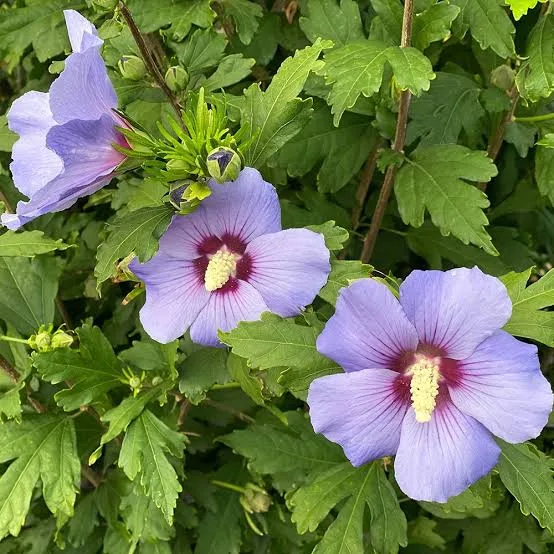
무궁화
95% 일치이미지 속 식물은 무궁화로 보이며, 보라빛의 다섯 꽃잎이 모여 큰 꽃을 이룹니다. 꽃 중앙에는 어두운 눈이 있고 노란색 수술관이 눈에 띄게 돌출되어 있습니다. 잎은 보통 3개로 갈라진 삼출형 모양이며 가장자리에 톱니가 뚜렷합니다. 여름에서 초가을까지 화려하게 피며 관상용으로 널리 재배됩니다. 다년생 관목으로 자라며 높이는 일반적으로 1~2m 정도이고 가지를 잘 다듬어 모양을 잡습니다. 자생지는 따뜻하고 햇빛이 잘 드는 곳을 선호합니다. 재배 팁으로는 배수가 잘 되는 비옥한 토양을 좋아하며, 물은 토양이 거의 마를 때 충분히 주되 뿌리가 물에 잠기지 않도록 관리합니다. 봄에는 균형 잡힌 비료를 주고 겨울에는 혹한으로부터 보호해주는 것이 좋습니다. 가지치기는 겨울~이른 봄에 실시해 새싹이 풍성하게 나오도록 하고, 진딧물 등 해충 관리에도 신경 써야 합니다. 삽목이나 분주를 통해 번식할 수 있으며, 정원이나 담장 주변의 포인트 식물로 활용하기에 적합합니다.
2026년 5월 25일
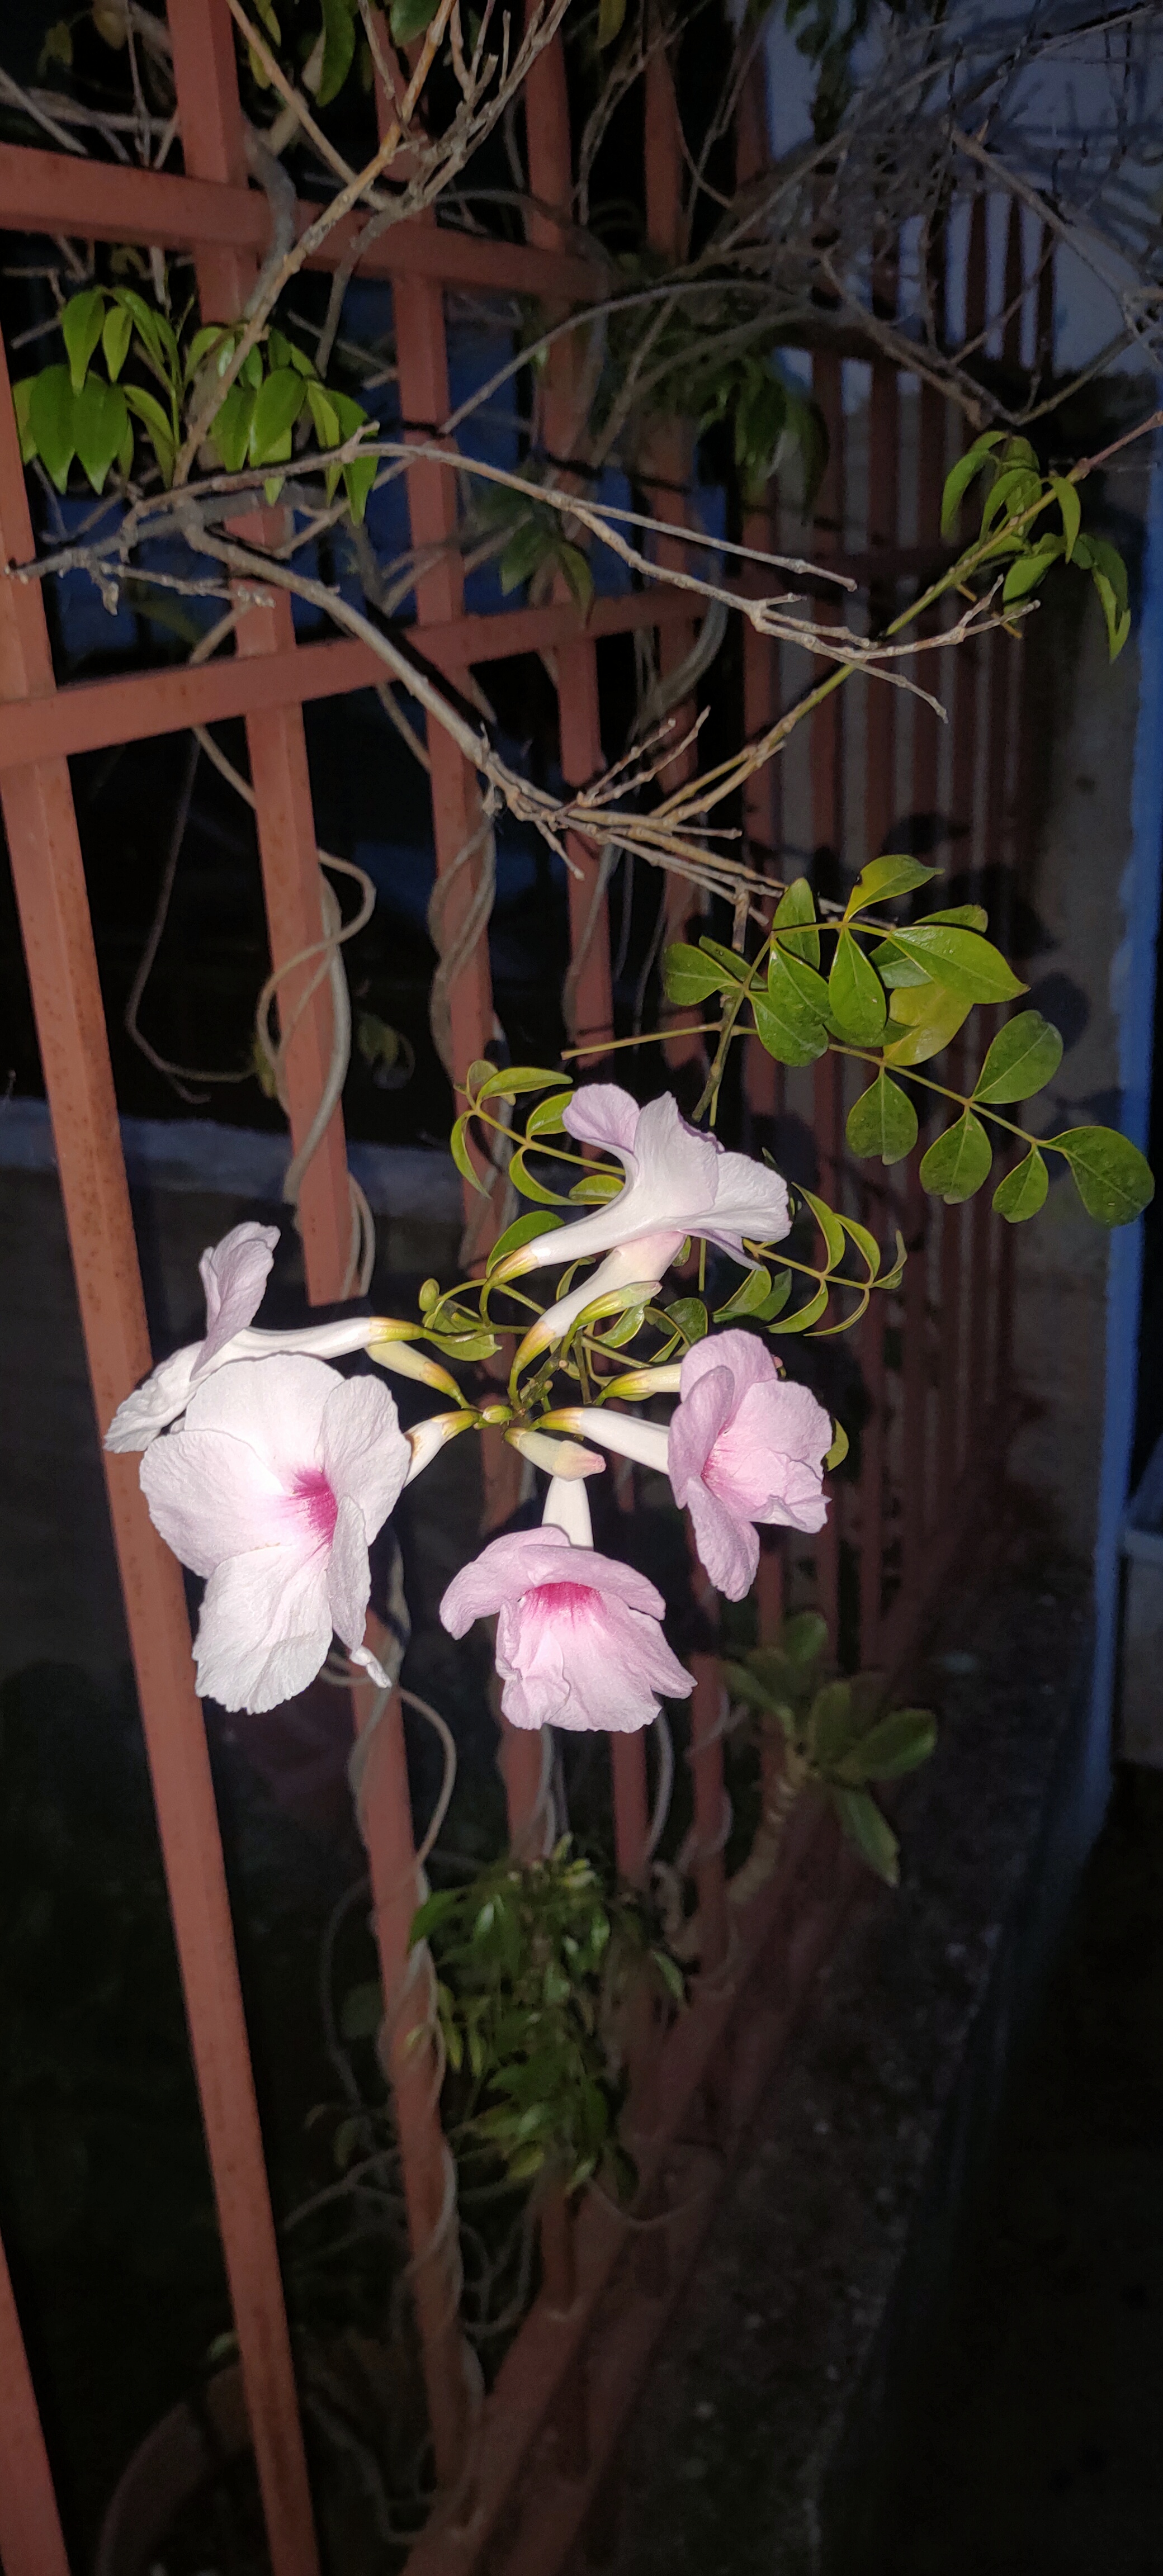
Mandevilla (Dipladenia)
95% 일치The plant shown appears to be a Mandevilla, a popular tropical climbing vine also sold under the name dipladenia. It is grown mainly for its showy, trumpet shaped flowers that come in shades of pink, white, and deep red, often with a contrasting throat. The plant is native to Central and South America and the Caribbean, where it grows as a vigorous climber in warm, frost free environments. In cultivation it is grown on trellises, fences, or arbors and can trail from containers or baskets. The distinctive floral display consists of large, five petaled blooms that form a funnel or trumpet shape. Each flower typically measures about 2 to 3 inches across, with a tubular corolla that widens into flaring lobes. The color in the photo appears as pale pink to white petals with a more saturated pink or magenta center or throat, which is common across numerous mandevilla hybrids. Leaves are glossy, dark green, and opposite, usually simple and oval to elliptical in shape. The vines are slender and woody, and will twine around supports or climb with the help of a trellis or wires, making mandevilla a striking vertical accent in a garden, patio, or balcony setting. The plant tends to produce clusters of blooms rather than solitary flowers, especially during the growing season, creating a vibrant display when given the right conditions. Depending on the cultivar, the plant may be evergreen in warm climates or semi evergreen in milder temperate zones, with leaf drop occurring if temperatures stay very cool for extended periods. The overall habit is of a vigorous, cheerful climber that can fill vertical space with both foliage and abundant blossoms when properly cared for. The aroma of mandevilla blossoms ranges from faint to moderately sweet, and in some cultivars the scent is stronger in the evening, adding to the plant’s appeal in outdoor seating areas. In addition to its visual appeal, mandevilla is relatively forgiving and adaptable, but it does have specific cultural needs to perform well, especially in cooler climates where it is often grown in containers that can be moved indoors during winter. The plant belongs to the Apocynaceae family, which includes other tropical ornamentals that share a similar glossy leaf texture and showy blooms. Overall, the pictured plant matches the classic traits of mandevilla dipladenia: a climbing or trailing tropical vine with pink to white trumpet flowers, glossy opposite leaves, and a habit that thrives with sun, warmth, and attentive but not excessive care.
2026년 5월 22일
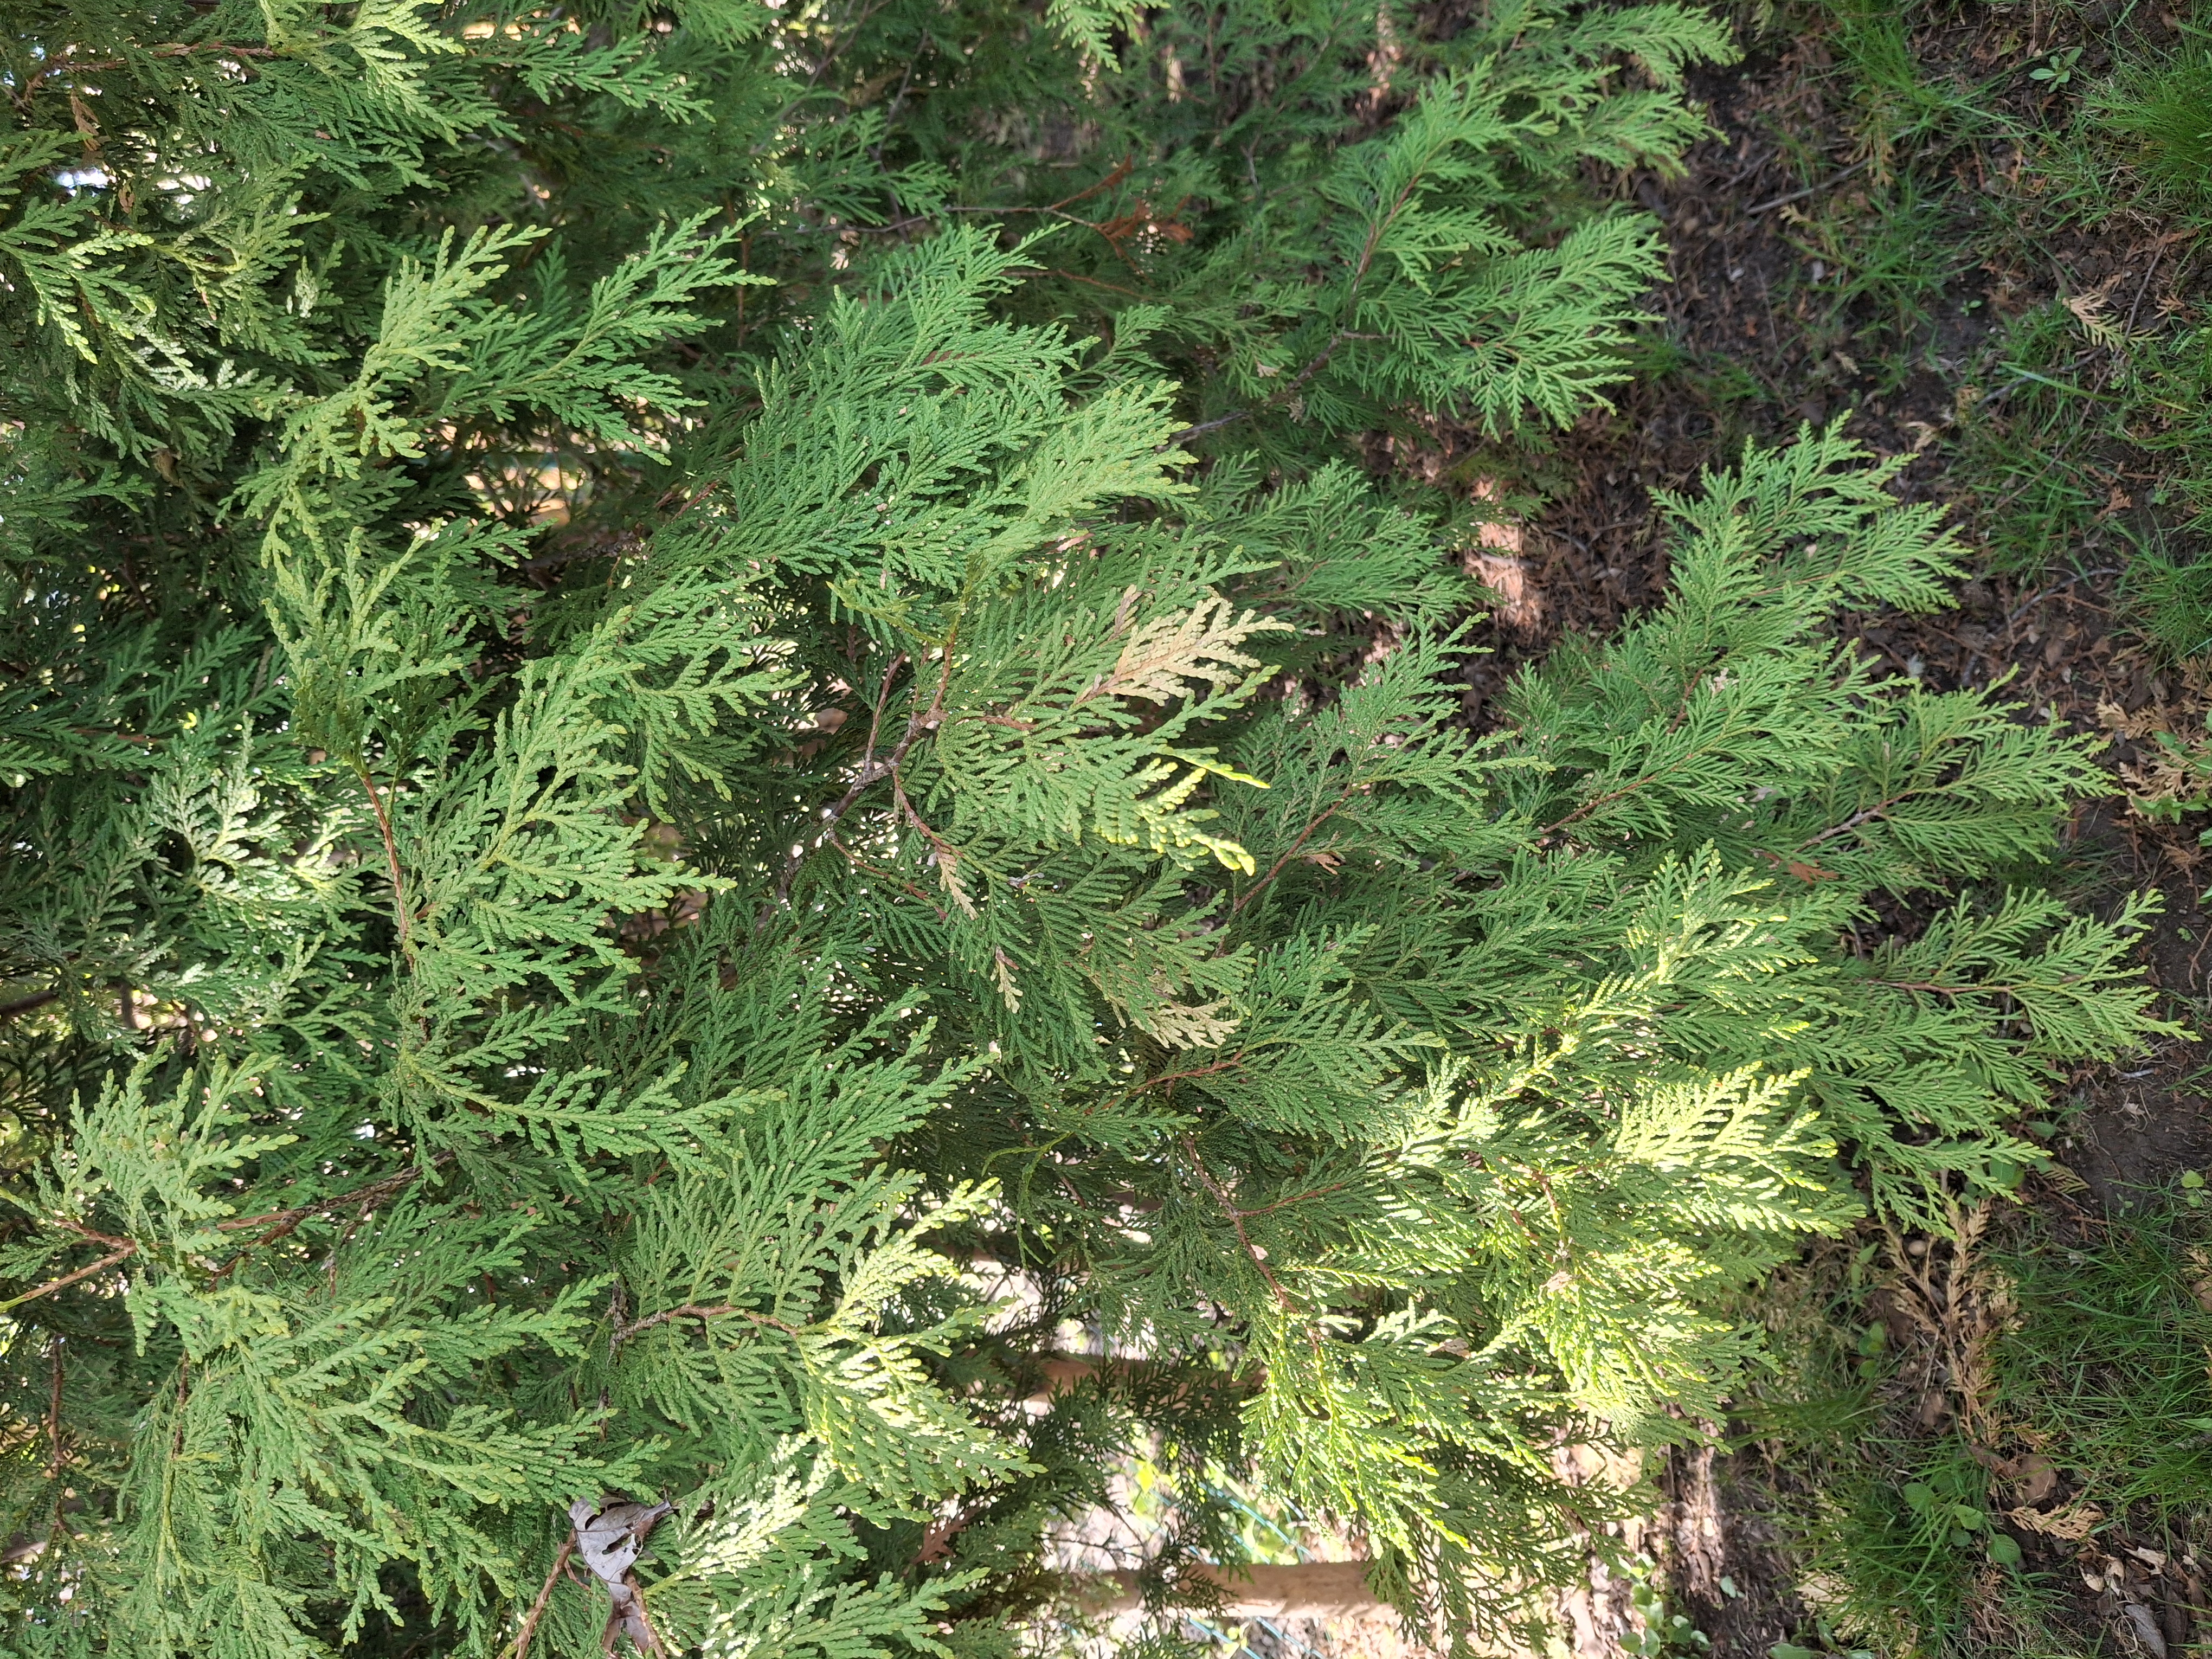
Juniper (Juniperus) shrub
70% 일치The plant shown in the photos is best identified as a juniper shrub (genus Juniperus), a common evergreen conifer used extensively in gardens and landscapes. The foliage is made up of small, scale-like leaves that create a soft, feathery texture on dense, spreading branches. New growth often appears lighter or yellow-green, which adds brightness to the overall plant during the growing season. The branches tend to have a somewhat cascading or sprawling habit, forming a thick, bushy mass that can serve as a hedge, screen, or ground cover depending on the cultivar and pruning used. While the exact species and cultivar cannot be determined from the photos alone, the characteristics are typical of many evergreen junipers used in temperate gardens, including J. chinensis, J. sabina, or related cultivars that have been selected for dense foliage and low-to-moderate height. What you are seeing is a conifer with a strong evergreen presence and a texture that is both graceful and forgiving in garden settings. The tiny leaves are scale-like and overlap along the shoots, giving the impression of a soft, compact surface rather than sharp needles. This is a hallmark of many junipers and some related cupressaceous plants. The color range—bright to deep greens with lighter new growth—reflects common juvenile vs. mature foliage in junipers, as well as the sun exposure and soil conditions in the planting site. Cultural and landscape uses - Hedges and screens: Junipers are frequently pruned into formal or informal hedges, offering year-round privacy and windbreaks. They respond well to regular shearing when you want a dense, uniform look. - Specimen and foundation plantings: Their evergreen color and textural ripples in the foliage make them attractive as standalone or near-building accent plants. - Ground cover and mass plantings: Spreading cultivars can blanket slopes or beds, suppressing weeds and providing a low-maintenance option. - Drought-tolerant landscapes: Once established, many juniper cultivars are quite drought-tolerant and thrive in well-drained soil with good sun exposure. Key botanical features - Foliage: Small, scale-like leaves arranged along slender shoots form flattened sprays. New growth is often lighter in color, providing contrast throughout the growing season. - Growth habit: The plant in the photos appears to be a dense, spreading shrub rather than a tall, columnar form. Depending on the cultivar, junipers can be low groundcovers, mounding shrubs, or upright trees. - Bark: The bark tends to be reddish-brown to gray, often pebbly or fibrous in older wood; it becomes more apparent on larger, older specimens. - Cones: Junipers bear fleshy berry-like cones that are typically bluish or purplish and help identify the plant as a juniper to a trained eye. These are not always obvious on young or densely cultivated plants. Care and maintenance (general guidelines that apply to most juniper cultivars) Light and site - Sun exposure: Junipers perform best in full sun, which means at least 6 hours of direct sun per day. They tolerate some light shade, but in shade they may become leggy and less dense. - Wind: If planted in exposed sites, provide some shelter. Strong winds can desiccate evergreen foliage, especially on the outer tips. Soil and drainage - Soil type: They prefer well-drained soil. They tolerate a range of soil textures, including sandy or loamy soils, and they often tolerate fairly poor soils better than they tolerate consistently wet, compacted conditions. - pH: Most junipers are adaptable across a range of pH levels, from slightly acidic to neutral; excessive alkalinity or acidity is rarely an issue unless the site is extreme. Watering and moisture - Establishment: Water regularly after planting to help roots establish. Keep the soil evenly moist (not waterlogged) for the first growing season. - Mature plants: Once established, many juniper cultivars are drought-tolerant. Deep, infrequent watering is often preferable to frequent light watering. In prolonged drought, a deep soak every few weeks is usually sufficient. - Avoid waterlogging: Junipers dislike soggy soils, which can lead to root rot and other issues. Fertilization - Timing: Feed sparingly in early spring with a balanced, slow-release fertilizer if growth looks sparse or the plant is in poor soil. Avoid heavy fertilization, which can encourage excessive soft growth more susceptible to cold damage and pests. - Type: A general-purpose conifer or slow-release shrub fertilizer is typically suitable; follow label directions carefully. Pruning and shaping - When to prune: Prune after the main flush of new growth in late spring or early summer. Light, ongoing maintenance pruning is easier than heavy reshaping and helps maintain dense, natural form. - How to prune: Remove dead, diseased, or damaged wood first. For hedges or screens, use selective clipping to maintain a uniform width. Avoid cutting into old, brown wood that shows no living green tissue, as junipers do not readily regrow from old wood. - Containment: If you want a more formal shape, plan a regular pruning schedule; otherwise, let the plant keep its natural, layered look, which is often more visually appealing and less work. Mulching and soil care - Mulch: Apply a 2-3 inch layer of organic mulch around the base (but not touching the trunk) to conserve moisture, regulate soil temperature, and reduce weeds. - Soil improvement: If soil is heavy clay or very poor, amending with organic matter can help drainage and root development, but avoid over-amending with rich organic matter that may promote too-rapid top growth. Pests, diseases, and signs of trouble - Common issues: Junipers can be susceptible to diseases such as cedar-apple rust and root rot if the soil stays wet, as well as pests like scale insects, spider mites, and bagworms. Good air circulation, proper planting depth, and avoiding overly wet conditions help reduce problems. - Symptoms to watch: Yellowing or thinning foliage, dieback on inner or outer branches, resinous (sticky) exudates, or the appearance of small, discolored spots on bark or needles may indicate disease or pest pressure. If pests are visible, appropriate horticultural oils or insecticidal soaps can help, but always follow product instructions and consider the impact on beneficial insects. - Preventive care: Keep the plant well spaced from other vegetation to improve airflow, remove fallen plant debris to reduce overwintering pests, and ensure proper watering practices to avoid overly moist soil that can foster root diseases. Propagation - Cuttings: Many juniper cultivars root well from semi-hardwood cuttings taken in late summer. Use well-draining medium and provide high humidity until rooting occurs. - Layering: Some junipers can be induced to form new plants by bending low branches to the soil, pegging them down, and encouraging them to root. - Seed: Propagation by seed is possible but less reliable for maintaining cultivar traits. Lifestyle and seasonal care - Winter care: Most junipers tolerate cold winters well in temperate climates, though extremely harsh winds and drying winter air may desiccate outer growth. A layer of mulch helps moderate soil temperature. - Summer care: In hot climates, ensure adequate moisture during heat waves. A layer of mulch helps retain soil moisture and reduces weed competition. - Longevity and succession: With proper care, many juniper cultivars live for several decades and can become longstanding backbone plants in a landscape. Regular pruning to maintain desired size and shape can prolong vigor and aesthetic appeal. Common cultivar notes to help with identification and care (optional guidance) - If you are aiming for a neat hedge, you might choose a cultivar that is known for dense, uniform growth and a compact habit. If you prefer a more natural, sprawling look, select a low-growing ground-cover variety and prune only to remove dead wood or to maintain a soft outline. - Scout for cones or berries in late summer or fall; some cultivars feature prominent berry-like cones that add seasonal interest and can help confirm a juniper ID for reference, though not all cultivars display conspicuous fruit. - For those who enjoy edible aspects, juniper berries are used in flavoring spirits like gin, though many landscape cultivars are not intended for culinary use and berries should not be consumed in large quantities without proper identification and guidance. Important notes for this photograph - The plant appears to be a dense, evergreen shrub with scale-like foliage and bright green new growth, typical of several juniper cultivars or related cupressaceous species used in ornamental landscapes. - If you want a more precise identification (species or cultivar), examine the plant for: (1) the exact shape and density of the growth habit, (2) the presence and appearance of cones or berries, (3) the texture of the foliage up close (scale-like versus needle-like), and (4) the bark characteristics. A horticulturist or local extension service, or a comparison with labeled nursery specimens, can help confirm the exact cultivar. In summary, the plant in your photos is most reliably described as a juniper shrub—a versatile evergreen conifer valued for its year-round color, feathery foliage texture, and drought tolerance. With appropriate sun, well-drained soil, and mindful pruning, it can serve as a low-maintenance hedge, a screen, or a decorative accent in landscaped beds. If you provide more details about climate, soil, and your preferred landscape look, I can tailor a precise care plan and suggest a few cultivar options that match the appearance and growth habit you’re aiming for.
2026년 5월 17일
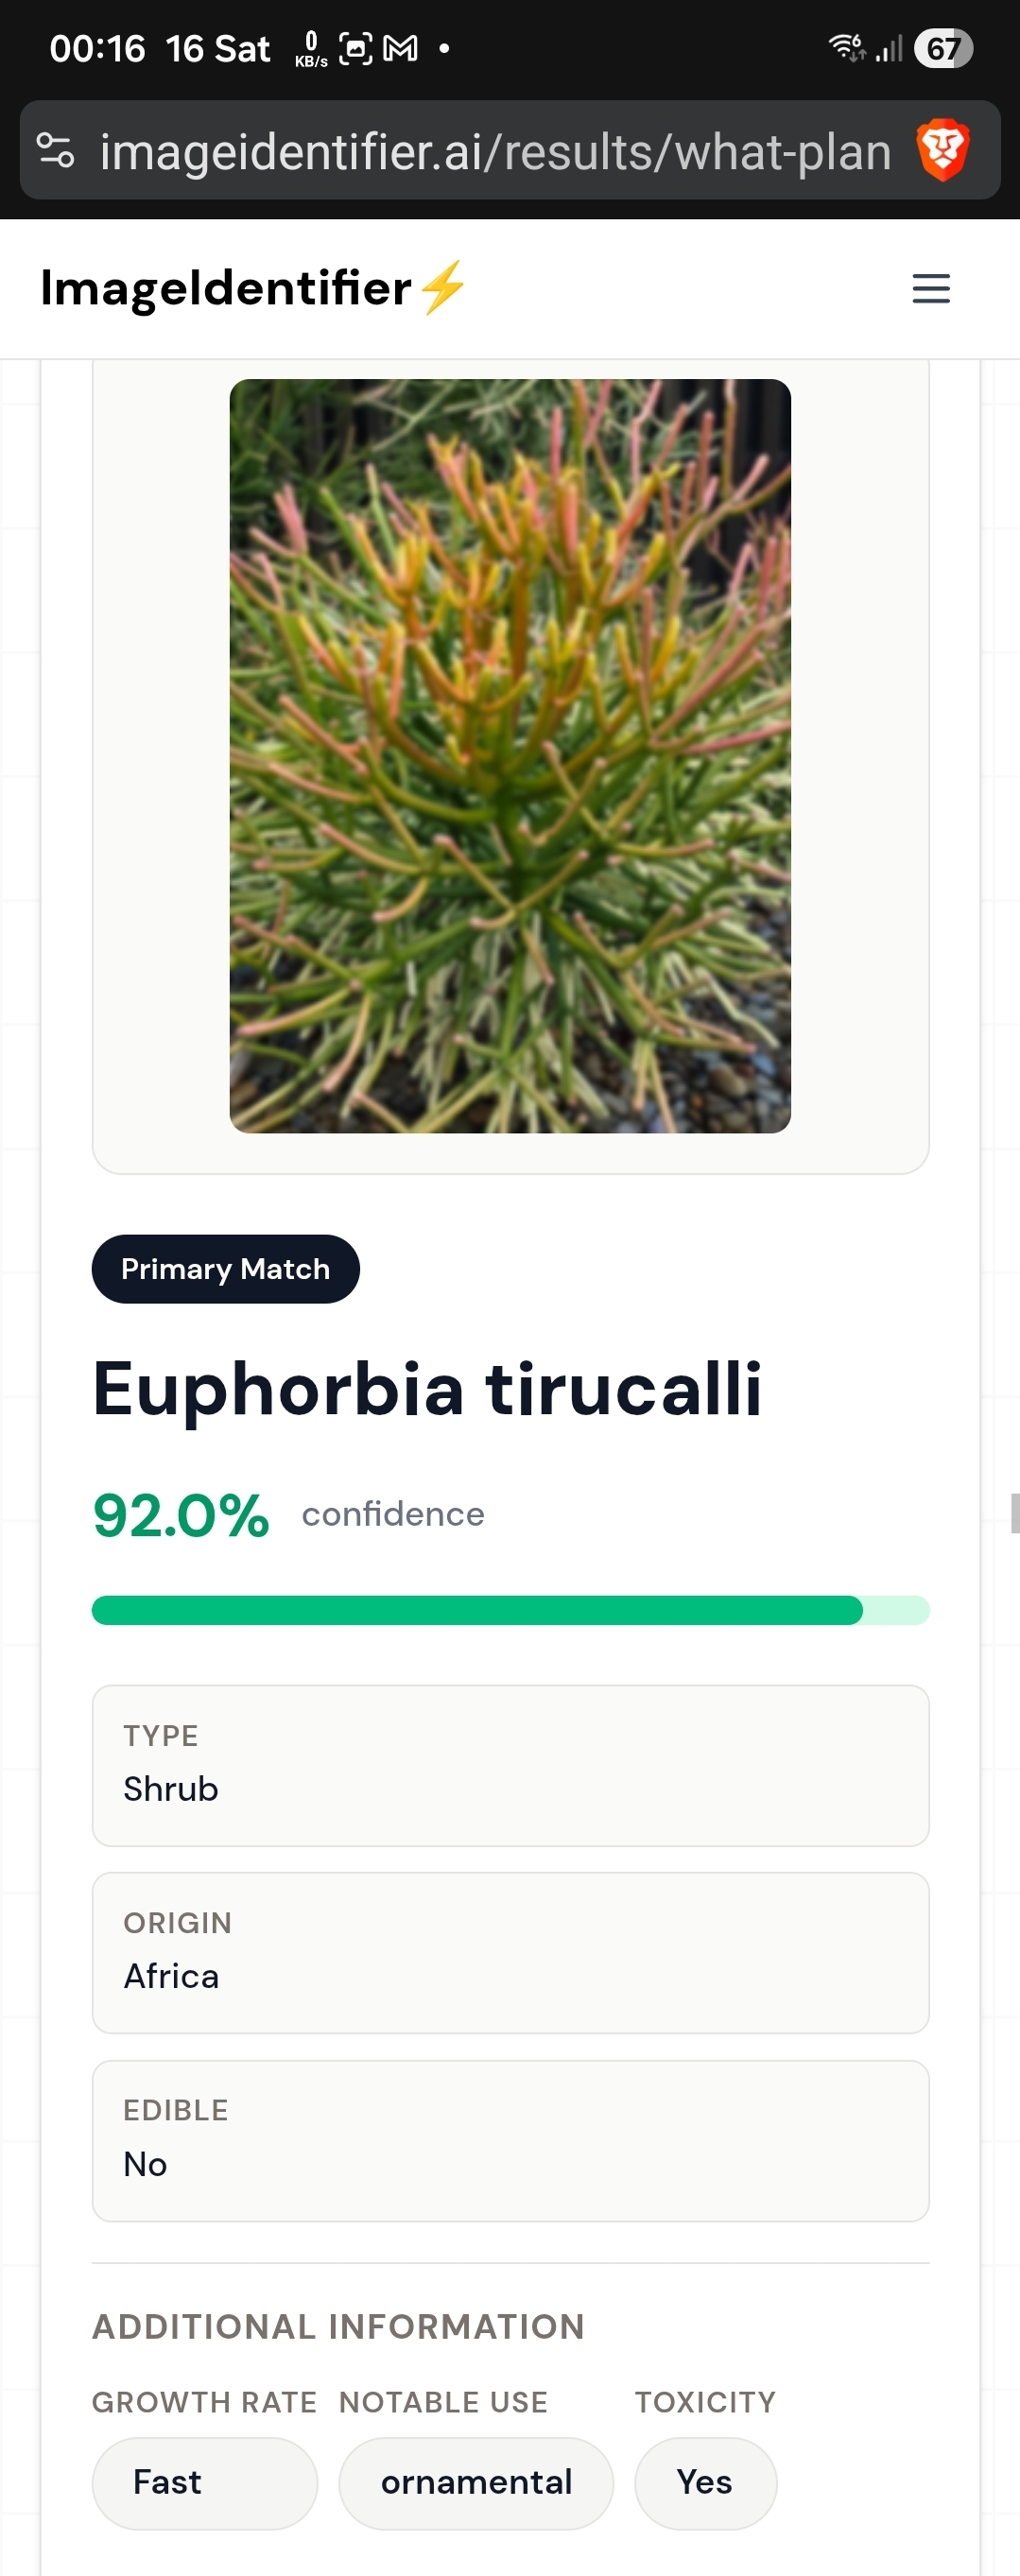
Euphorbia tirucalli (Pencil Cactus)
95% 일치Euphorbia tirucalli, commonly called pencil cactus, firestick plant, or milk bush, is a striking succulent shrub native to arid regions of Africa and parts of Asia. It is best known for its thin, cylindrical, leafless stems that form dense, branching thickets. The stems are pencil like in appearance, usually green to yellow green, and they often take on fiery tones—orange, red, or pink—when exposed to bright sun or hot temperatures. The plant looks almost like a collection of green or colored sticks and can create a dramatic architectural feature in a garden or indoor space. In the landscape you may see it growing as a sprawling shrub or a tall, cane like tree; indoors it often remains smaller but still maintains a bold, sculptural form. A key feature is the milky latex that oozes from any cut or break in the plant, which is common in many Euphorbia species. That latex is caustic and can irritate skin and eyes, so handling should be with care and protective gloves is recommended. The leaves are either very small or absent, which is why the stems themselves are the visible ornament. The plant is evergreen and adapts to hot, dry conditions, but it is not frost tolerant and slows its growth in cooler seasons. Care and cultivation overview - Light and placement: Pencil cactus thrives in bright light and often performs best in full sun. It can tolerate some light shade, but intense, long lasting sun usually brings the most vivid stem color and denser branching. When grown indoors, place it near a sunny window. If your plant becomes leggy, it is a sign that it needs more light. - Temperature and climate: This plant prefers warm conditions and does not tolerate freezing. Aim for day temperatures roughly above 65 F (18 C) and keep it away from drafts and frost. In very hot climates the plant can handle high temperatures, but provide adequate sun exposure gradually to avoid sunburn on new growth. - Watering and soil: Euphorbia tirucalli is a drought tolerant succulent. Water deeply but infrequently, letting the soil dry out completely between waterings. Overwatering or prolonged wet soil can lead to root rot and other problems. In winter, reduce watering further because the plant rests. Use a well draining soil mix such as a cactus or succulent potting mix with added perlite or coarse sand to improve drainage and prevent moisture retention around the roots. - Soil pH and nutrients: A neutral to slightly acidic soil pH (around 6.0 to 7.5) is suitable. Fertilize sparingly during the growing season (spring through summer) with a balanced, diluted fertilizer (for example a 10-10-10 or 20-20-20 at 1/2 to 1/4 strength every 4 to 6 weeks). Do not fertilize in winter when growth is minimal. - Potting and repotting: Use a pot with good drainage and refresh potting mix every couple of years to prevent soil compaction and to check root health. If the plant becomes root bound, it is appropriate to move it to a slightly larger container. - Pruning and shaping: Light pruning can help control height and encourage branching, but take care to use clean shears and avoid wounding the plant unnecessarily. When cut, the latex will ooze out; avoid contact with skin and eyes. Prune during warm periods of the growing season for best recovery. Branches can be trained or wired into a desired shape if you want a more ornamental form, but always remove larger cuts with caution because the plant can exude a lot of latex. - Propagation: Propagation is commonly done from stem cuttings. Cut a healthy branch, allow the cut end to callous for several days to a week, then insert into a well draining mix (slightly damp, not wet) and keep in bright light. Root formation occurs in several weeks to a couple of months depending on conditions. Avoid injuring the plant or its latex during handling of cuttings. - Pests and diseases: This plant is relatively hardy but can be affected by pests such as mealybugs, scale, and spider mites. Keep an eye on the undersides of stems and new growth. Treat with insecticidal soap or horticultural oil if infestations appear. Root rot can occur if watering is excessive or the soil does not drain well; ensure proper drainage and reduce watering if signs of rot appear. - Toxicity and safety: All parts of Euphorbia tirucalli contain a milky latex that is caustic and can irritate skin, eyes, and mucous membranes. Ingestion is dangerous. Wear gloves when pruning or handling cuttings, and keep the plant away from children and pets. If latex contact occurs on skin or eyes, rinse immediately with plenty of water. If a large amount is ingested or if irritation persists, seek medical advice. - Uses and landscape value: The pencil cactus is valued for its sculptural form and drought tolerance. It is a popular choice in xeriscapes, modern and tropical style gardens, and contemporary indoor spaces where a striking architectural element is desired. When grown outdoors in warm climates, it can reach substantial height and form a dense, bristly canopy; as a container plant, it offers year round visual interest with minimal maintenance. - Growth rate and longevity: In optimal conditions, Euphorbia tirucalli grows steadily and can live for many years. Growth rates slow during cooler periods but recover quickly with warmth and light. Because the plant sheds older growth slowly and continuously new growth appears as slender shoots from the interior, the overall appearance remains airy and open rather than dense and leafy. - Special notes on invasiveness and regional considerations: In some regions outside its native range, Euphorbia tirucalli has the potential to become invasive or to escape cultivation. Always check local guidelines and avoid planting where it could spread into natural habitats. In areas with heavy frost or cold winds, provide winter protection or move container plants indoors. - Common names and recognition: Although called pencil cactus, it is not a true cactus. It belongs to the euphorbia family, which includes many succulents that share the drought tolerance and latex phenomenon. The bright color shift on the tips under high light is a hallmark of this species and helps identify it in mixed plantings. - Care summary for beginners: Start in bright light with a well draining soil, water sparingly, and avoid letting the soil stay wet. Use gloves when handling and pruning to avoid latex contact. If you are growing it indoors, provide as much light as possible and monitor humidity to prevent overly dry conditions that can stress the plant. - Practical tips: If you notice the plant becoming leggy, prune back some of the interior growth to encourage bushier branching. If a cutting is damaged, seal the cut to minimize latex loss and disease risk. When repotting, handle with care and use a clean container to minimize pest introduction. Regularly remove dust from stems to keep the plant looking vibrant and to help photosynthesis proceed efficiently. In sum, Euphorbia tirucalli is a dramatic, low maintenance succulent that offers architectural impact with relatively simple care. Its slender stems and potential for fiery coloration provide visual interest in warm climates and sunny interiors. However, its latex and toxic properties demand careful handling, and overwatering should be avoided to keep the plant healthy. With proper light, warmth, and a lean, well draining soil, the pencil cactus can thrive for many years as a standout feature in both outdoor and indoor settings.
2026년 5월 15일
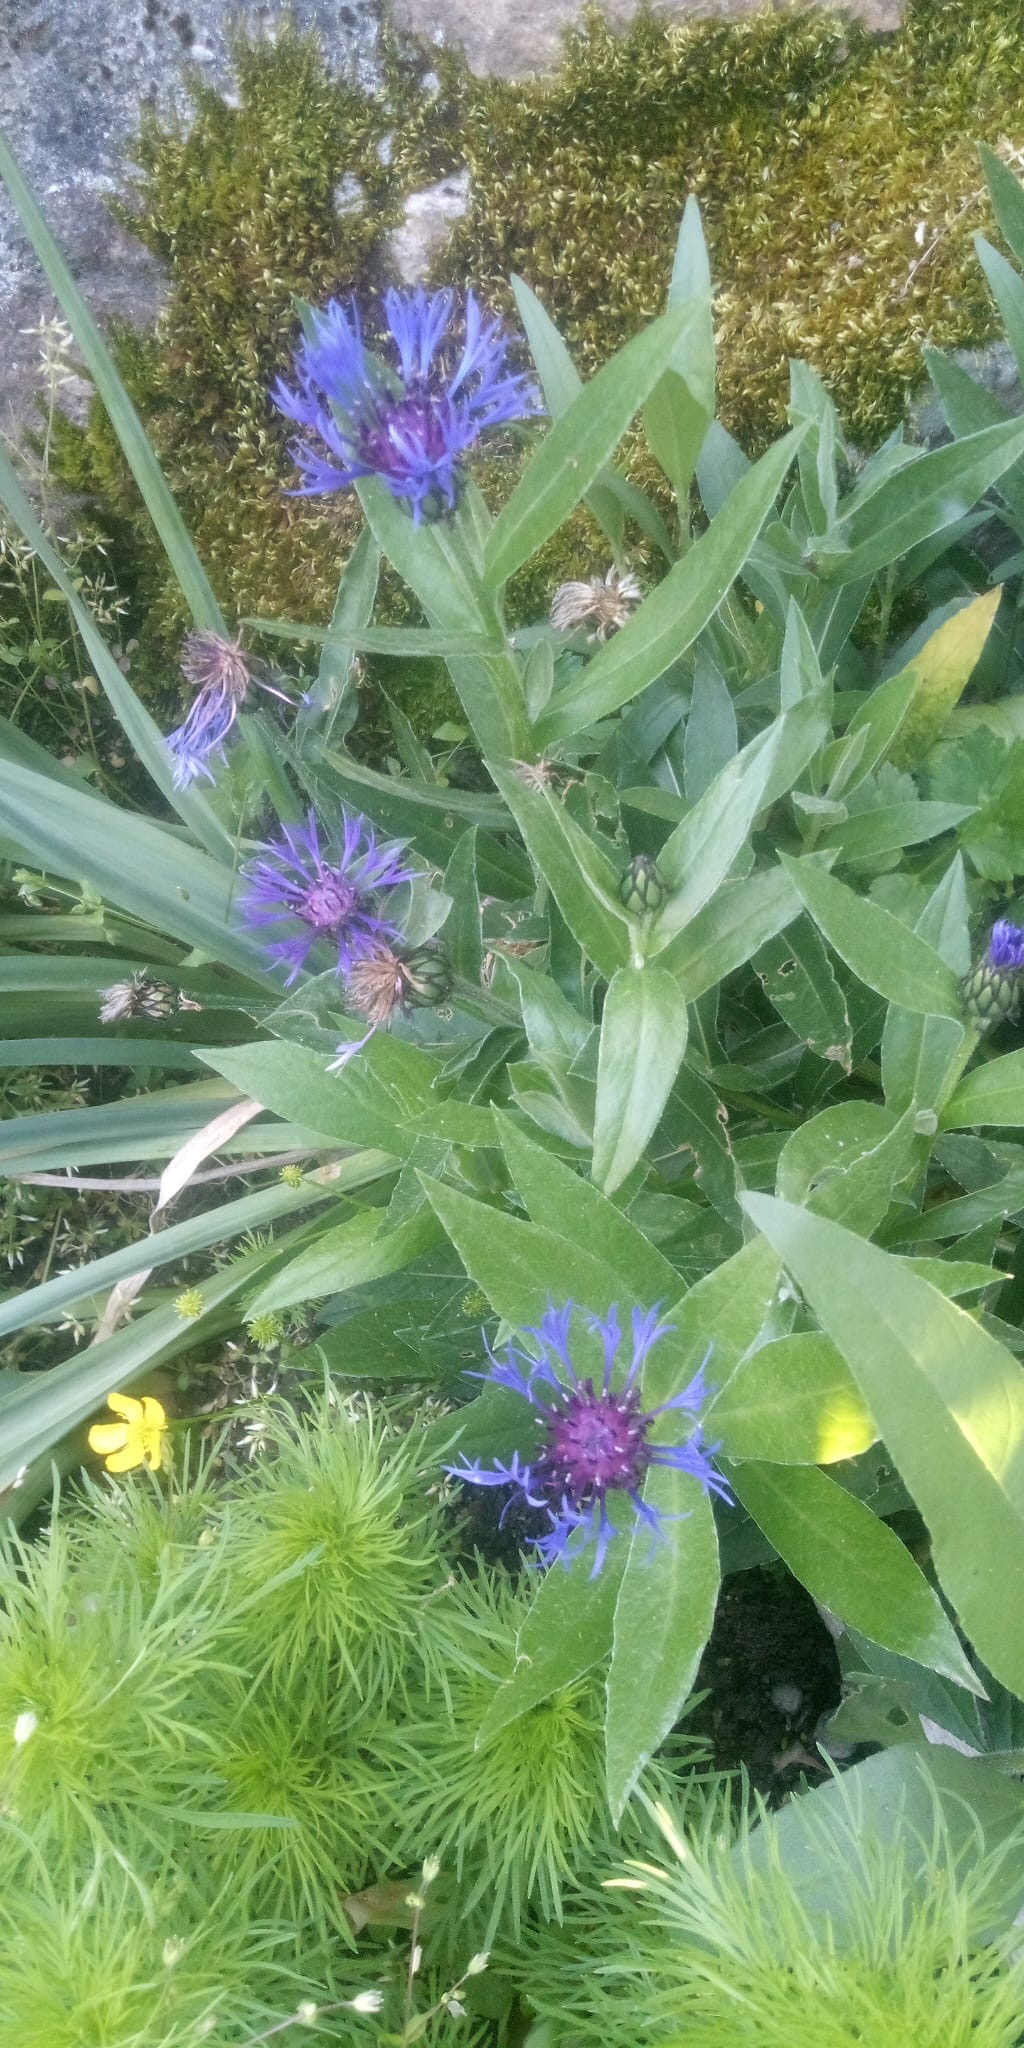
Blue knapweed (Centaurea montana)
95% 일치The plant shown appears to be a blue knapweed, a perennial commonly grown in borders for its striking cobalt‑blue flower heads. It belongs to the aster family (Asteraceae) and the genus Centaurea. The inflorescences are distinctive: rounded to globose heads densely packed with slender florets that give the blooms a wispy, almost thistle‑like appearance. Each flower head is surrounded by bracts that can feel slightly spiny, which adds architectural detail to the plant even after flowering. The overall clump is formed by sturdy, green stems rising from a tuft of leaves at the base. The leaves are lanceolate to elliptical, a smooth, green to gray‑green color, and they provide a neat, evergreen‑leaning backdrop to the bright blue blooms. Plants of this type typically reach a height of about 60–90 cm (2–3 feet) and spread 40–60 cm (1.5–2 feet), forming a dense, cottage‑garden clump that does well in mixed borders and sunny beds. While individual forms can vary, the image’s purple‑blue heads and the general growth habit strongly resemble Centaurea montana or a closely related blue knapweed cultivar, which is a popular choice for long‑lasting summer color and pollinator appeal.
2026년 5월 13일
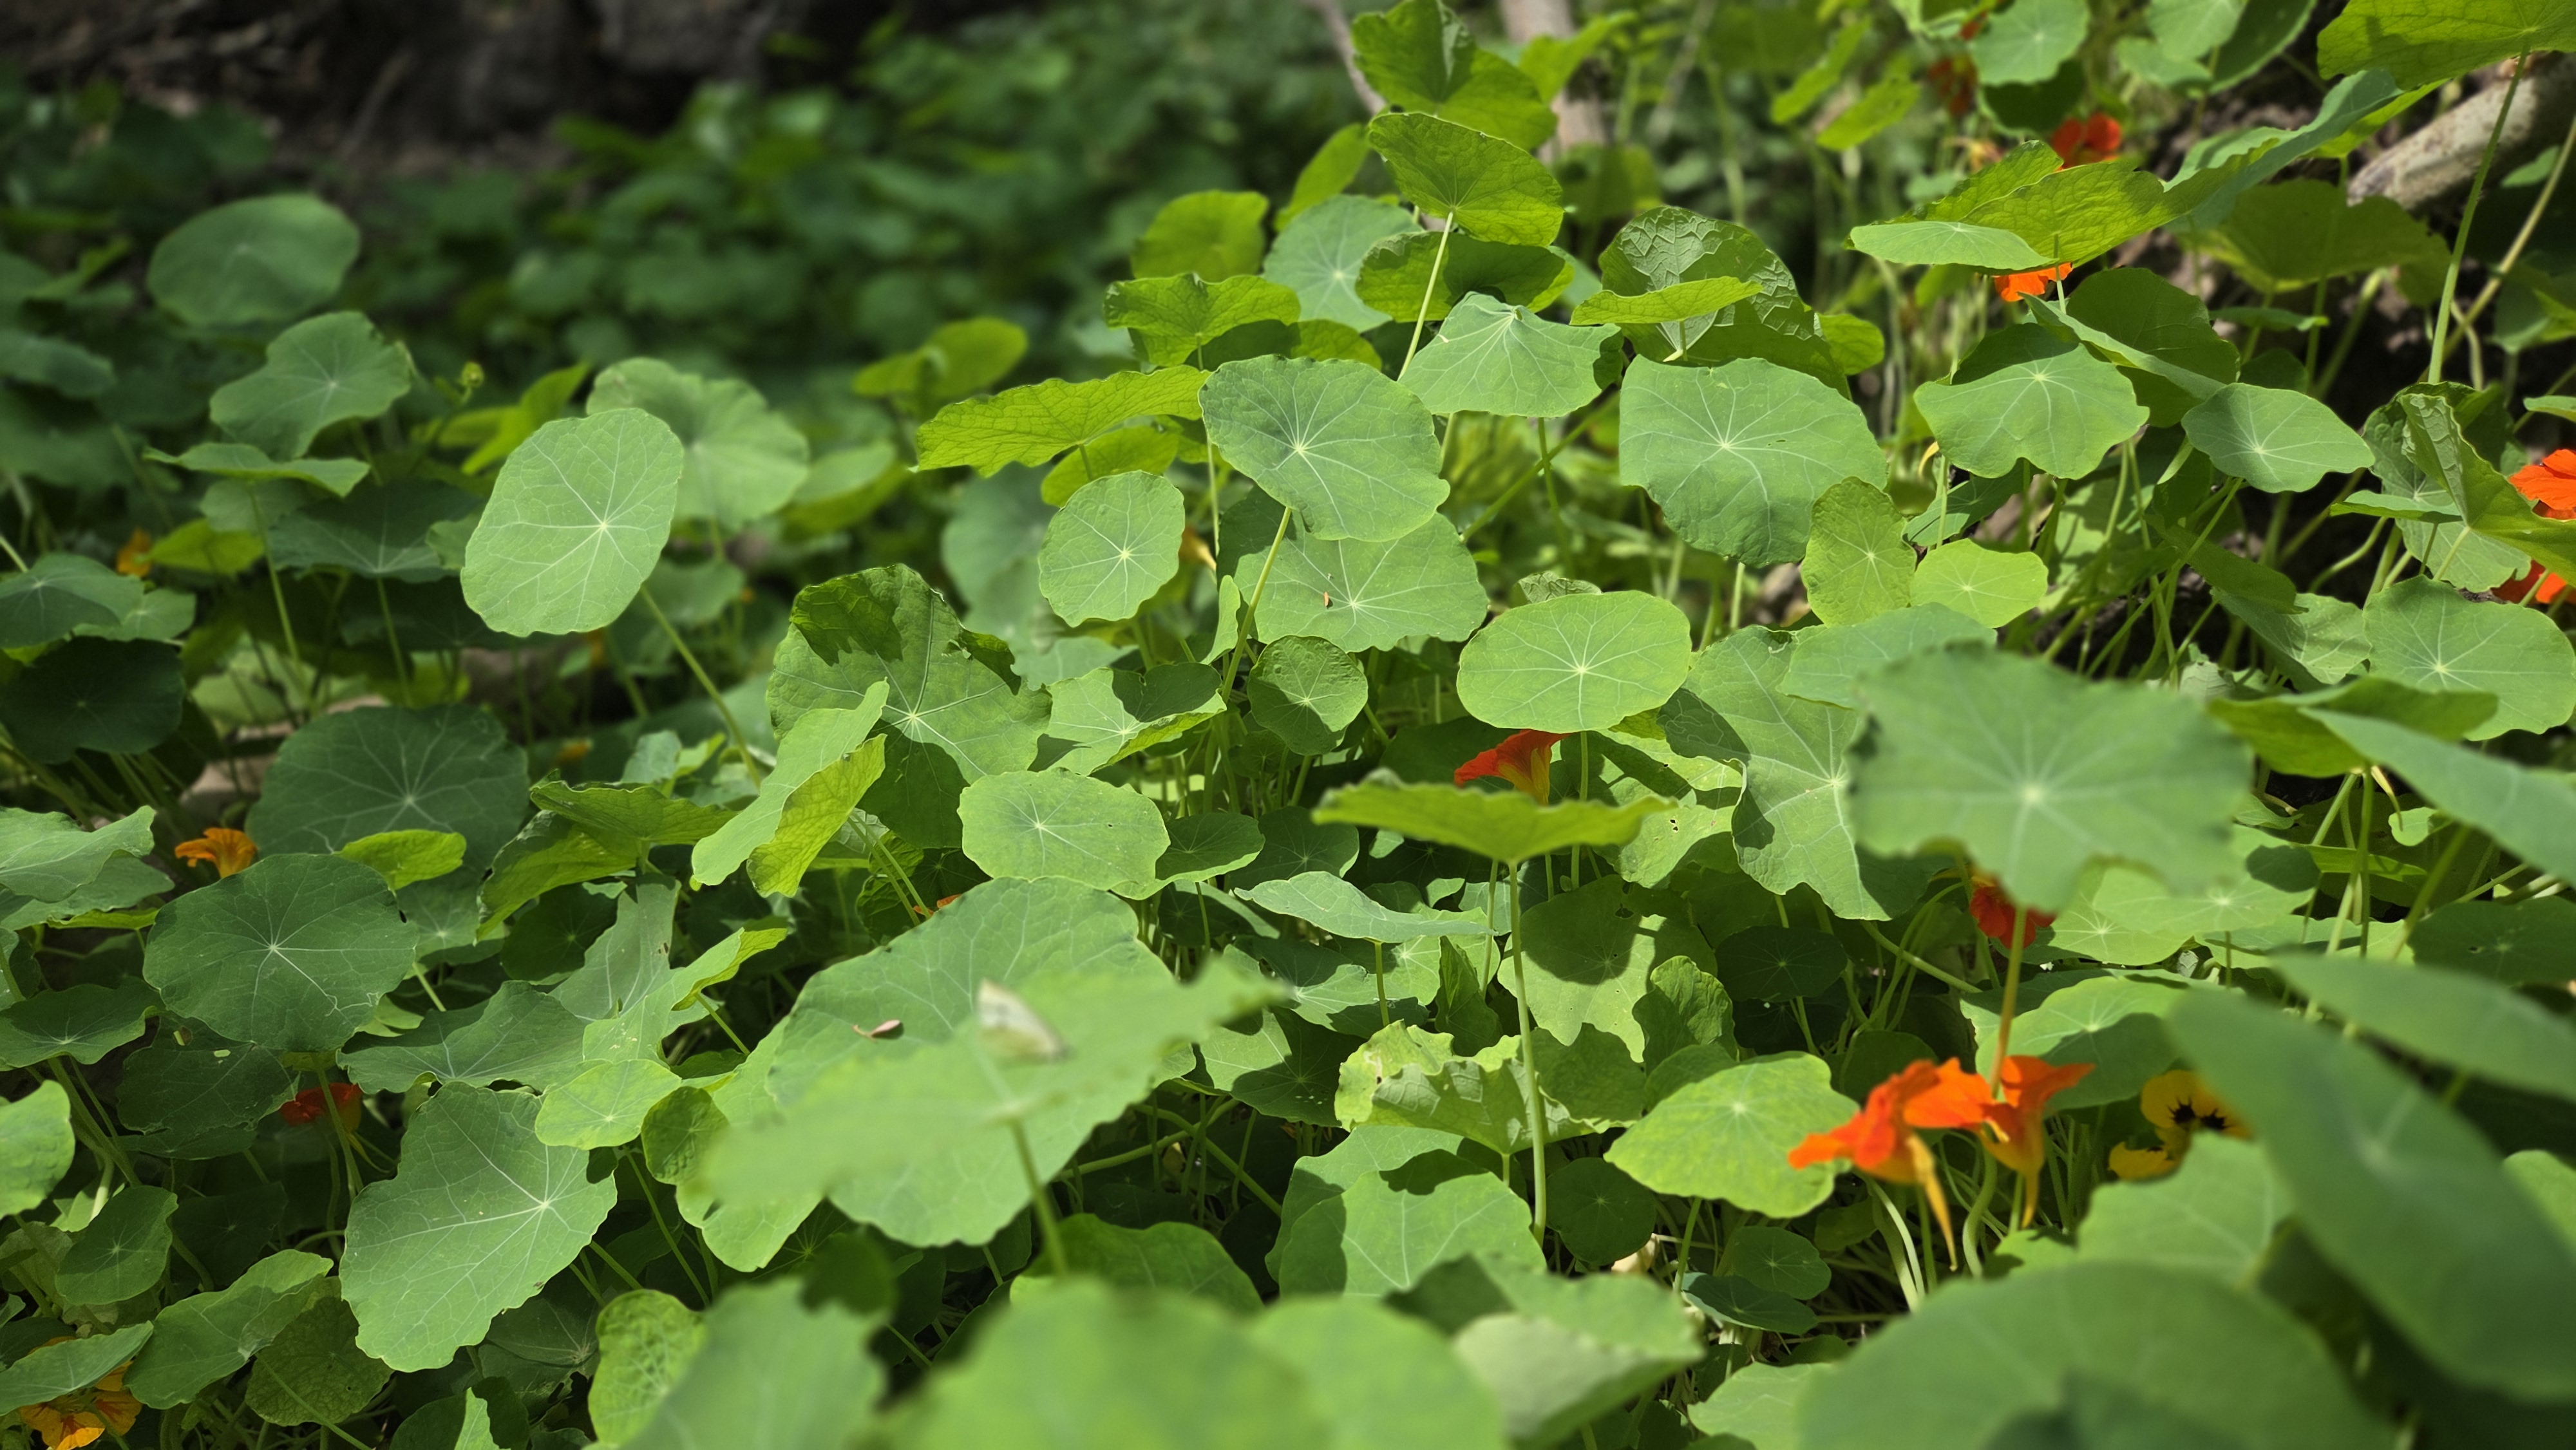
Nasturtium (Tropaeolum majus)
95% 일치From the photo, the plant appears to be nasturtium (Tropaeolum majus). This is a robust, scrambling or climbing annual that is widely grown for its striking, rounded, almost circular foliage and vibrant flowers. The leaves are distinctive: almost perfectly round or kidney-shaped with long, slender petioles that attach near the center of the blade, and the veins radiate outward like spokes on a wheel. The leaves are a bright to medium green and sit on wiry, trailing stems. In the image you can also glimpse brilliant orange blooms peeking through the foliage, which is another hallmark of many nasturtium cultivars. Beside their beauty, nasturtiums are valued for being edible and highly versatile in garden design, from ground cover to hanging baskets to climbers along trellises. Here is a thorough guide to understanding this plant’s biology, how to grow and care for it, and how to use it in the garden and kitchen. Botanical notes and basic characteristics: Nasturtium is Tropaeolum majus, a member of the Tropaeolaceae family. It is native to South America and is cultivated worldwide as an ornamental annual in temperate regions. The plant’s growth habit is typically trailing or climbing, depending on the variety and support provided. Leaves are peltate, meaning the petiole attaches at or near the center of the blade rather than at the edge. Leaves are round to shield-shaped, often 3–7 cm (about 1–3 inches) in diameter, though some varieties create larger or smaller leaves. Veins radiate from a central point, giving the leaf an elegant, almost star-like look. Flowers occur singly on slender stalks and display a five-petaled, funnel-shaped corolla. Colors vary by cultivar but commonly include orange, yellow, and red tones; some cultivars also show bicolor patterns. The edible aspect is a strong distinguishing feature: both leaves and flowers have a peppery, slightly zesty flavor reminiscent of watercress. The seeds, when mature, form in pods that can be quite large and are sometimes used as a peppercorn substitute in pickling or seasoning. Cultural requirements and care: - Light and temperature: Nasturtiums perform best in full sun, where they can receive at least 6 hours of direct light per day. They tolerate light shade but flowering may be reduced in very shady spots. They are generally frost-tensitive and are treated as annuals in temperate climates. In very hot climates, they may benefit from some afternoon shade and consistent moisture to prevent scorching. - Soil and planting: They are famously unfussy about soil quality and will thrive in average to poor, well-drained soil. In fact, overly rich soil can promote lush leaf growth at the expense of flowering. If you want dense, prolific bloom, avoid heavy fertilizers, especially those high in nitrogen. The soil should drain well to avoid root rot or crown rot. Plant nasturtium seeds directly in the garden after the danger of frost if you live in a region with cold springs; germination typically occurs in 7–14 days. Soaking seeds overnight before sowing can speed germination. Spacing depends on the growth habit: climbers or trailing varieties typically need a support like a trellis or cage and can be spaced about 25–40 cm (10–16 inches) apart to give each plant space to spread. - Watering: Keep the soil evenly moist but not waterlogged. Nasturtiums prefer steady moisture in hot weather, but they will tolerate some drought once established. Overwatering or poorly drained soil can lead to root problems. Mulching helps conserve moisture and keeps roots cooler in warm months. - Fertilization: These plants are light feeders. A light side-dressing of a balanced, low-nitrogen fertilizer or compost worked into the top layer at planting time is usually sufficient. Avoid heavy, high-nitrogen feeding that encourages leafy growth over flowers. - Pruning and training: For bushier, more floriferous plants, pinch back the growing tips when the vines are a few inches tall. Regularly remove spent flowers to encourage continuous blooming, particularly in long-season climates. If you are growing climbing nasturtiums, provide a sturdy trellis or fence and gently guide the vines; they will climb with little encouragement. - Temperature and pests: Nasturtiums are fairly pest-resistant and often act as a trap crop for aphids on nearby plants. They can still be affected by aphids, caterpillars, slugs, and some beetles. Insecticidal soap, strong water sprays, or hand-picking can control aphids. Slugs and snails may be a problem in damp beds; morning watering and mulching with diatomaceous earth or gravel can help. Powdery mildew can occur in crowded, humid conditions; ensure good air circulation and avoid overhead watering. Pollinators and ecological value: The bright flowers are attractive to bees, butterflies, and hoverflies, making nasturtiums a valuable plant for pollinator-friendly gardens. The edible nature of leaves and flowers adds to their allure, encouraging gardeners to plant them where pollinators are active. Some gardeners also plant nasturtiums as a trap crop to protect more valuable ornamentals or vegetables from pests, though this practice should be planned carefully, as it can influence pest dynamics in the entire bed. Edible uses and culinary notes: Both leaves and flowers are edible and have a peppery, tangy flavor. Young leaves are milder, while mature leaves and especially flowers have a stronger bite. The leaves can be added raw to salads, used as edible garnish, or stuffed with soft cheeses or herbed spreads. The flowers are often used to decorate salads, deviled eggs, or sushi platters, and they add a pleasant peppery zing. Seeds can be pickled or used as a peppercorn substitute in small amounts; however, the seeds can be rather hard and spicy, so they are typically used sparingly. Cooking nasturtium leaves or flowers briefly can soften their bite while preserving color. For decorative purposes, use a mix of colors and sizes to create striking edible arrangements. As with many edible ornamentals, start with small amounts to gauge tolerance for flavor in sensitive individuals, and avoid large quantities if you have never eaten the plant before. Garden design and landscape potential: Nasturtium’s versatility is a major strength. It can form a trailing ground cover on borders, spill over into containers, drape over a low wall, or climb a trellis to create a vertical green screen. The compact, round leaves lend a soft, almost water-lily-like texture to plantings, while the bright flowers provide bold pops of color from late spring through late summer in favorable climates. When used as a ground cover, nasturtium can help suppress weeds and provide a living mulch, though its vigorous growth means it may outpace slow-growing neighbors if not monitored. In edible landscapes, combining nasturtiums with lettuce, herbs, or tomatoes makes for both aesthetic appeal and pest-management synergy, since the presence of nasturtiums can attract beneficial insects and, in some cases, divert aphids from more valuable crops. Propagation and longevity: If you desire a quick start, sow seeds directly into the garden in spring after the last frost, or start indoors a few weeks ahead in a warm, bright area and transplant after hardening off. Nasturtiums typically behave as annuals in temperate regions, but in areas with mild winters (where frost is rare or absent), some varieties can behave as short-lived perennials. Deadheading spent flowers throughout the season encourages continuous bloom. In climates with cold winters, you can collect seeds from mature pods to plant next year, though self-sowing is common if you let some seed pods mature. Potential cautions and compatibility: While nasturtiums are generally safe and edible for humans, some people may be sensitive to the peppery compounds in leaves and flowers. Always introduce new edible plants gradually to gauge personal tolerance. They are non-toxic to pets in typical garden exposure, but excessive ingestion of any ornamental plant material is not advised. In terms of companion planting, nasturtiums can be beneficial near vegetables like tomatoes, beans, and other crops by attracting pests away or by attracting pollinators; however, their vigorous spread means they can compete for space and nutrients, so plan beds accordingly. Overall impression and practical tips: If your goal is a cheerful, easy-to-care-for plant that doubles as edible garnish and a beautiful ground cover or climber, nasturtium is an excellent choice. It thrives in containers if given bright light and good drainage, and it can fill a fence line or border with a shimmering carpet of rounded leaves and orange flowers. When selecting varieties, look for trailing or climbing forms if you want cascading color and the ability to cover a trellis; bush forms are better for low borders and massed plantings. Remember to plant in well-drained soil, avoid over-fertilizing, and water regularly during dry spells. Pinch or trim as needed to shape the plant, and deadhead spent blossoms to prolong flowering. With these practices, nasturtiums will enrich your garden with dynamic texture, edible leaves and flowers, and a reliable splash of color that glows in sunlit spots.
2026년 5월 10일
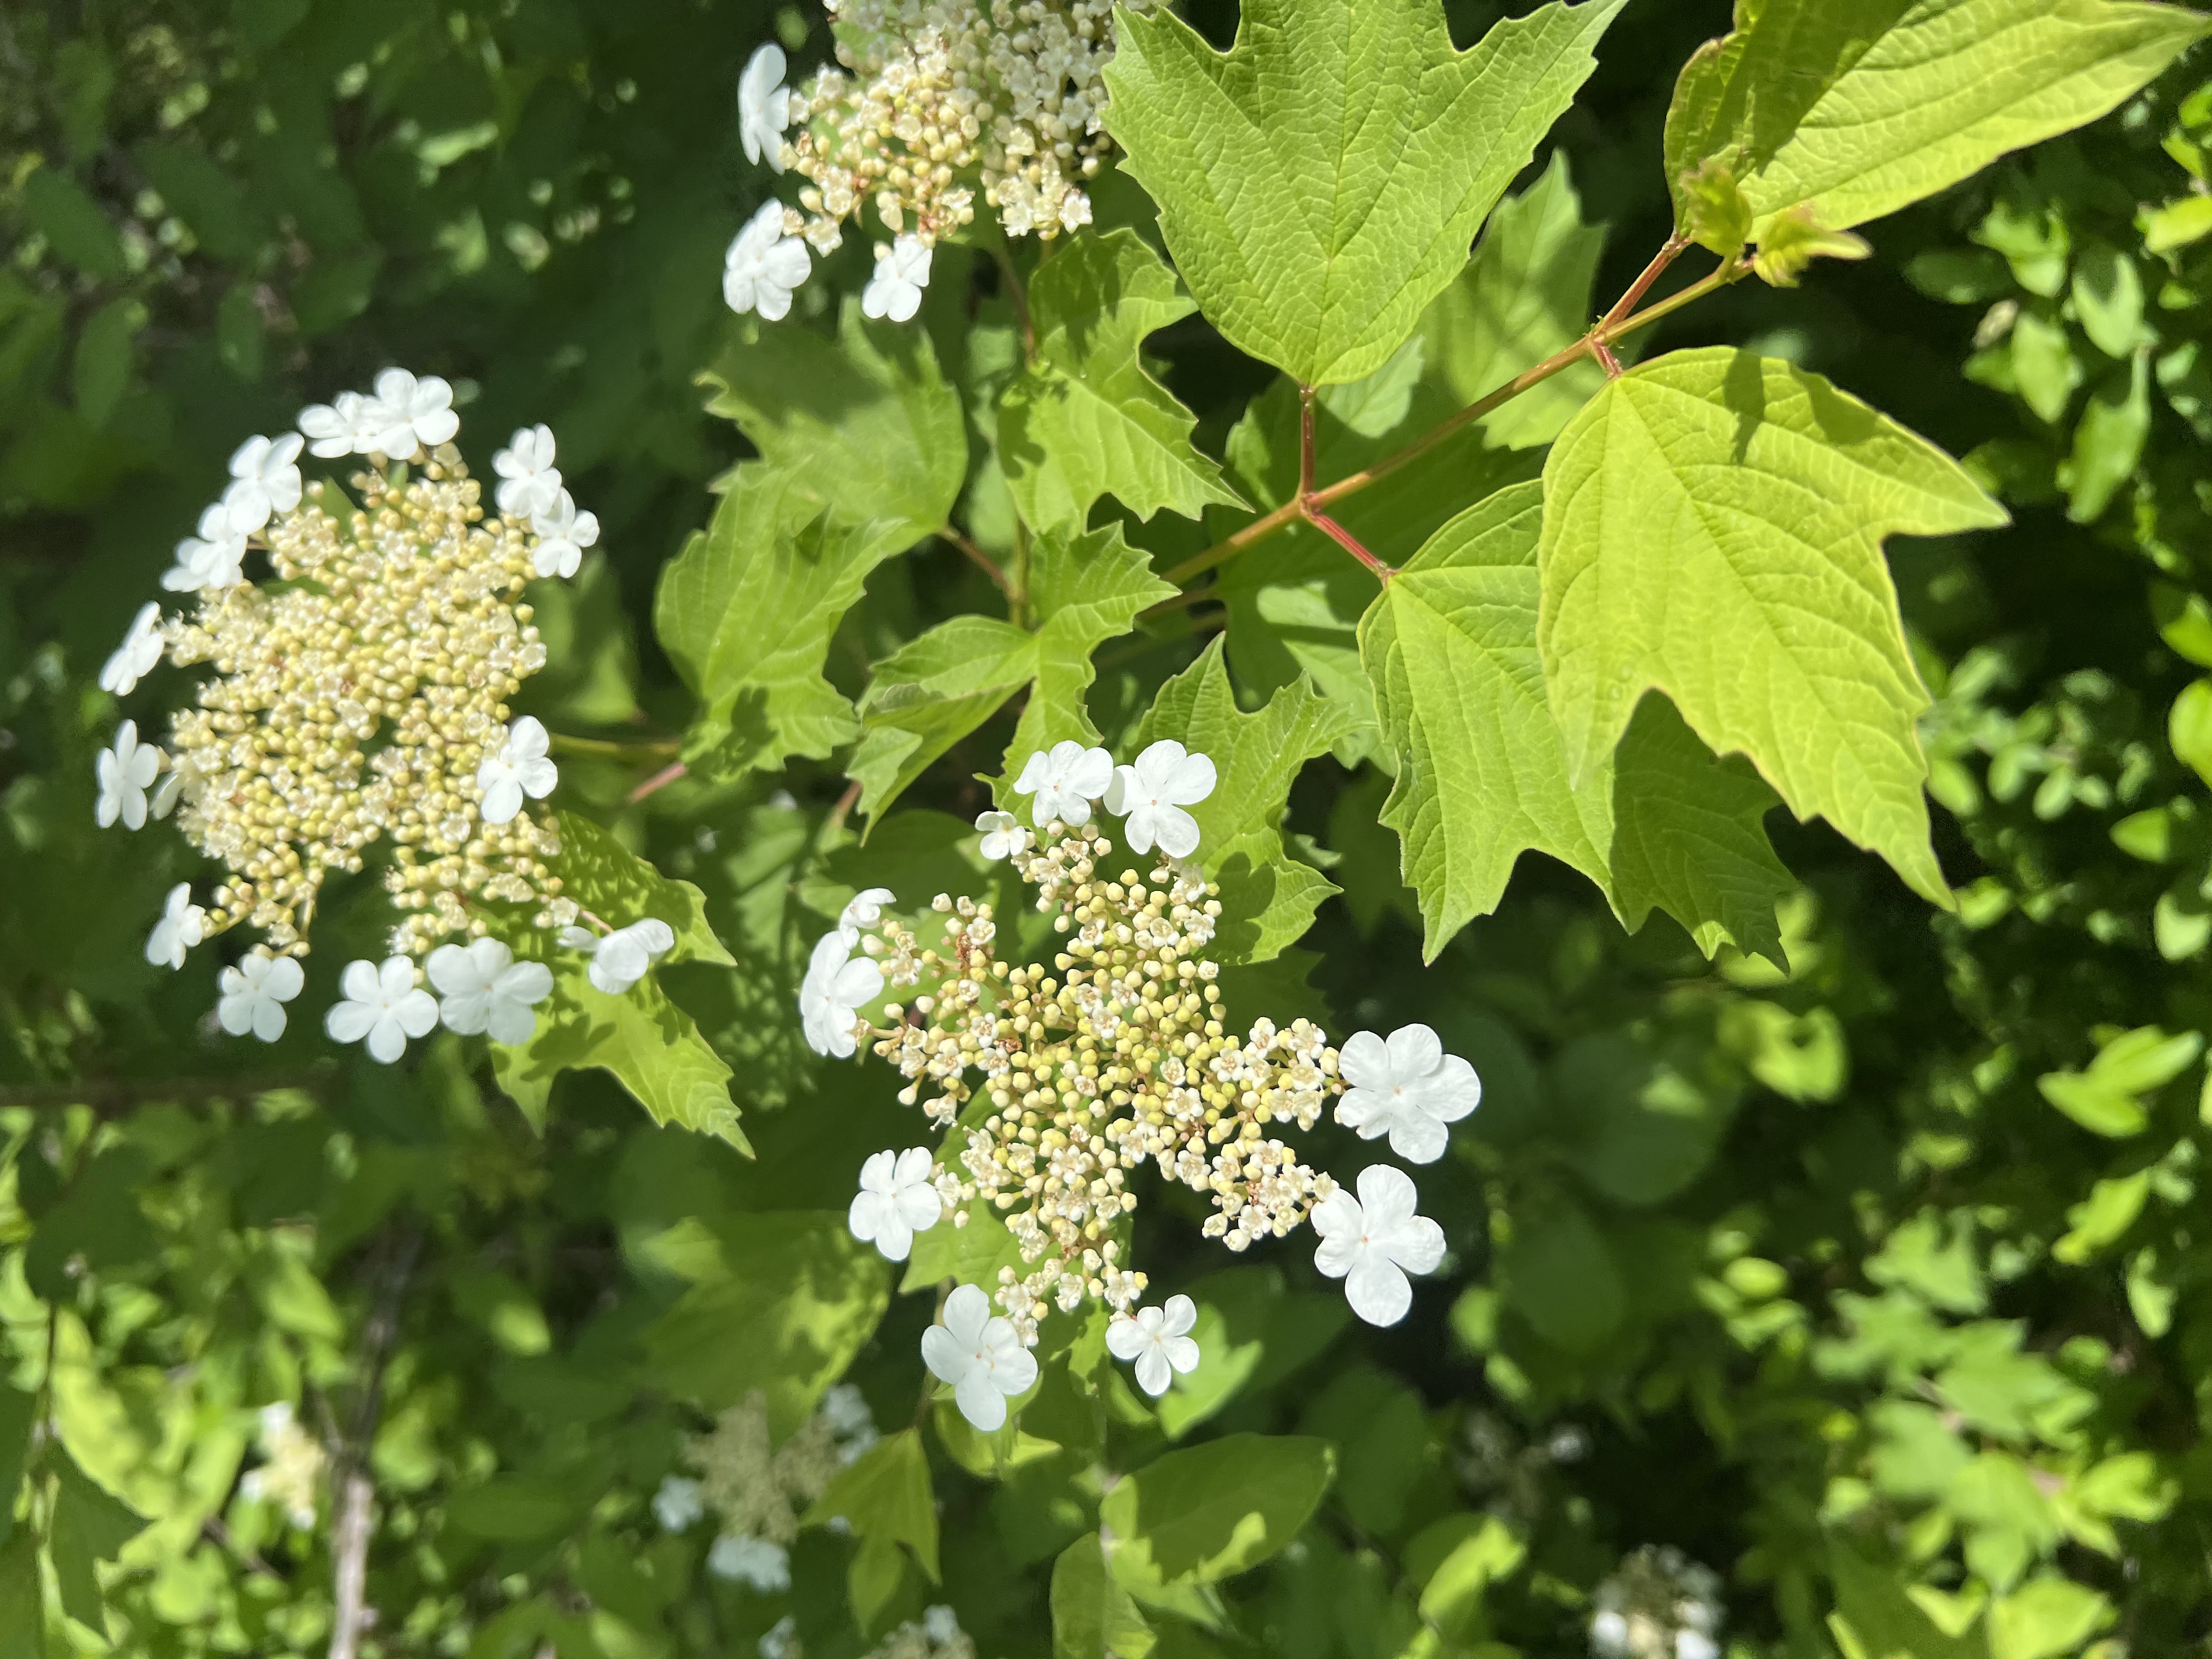
Oakleaf Hydrangea (Hydrangea quercifolia)
95% 일치The plant in the photo appears to be an oakleaf hydrangea, Hydrangea quercifolia. This is a deciduous shrub prized for two striking features: its distinctive lobed leaves that resemble oak leaves, and the lacecap type flower heads that show a ring of larger, sterile white florets around a cluster of tiny fertile blooms. In the landscape, it gives a multilayered look year‑round: sculptural foliage in spring and summer, a dramatic white flower display in early summer, and often vibrant red, orange, or bronze tones in the fall. The overall habit is upright with arching branches, and on older plants the bark can be handsome, shedding in ribbons to reveal a cinnamon or grayish-character underlayer. It grows naturally in the southeastern United States, but in cultivated settings it has become a popular woodland or shade plant in many temperate gardens. Identification and description of distinguishing features - Leaves: The leaves are large, deeply lobed like an oak, with a rough texture and serrated margins. They are typically arranged alternately along the woody stems and can be quite showy in their fall color, turning rich burgundy or bronze before dropping. The leaf surface is often a bit fuzzy on new growth, giving a soft feel to the plant when it is leafing out in spring. - Flowers: In mid to late spring through early summer the plant produces a large, cone‑shaped panicle. The outer ring consists of several large sterile florets with four petal‑like sepals (often described as bracts), which create the lacecap effect. The center contains numerous tiny fertile florets that start greenish or yellowish and may fade as the bloom ages. In many cultivars the outer bracts age to pinkish tones as the center florets mature. - Size and form: Oakleaf hydrangea is a deciduous shrub that typically reaches about 6 to 8 feet tall and wide, though some cultivars stay a bit smaller or larger depending on pruning and site conditions. The branches can be sturdy and may arch gracefully, especially when supported by a rich, well‑drained planting site. - Bark and winter interest: As it matures, the stems reveal a textured, sometimes peeling bark that adds winter interest. The plant loses its leaves in fall, exposing the skeletal structure of the branches, which can be an attractive feature in a winter landscape. Natural habitat and climate suitability Oakleaf hydrangea is hardy in USDA zones 5 through 9, making it suitable for much of the eastern United States and other temperate regions with cold winters and warm summers. It prefers a cool, sheltered location with protection from strong, drying winds. In its native range it grows in woodland margins and forest edges where moisture and organic matter in the soil are abundant. In a garden, it performs best in part shade to full shade, although with sufficient moisture it can tolerate more sun, particularly in cooler climates. In hot, dry southern exposures a site with morning sun and afternoon shade helps protect both foliage and flower quality. Soil and moisture needs - Soil type: Oakleaf hydrangea thrives in rich, well‑drained soils that are high in organic matter. It tolerates a range of soil types, but it does best in loamy soils that retain moisture without becoming soggy. - pH: It tolerates a range of pH levels from acidic to slightly alkaline, though extremely alkaline conditions can reduce the intensity of bloom or affect overall vigor. - Moisture: Consistent moisture is important, especially for newly planted plants and during hot spells. Mulching helps conserve soil moisture and keep roots cool. Avoid letting the plant sit in standing water, which can lead to root rot. Cultural care and maintenance - Planting: When you plant an oakleaf hydrangea, set it at the same depth as it was in the container or nursery, with the rootball slightly above the surrounding soil to prevent crown saturation. Space plants enough for mature size (roughly 6–8 feet apart, though some cultivars are smaller or larger). - Watering: Water regularly during the first growing season to establish a deep, extensive root system. After establishment, water during prolonged dry spells. In general, aim for even soil moisture rather than allowing the soil to dry completely between waterings. - Mulching: Apply 2 to 4 inches of organic mulch (like shredded bark) around the root zone. Mulch helps preserve moisture, moderates soil temperature, and improves soil structure as it decomposes. Keep mulch a few inches away from the trunk to prevent rot. - Fertilization: Feed lightly in spring with a balanced, slow‑release fertilizer or compost. Avoid heavy, high‑nitrogen feeds, which can promote leaf growth at the expense of flowers and may encourage weak wood prone to winter damage. If soil is poor, a light top‑dressing of compost in spring is often beneficial. - Pruning and shaping: Oakleaf hydrangea blooms on old wood, meaning the flower buds for the following year form on wood from the previous season. Because of this, pruning is best done soon after flowering finishes in late spring to early summer. Remove any dead or damaged wood and selectively thin crowded branches to improve air circulation and light penetration. Heavy pruning or cutting back last year's wood can dramatically reduce next year’s bloom; therefore avoid hard pruning or hard shaping unless you want to slow or reset flowering. - Pest and disease management: Generally, oakleaf hydrangea is relatively pest‑resistant, but it can be bothered by aphids, scale, and spider mites in some conditions. Powdery mildew can occur in humid summers, particularly on crowded foliage. Ensure good air circulation, avoid overhead irrigation late in the day, and monitor for pests. If mildew appears, treat with appropriate horticultural oil or fungicide and improve airflow through pruning. - Winter care: In colder zones, protect the plant from harsh winter winds and extreme temperature fluctuations. A layer of mulch helps protect the shallow root zone. In late winter or early spring, remove any damaged wood and tidy the plant to encourage new growth in the season ahead. Propagation and cultivar notes Oakleaf hydrangea is commonly propagated by softwood or semi‑hardwood cuttings taken in late spring or early summer, or by layering. Layering involves bending a flexible low‑growing stem to the ground, covering a portion with soil while still attached to the parent plant, and allowing roots to form before separation. This method tends to yield plants that naturally match the parent in growth habit and bloom potential. Many cultivars have been selected for their leaf shape, autumn color, or flower size and bract brightness. Fall color ranges from burgundy to orange to bronze, adding seasonal interest even after flowering has ended. Garden use and ornamental value - Landscape role: Oakleaf hydrangea works brilliantly as a specimen plant or as a focal point in a shade garden. Its dramatic autumn foliage and graceful bloom heads make it a reliable backdrop for woodland plantings such as ferns, hostas, and perennials that prefer similar moisture and light conditions. - Design tips: Plant in partial shade near a path or seating area where the flowers and foliage can be admired up close. Use it near a foundation or under deciduous trees to let summer shade keep the plant cool. For a layered look, plant with taller shrubs behind and shorter perennials in front to highlight both foliage and flowers. - Pairing ideas: Pair with early‑season bloomers for continuous interest, or combine with evergreen accents to maintain structure in winter. The bark and branching pattern provide texture even in leafless months, so it can be part of a year‑round composition. Common concerns and troubleshooting - Blooming issues: If you see reduced blooms, consider whether you pruned too aggressively after a previous flowering season. Remember that the plant forms most of its flower buds on old wood, so late pruning can shorten the next season’s display. - Leaf scorch or sun damage: In very sunny, hot sites, leaves may scorch at the edges. Ensure adequate moisture and provide afternoon shade if heat stress appears. - Soil problems: Very poor drainage or waterlogged soils can lead to root rot and poor performance. Improve drainage and consider raised beds or amended soil if drainage is an issue. - Pests and diseases: Watch for aphids, scale, and powdery mildew under humid conditions. Regular inspection and appropriate treatment will usually keep problems under control. In sum Oakleaf hydrangea is a robust, visually striking shrub that blends well into shaded or woodland garden settings. Its combination of architectural foliage, lacecap flowers, and seasonal color transitions makes it a standout choice for gardeners seeking a plant with multi‑season appeal and relatively easy care. By providing the right light, moisture, and pruning timing, you can enjoy years of graceful growth, dramatic floral displays, and a lush, textured presence in your landscape.
2026년 5월 9일
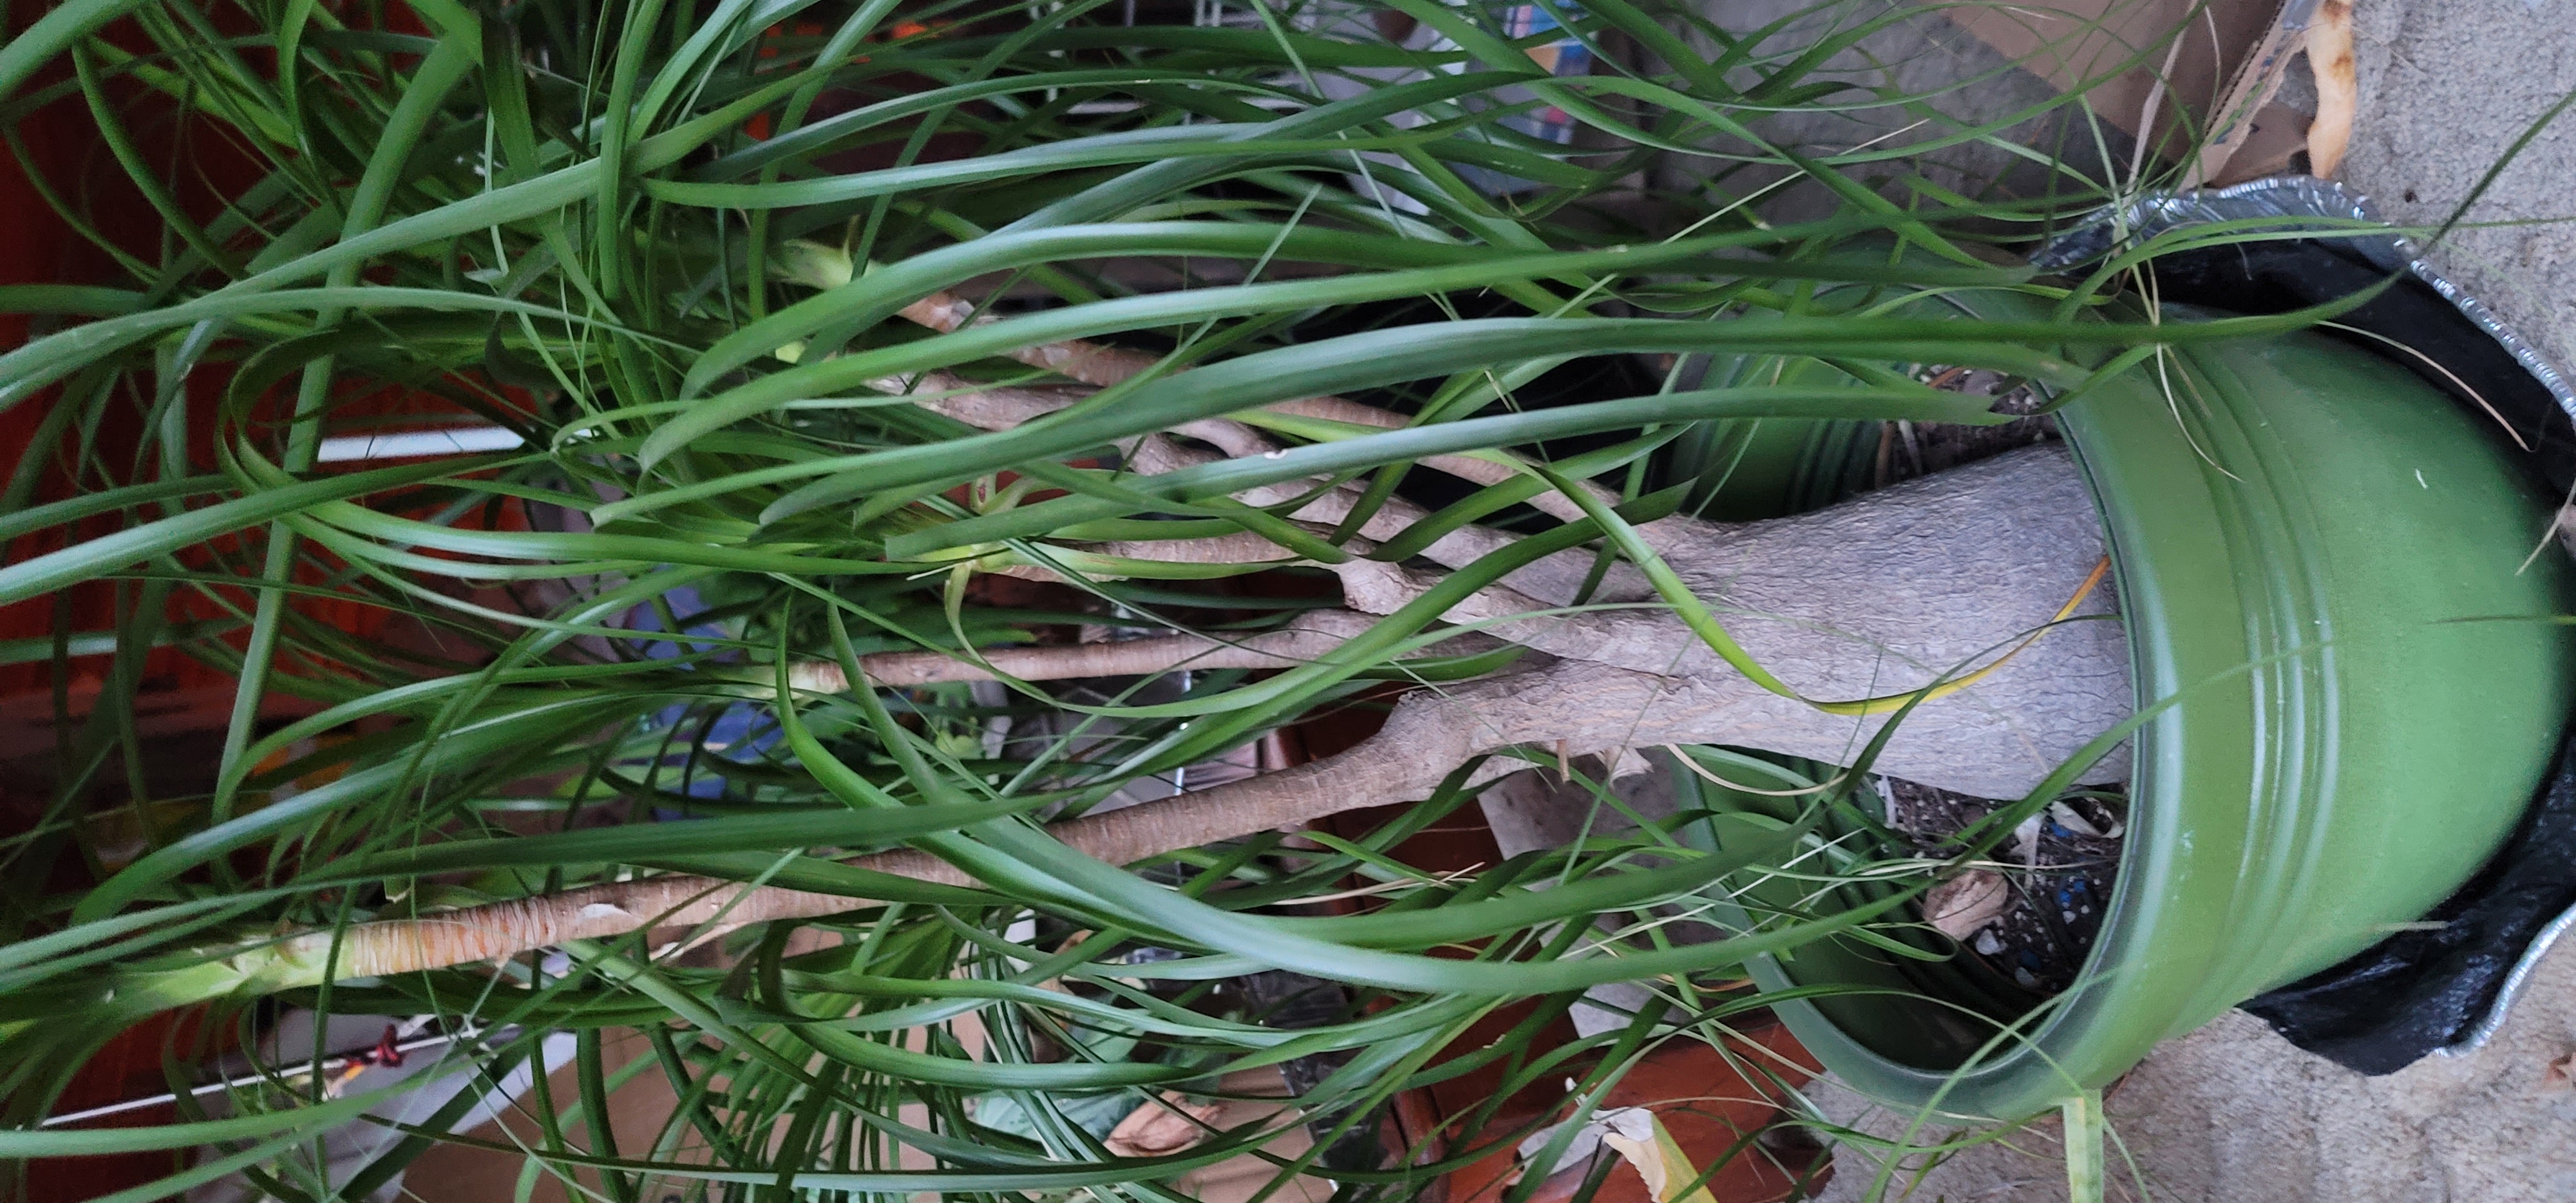
Beaucarnea recurvata (Ponytail Palm)
95% 일치Beaucarnea recurvata, commonly known as the ponytail palm, bottle palm, or elephant foot palm, is a striking caudiciform houseplant that many gardeners grow for its sculptural trunk and graceful, flowing leaves. It is not a true palm; it belongs to the Asparagaceae family and is native to dry, rocky regions of Mexico and the Caribbean. The most distinctive feature is its bottle-shaped trunk, a swollen base that stores water during drought. Above this thickened base sits a crown of long, slender, arching leaves that resemble a fountain. Each leaf is straplike, about 1–2 cm wide, with a glossy green surface and a pointed tip. In young plants the growth is compact, but as the plant matures the trunk thickens, sometimes producing several stems from the base, each crowned by a tuft of leaves. Indoors, ponytail palms tend to stay relatively compact, rarely exceeding 6–8 feet in height under good light, though outdoors in warm climates they can reach several meters tall. The plant’s overall silhouette is a calm, architectural form that works well in contemporary interiors or as a focal point in a bright entryway. The trunk is typically gray or light brown, smooth or slightly textured, and the base is noticeably swollen, sometimes giving the impression of a small bottle or keg embedded in its pot. New growth emerges at the crown and can give the plant a fountain-like appearance, especially when given a tall container and ample light.
2026년 5월 5일
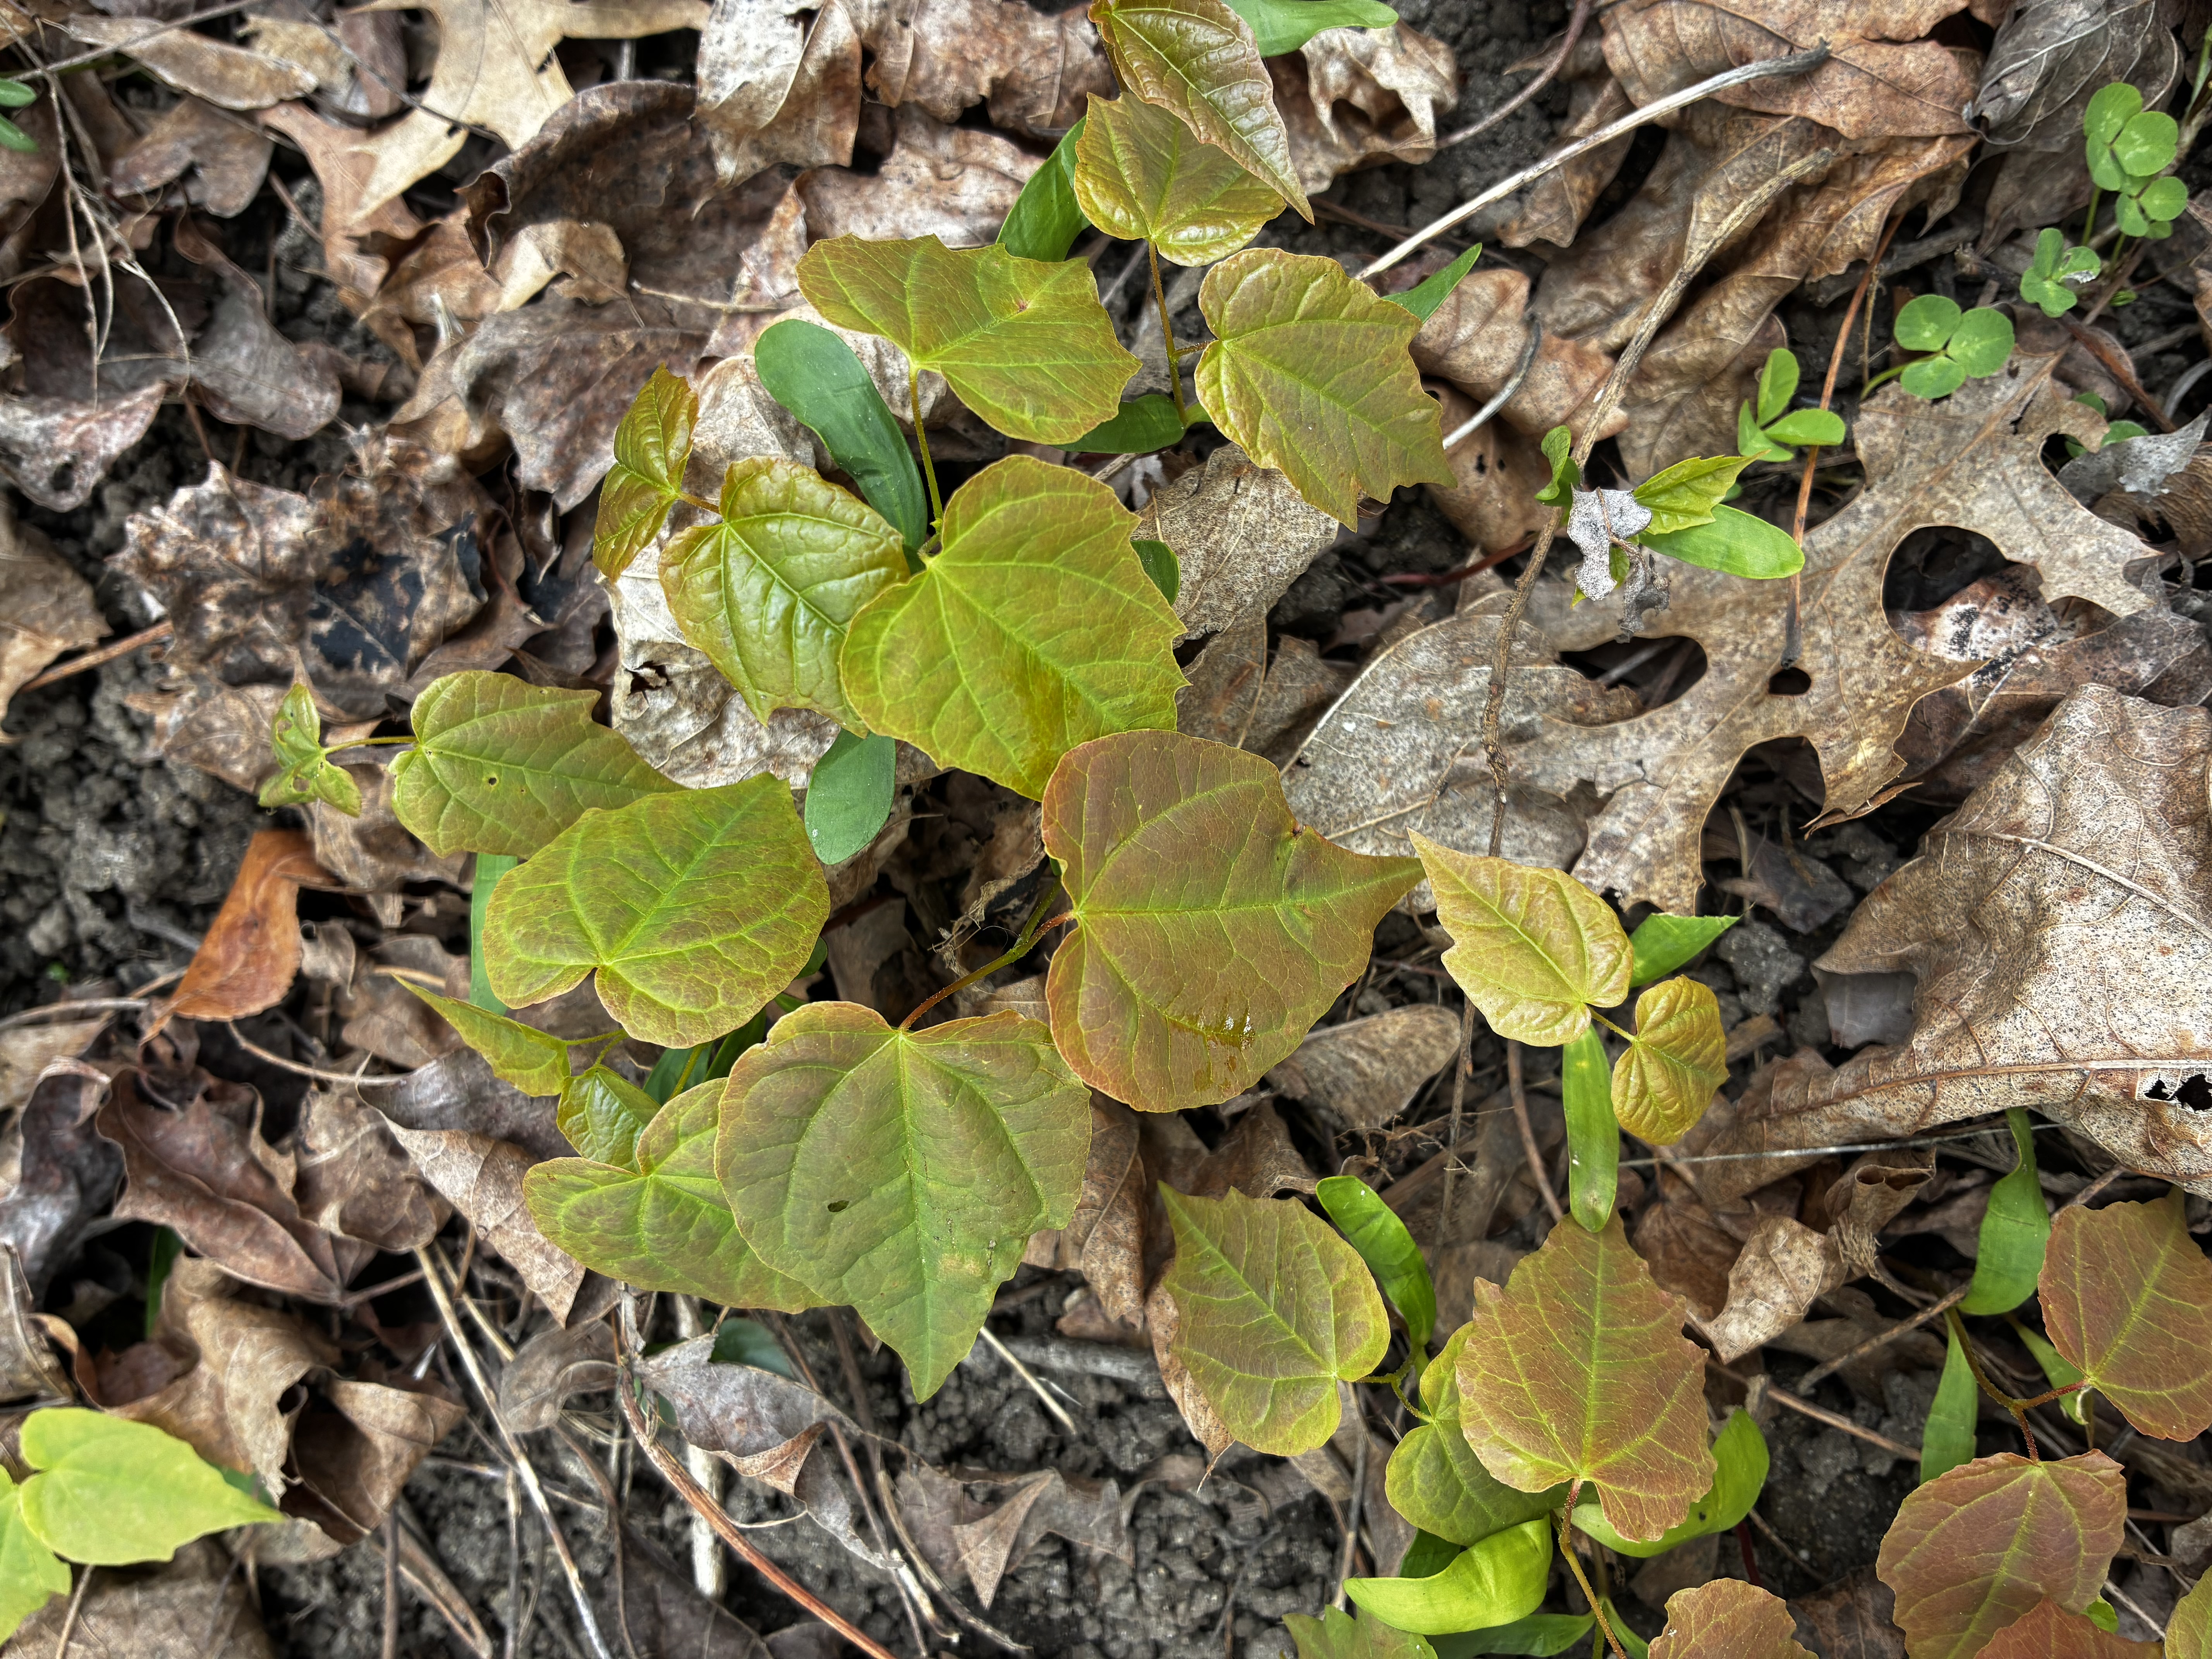
Epimedium (bishop's hat, barrenwort)
95% 일치The plant in the photo most closely resembles Epimedium, commonly called bishop's hat or barrenwort. This is a low-growing, herbaceous perennial that forms a delicate, evergreen to semi-evergreen carpet in shade gardens. Its most recognizable feature is the foliage: small, heart-shaped or cordate leaves that arise on slender petioles from creeping rhizomes. In spring, new growth often appears bright green and can take on a coppery or bronze tinge as cooler weather arrives; as the season moves into full warmth, the leaves typically settle into a rich green color, sometimes with hints of red along the margins. In many climates the foliage persists through the winter, though it may look tattered or lose some of its color in very cold spells. The overall habit is a slow, steady spread that can cover several square feet over a few years, making Epimedium a popular groundcover for shade and woodland garden settings. Leaves and form: Each leaf blade is usually small (about 1.5–3 cm across) and is often heart-shaped with a smooth or subtly wavy margin. The venation is clear, with a strong midrib and lateral veins that create a slightly quilted appearance on close inspection. Many Epimedium cultivars display a pair of leaflets or a compound leaf at the tip of a slender stalk, giving the impression of a delicate, airy rosette emerging from the soil. The plant produces slender flowering stems that rise above the foliage in spring, bearing small, arching flowers with spurred petals. Flower color varies by cultivar, including yellows, pinks, whites, and sometimes orange tones, often with a delicate, intricate shape that is more appreciated up close than from a distance. Cultural needs and care: - Light: Epimedium thrives best in partial to full shade. It is well suited for woodland gardens, under deciduous trees, or in the shadier margins of borders. Some cultivars tolerate dappled sun, but too much strong sun, especially in hot climates, can scorch the leaves and fade color. - Soil: It prefers deep, fertile, humus-rich soil with excellent drainage. A loamy soil that retains some moisture but does not become waterlogged is ideal. Incorporating organic matter such as compost improves texture and nutrient availability. Slightly acidic to neutral pH is common for many Epimediums, though they can tolerate a range. - Water: Regular moisture is important while establishing, but Epimedium does not like to sit in wet soil. Keep the root zone evenly moist, particularly during dry spells, but allow the top layer of soil to dry out slightly between waterings to prevent root rot. - Mulching and temperature: A layer of mulch (leaf mold, pine bark, or compost) helps maintain moisture and keeps roots cool during hot periods. In colder climates, the foliage may die back to the crown; however, the plant often regrows from the crown in spring. In zones 5–9, many Epimediums are reliably hardy, though extreme conditions can affect growth. - Feeding: Apply a balanced, slow-release fertilizer or organic compost in spring as new growth begins. Avoid heavy nitrogen applications, which can promote lush top growth at the expense of flowering and overall hardiness. - Pruning and maintenance: Remove spent flower stalks after blooming to keep a neat appearance. In late winter or early spring, trim away any old or damaged foliage to make way for new growth. If clumps become dense or thinned with age, rejuvenate by dividing in early spring or fall. Division also helps maintain vigor and spread control. - Propagation: Division is the most reliable method, typically done in spring or fall when the plant is not actively flowering. Separate rhizome sections with a few shoots and replant at the same depth as before. Seed propagation is possible but slow and may result in plants that differ from the parent. Care through the seasons: - Spring: New growth appears; flowers emerge on slender stalks above the foliage. It’s a good time to divide if clumps are crowded. - Summer: Maintain moisture during warm, dry periods. Light shading can help protect leaves from sun scorch in hotter regions. - Fall: Foliage often takes on bronze, copper, or red tones, adding seasonal color to shade borders. This is a good time to apply a light mulch and monitor moisture as temperatures change. - Winter: In milder climates, evergreen or semi-evergreen leaves provide year-round texture. In colder zones, above-ground foliage may die back, but crowns usually survive, and new leaves emerge in spring. Pests, diseases, and problems: - Pests: Slugs and snails can nibble on new growth and tender foliage, particularly in damp, sheltered spots. Monitor and manage as needed. - Diseases: Epimedium is relatively disease-resistant but can suffer from powdery mildew in very humid, poorly ventilated sites. Ensure good air circulation and avoid overhead watering to minimize risk. - Tolerance and problems: Poor drainage, heavy clay, or poorly lit, overly dry sites can reduce vigor. Excessive sun can scorch foliage, while very hot, dry climates may slow growth unless consistently watered. Benefits and garden uses: - Visual appeal: Epimedium provides year-round interest with its delicate, heart-shaped leaves and spring flowers. The foliage can glow bronze or copper in fall/winter, offering color even when many shade plants are dormant. - Groundcover: Its creeping rhizomes form a low, dense mat that helps suppress weeds in shady areas. It pairs well with ferns, hostas, hellebores, and other woodland understory plants. - Versatility: Ideal for under trees, along the shaded edges of paths, rock gardens, or in front of larger perennials where its low height won’t compete with taller plants. Common cautions and notes: - Plant selection: Since Epimedium has many cultivars with slightly different growth habits and color shifts, choose a cultivar that matches your climate and light conditions. If you want evergreen foliage in milder winters, select cultivars known for retaining leaves in your region. - Colder climates: In zones where winter temperatures reach deeply below freezing, some foliage may die back; this is normal for many Epimediums, and new growth generally reemerges in spring. - Invasiveness: Epimedium is not considered invasive in most garden settings. It spreads gradually via rhizomes and is easy to contain with regular division or by planting in a defined bed edge. Why this plant fits the photo: - The photo shows small, cordate (heart-shaped) leaves with clear venation, emerging close to the ground in a dense, low-growing habit. The leaves appear to be turning bronze in some parts of the plant, which is a common fall/winter coloration for Epimedium. The habitat—a shaded, leaf-littered location—matches typical Epimedium habitat in woodland gardens. While it’s always possible that a very similar-looking species exists, Epimedium remains the most plausible identification given these characteristics. Bottom line: - If you’re looking for a graceful, shade-t-loving groundcover with attractive foliage that provides winter interest, Epimedium is a strong candidate. It’s relatively low-maintenance, rewards patience with slow but steady spread, and offers the added bonus of delicate spring flowers. Proper site selection (partial to full shade, rich, well-drained soil) and mindful maintenance (mulching, occasional division, and careful watering) will help this plant thrive year after year. If the plant is not evergreen in your region, you’ll still appreciate the way its leaves emerge bronzed in spring, then green, and finally bronze again in fall, creating a subtle, decorative tapestry under trees and in shade borders.
2026년 4월 29일
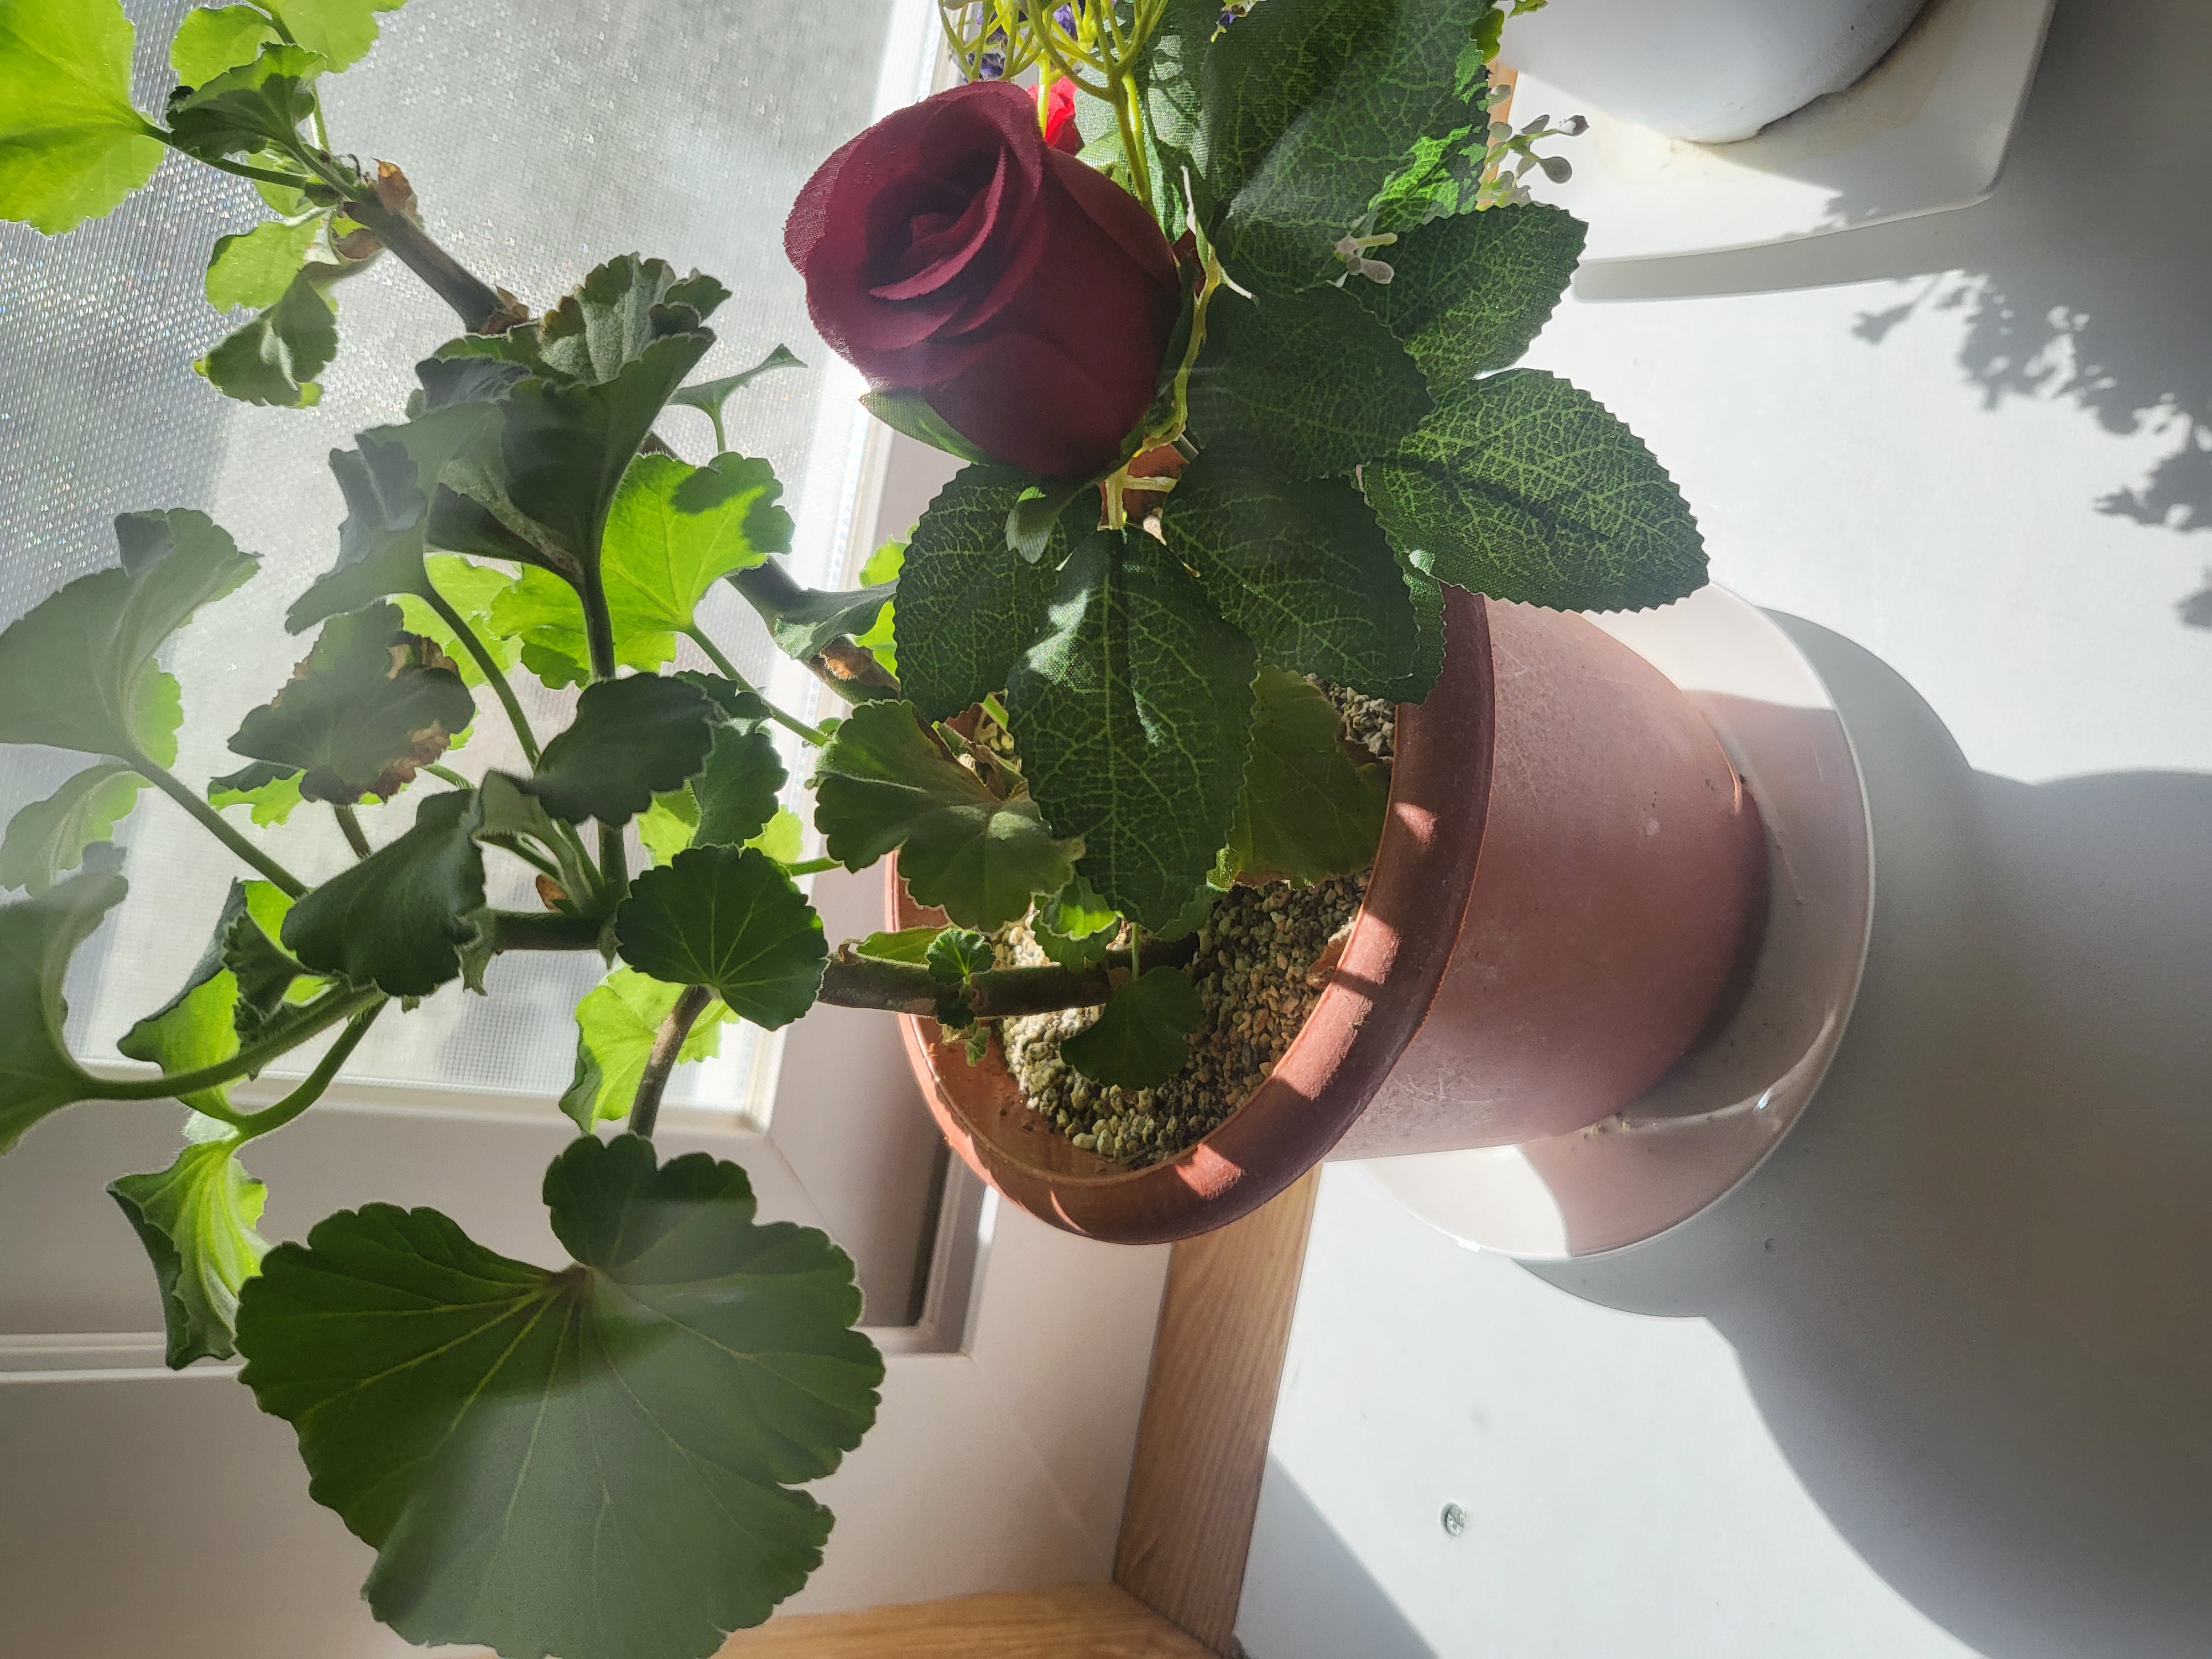
제라늄
95% 일치사진 속 식물은 제라늄( Pelargonium )으로 보입니다. 제라늄은 잎이 손바닥 모양으로 갈라진 듯한 형태가 특징이며, 가장자리는 두껍고 물결지듯 톱니 모양으로 나타납니다. 잎은 광택이 있고 향기가 강한 편으로 품종에 따라 레몬향이나 허브향이 나는 것도 있습니다. 줄기는 비교적 굵고 목질화되며 가지치기로 모양과 밀도를 조절하기 쉽습니다. 제라늄은 실내에서도 잘 자라며 밝은 창가를 선호합니다. 관리 포인트로는 직사광선을 받는 곳에서 잘 자라지만 여름에 너무 강한 직사광선은 잎을 태울 수 있으므로 반음영 또는 창가의 바로 옆 정도가 적합합니다. 온도는 대체로 18~24°C를 유지하고, 물은 흙표면이 건조해질 때마다 흠뻑 주되 물이 고이지 않도록 배수를 잘 해주는 것이 중요합니다. 과습은 뿌리썩음을 유발하므로 토양 배수가 잘 되는 혼합토를 사용하는 것이 좋습니다. 비료는 봄과 여름 성장기에 2~4주 간격으로 균형 비료를 주고, 겨울에는Growth가 느려지므로 물과 비료 양을 줄여주어야 합니다. 가지치기는 새 가지의 촘촘함을 유지하고 꽃이 피는 것을 촉진시키는 데 도움이 되며, 번식은 주로 줄기 꺾꽂이로 쉽게 가능합니다. 병해로는 진딧물, 깍지, 흰가루병 등을 주의하고 초기 단계에서 제거해 주면 관리가 수월합니다. 제라늄은 잎과 꽃의 감상용으로 인테리어에 자주 활용되며, 관리 방법만 잘 따르면 비교적 손이 많이 가지 않는 편이라 초보 가드너에게도 적합한 식물입니다.
2026년 4월 23일
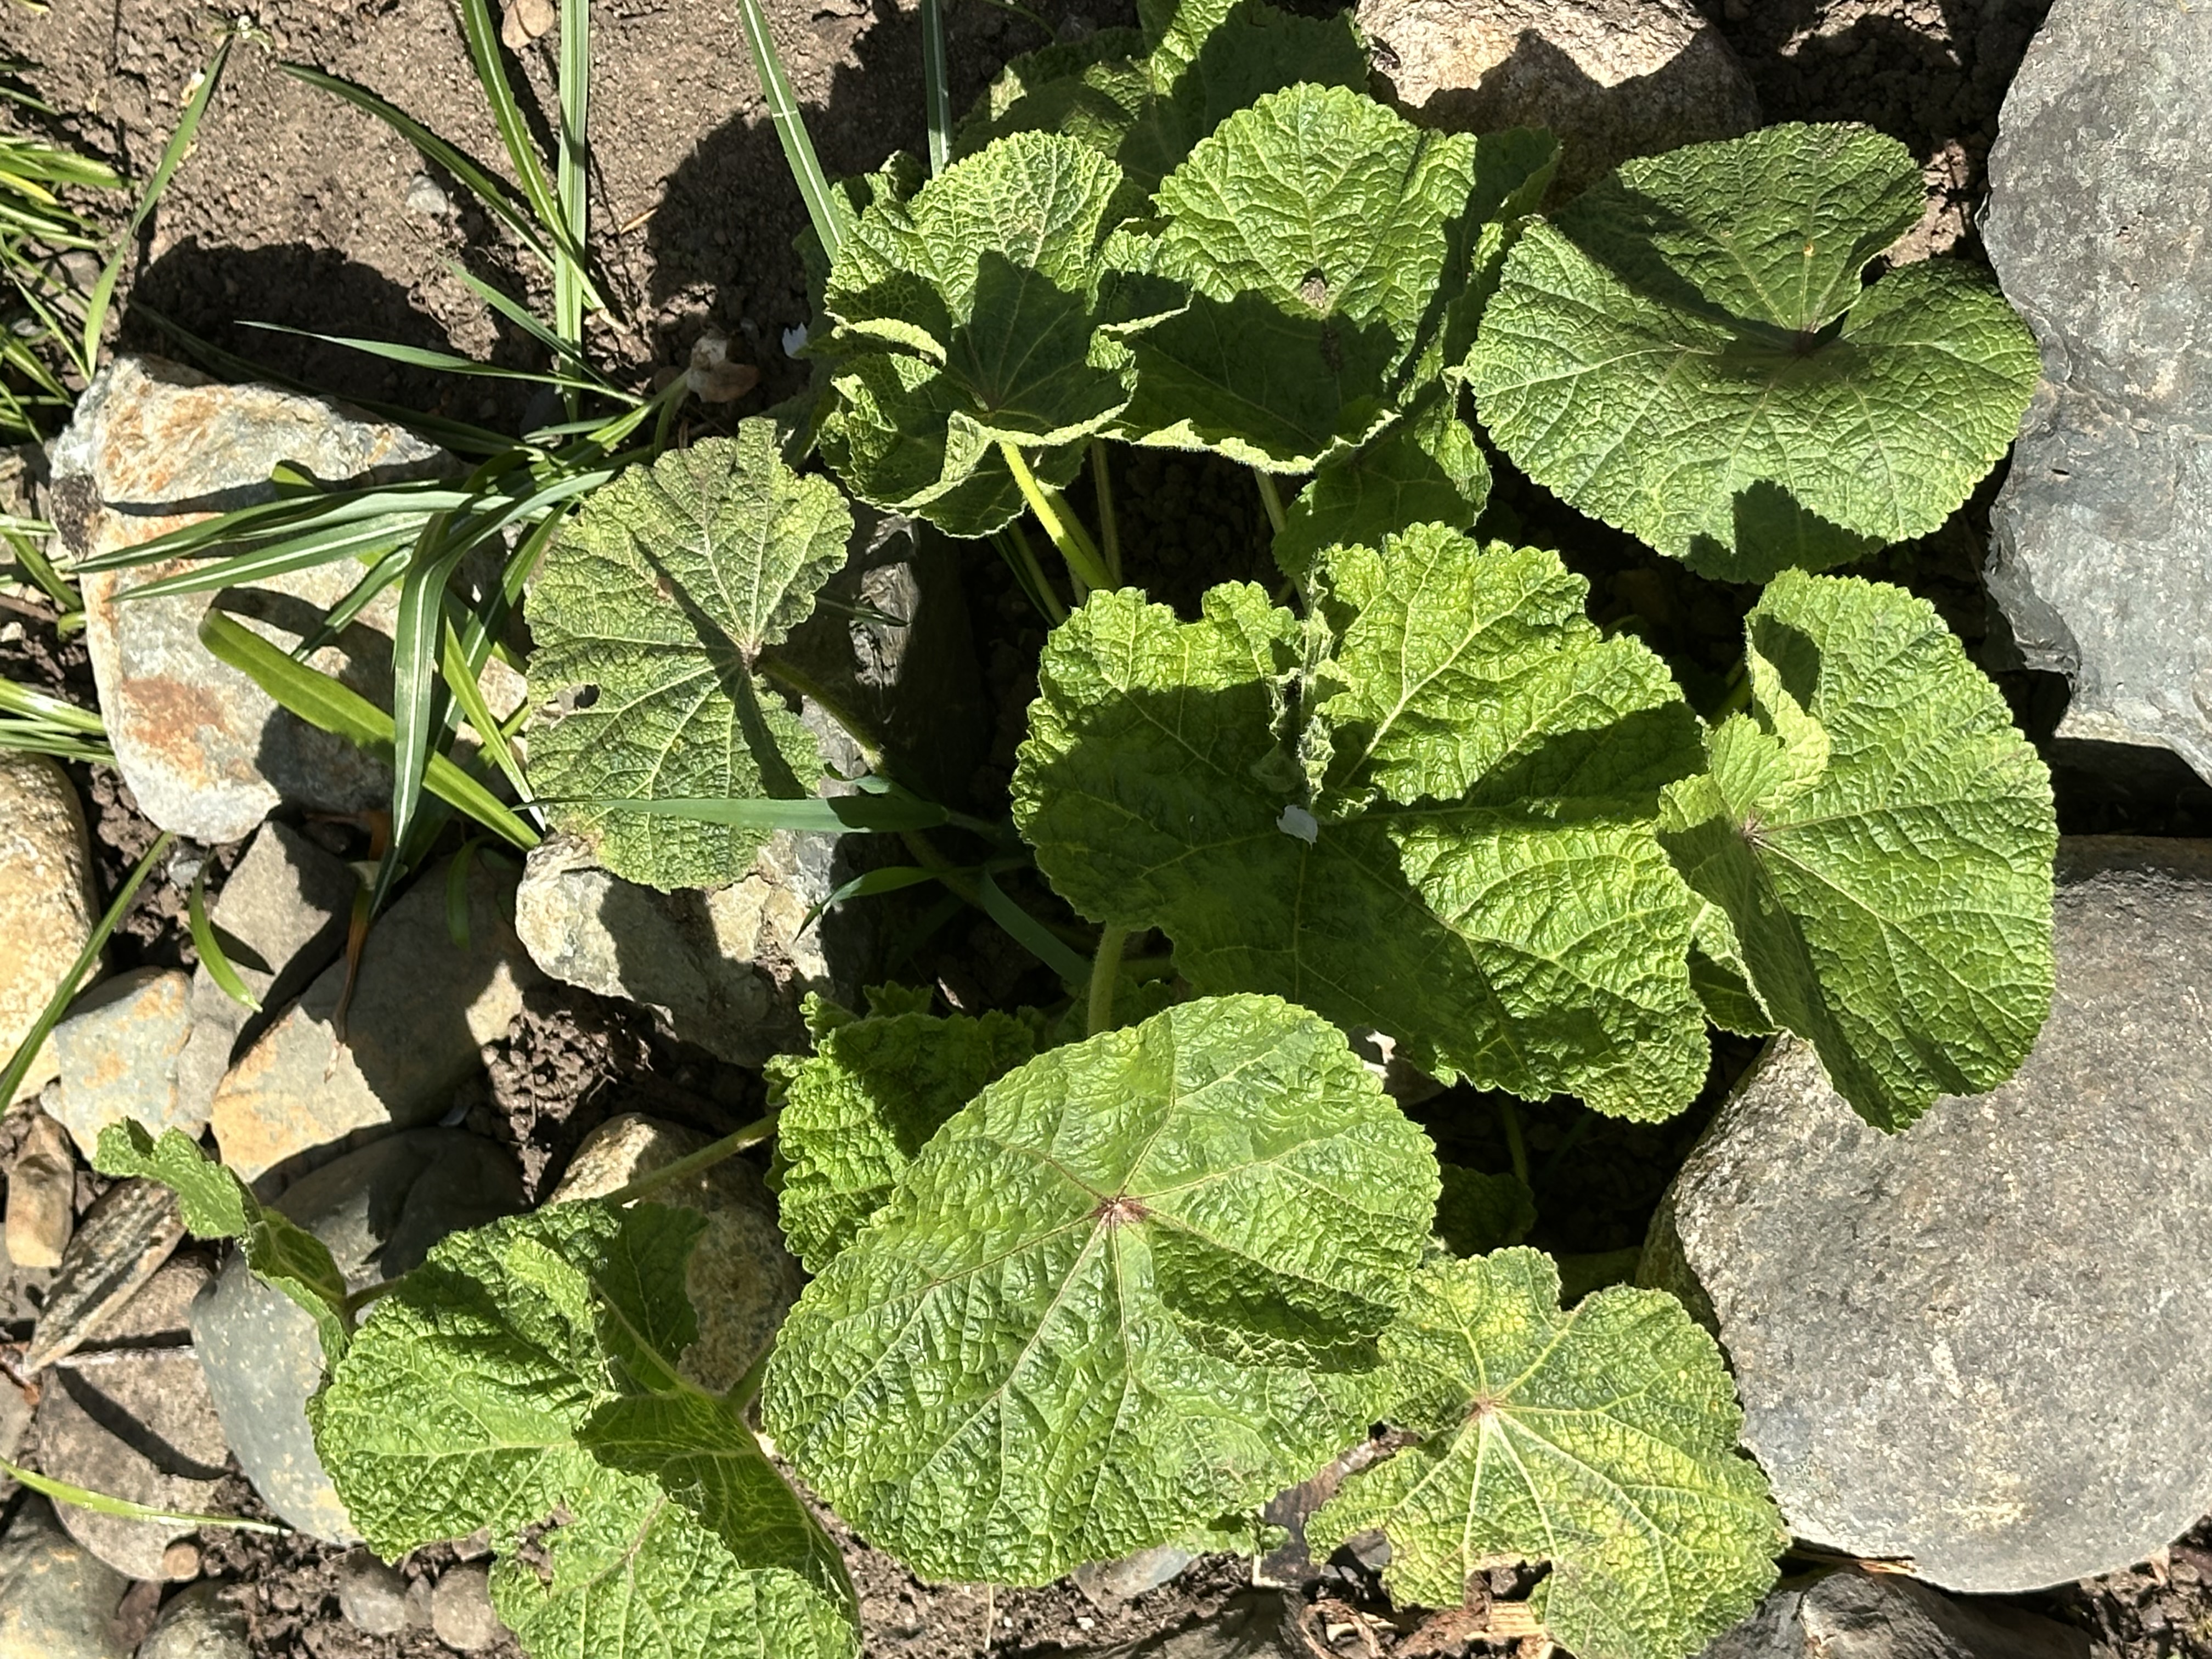
Common burdock (Arctium spp.)
95% 일치The plant shown appears to be a Common burdock (Arctium spp.) in its rosette stage. The broad, oval to heart‑shaped leaves sit low to the ground, forming a dense basal cluster. They are large, with a strongly wrinkled, textured surface and prominent venation. The upper leaf surface is a vivid green, while the underside is usually pale and wooly to a degree. The leaf margins are gently toothed or wavy rather than sharply serrated, and the petioles (leaf stalks) are relatively long and sturdy, lifting the blade slightly above the soil. In rosette form, these leaves lay flat against the ground, helping the plant store energy in its root system for the subsequent year’s growth. In late spring or early summer of the second year, burdock commonly sends up tall flowering stalks crowned with clusters of burrs that cling to fur and fabric, which is one of the most recognizable features of mature plants. The overall habit of the plant in the photo—compact, leafy, and clump‑forming—fits the typical first‑year appearance of burdock rather than an established garden perennial. The plant belongs to the Asteraceae family and is notorious for its burrs, which is why it is often regarded as a weed in managed landscapes. The pictured specimen has the classic look of a young burdock rosette: large, crinkled leaves radiating from the center and a robust, earth‑storing root system beginning to develop beneath the surface. What it is and how it grows: - Life cycle: Burdock is a biennial. In its first year, it forms a robust rosette of large leaves close to the ground. In the second year, it typically bolts a tall flowering stalk (often reaching several feet) bearing dense clusters of small flowers that mature into burrs. The burrs are the plant’s most infamous feature because they latch onto fur, clothing, and animal hair, aiding in seed dispersal. - Leaves: Leaves are large and can exceed 30 cm (12 inches) in mature plants, though younger rosettes are smaller. The texture is rough and hairy on the underside, with the upper surface being green and wrinkled. The venation is prominent, giving the leaf a quilted or crinkled appearance. The leaf bases are heart‑shaped, and the blades taper toward the tip. - Habitat: Burdock tolerates a wide range of soils but prefers disturbed ground, roadsides, fields, and garden margins. It does best in rich, well‑drained soil with full sun to light shade. In a garden, a dense rosette like the one shown can establish quickly if not managed. How to distinguish it from look‑alikes: - Butterbur (Petasites species) can have similar pre‑flowering leaves, but butterbur leaves typically become much larger (often very big) and are usually found in very moist soil along riverbanks or damp borders. Butterbur leaves sit on longer petioles and have a more umbrella‑like appearance as they mature. Burdock leaves are generally more elongated and heart‑shaped with a rough texture, whereas butterbur leaves tend to be more rounded and can be broader at the blade. - True dock (Rumex) leaves can resemble burdock from a distance, but dock leaves are usually narrower, with different venation and habit (often not forming such a dense basal rosette in the same way). - Some hollyhock or fig‑leaf relatives also have large, wrinkled leaves, but their leaf shapes, petiole attachments, and growth forms differ markedly (hollyhocks are typically more deeply lobed and tall when they bloom). Care and management in a garden setting: - If you want to remove it: Burdock is persistent because of its taproot. When removing a rosette, try to dig up the entire root to prevent resprouting. The best time is on a moist day when the soil is loosest. Wear gloves, as the plant’s rough texture and any burrs that form later can irritate skin and clothing. If you encounter burrs later in the season, handle plants with care to avoid burr spread. - If you want to keep it: Some gardeners tolerate burdock for its big, decorative leaves early in the season or for edible uses. If allowed to grow, be prepared for a second‑year flowering stalk and burrs, which will then spread seeds widely. In a rock garden or ornamental space, you may want to prune or restrict it so it does not crowd nearby plants. - Cultural control tips: Regular mowing or cutting back the rosette before it bolts can reduce the energy stored in the root and help keep the plant from flowering. Mulching can suppress the emergence of new rosettes in the surrounding area, but avoid heavy, damp mulch that could encourage rot in a dense rosette. - Competition and spacing: If a burdock plant is allowed to mature, the second‑year stalks require plenty of space and can shade out other perennials. In a garden bed, allocate space or remove aggressively to prevent spread. If you are growing other perennials nearby, consider companions that form a dense cover to minimize bare soil where burdock can establish rosettes. - Soil and water: Burdock tolerates a variety of soils but prefers well‑drained, fertile ground. Too much moisture in poorly drained soil can promote disease or root rot, especially in a crowded rosette. In drier climates, supplemental irrigation can help, but avoid waterlogging. Edible and medicinal notes (with cautions): - Burdock root is edible and has a long history in traditional cuisines. In East Asian cooking (notably Japanese), burdock root (called gobo) is cleaned, peeled, and cut into thin matchsticks or coins for kinpira or tempura, often with a sesame or soy glaze. The young leaves can also be eaten when small, though they are generally tougher and more bitter as the plant matures. Proper preparation is important to remove bitterness and any potential latexy sap. - The plant contains inulin and other carbohydrate compounds, and traditional herbal use has included diuretic and anti‑inflammatory applications. If you are considering using burdock for edible or medicinal purposes, start with a small amount and be aware that some individuals may have allergies or skin sensitivities. Always source from a non‑invasive stand and avoid using if you have a known sensitivity to related plants. - Caution: Do not harvest wild burdock from streets or contaminated soils where pollution or pesticides may be present. If grown in a garden bed, use clean soil and avoid applying herbicides that could be taken up by the plant and transfer to edible parts if you decide to consume them. Propagation and spread: - In managed settings, burdock can be propagated by seed or by transplanting rosettes. Seed germination is typically easy in warm soils, so if you are cultivating it intentionally, sow seeds in late spring to early summer with light coverage. If you are removing it, make sure to collect or destroy burrs and prevent seed dispersal to minimize spread. - For ornamental purposes, some gardeners cultivate burdock as a novelty rosette plant, but it requires careful management to avoid unwanted spread and to protect neighboring plants from crowding. Ecological notes and landscape considerations: - Burdock often coexists with early‑season weeds and disturbance. In some environments, it may provide temporary ground cover and reduce soil erosion for a season, but its aggressive growth and tendency to form burrs mean it is usually best kept under control within a cultivated landscape. - If you are transitioning a rocky or poor‑soil bed to a more stable planting scheme, consider replacing burdock with perennial groundcovers or compact perennials that offer similar visual impact (large, textured leaves) without the weedy potential. Native or noninvasive alternatives can provide a similar silhouette while reducing management needs. In summary, the plant in the photo matches the rosette form of common burdock—a biennial weed known for its large, wrinkled leaves and, later, its burr‑bearing flowering stalks. While not typically grown as a decorative foliage plant, burdock has a storied history in traditional cuisine and herbal uses. If you decide to manage it, focus on removing the root to prevent regrowth, monitor for second‑year bolting, and consider replacement with intentional plantings to maintain the look you want in the rock garden. If left unchecked, burdock can become persistent and spread through burrs, so early identification and proactive management are the keys to keeping it under control.
2026년 4월 20일
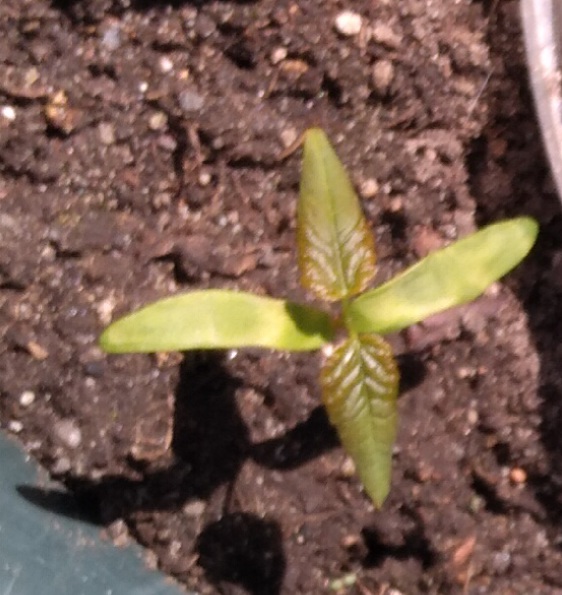
Guava (Psidium guajava) seedling
95% 일치Based on the photo, the plant appears to be a very young guava tree (Psidium guajava) seedling. The seedling shows opposite pairs of simple, entire leaves at the growing tip, a cross-like arrangement typical of many Myrtaceae. The leaves are narrow-to-elliptic with smooth margins, bright green on the upper surface, and prominent venation. The new growth often carries a reddish or bronze tint, which can be visible on the young leaves in the image. The stem is slender and green, and the plant looks compact, as you would expect from a seedling just a few weeks old. If the identification is uncertain because seedling leaves can resemble those of a few other tropical fruiting plants, this is still a plausible match, but the general care guidelines that follow will suit guavas and similar tropical woody herbs or small trees started from seed or cuttings. The description below focuses on guava and includes notes that are broadly applicable to many tropical fruit seedlings, with caveats about possible alternatives in case the plant turns out to be a close relative or a pepper-type seedling.
2026년 4월 14일
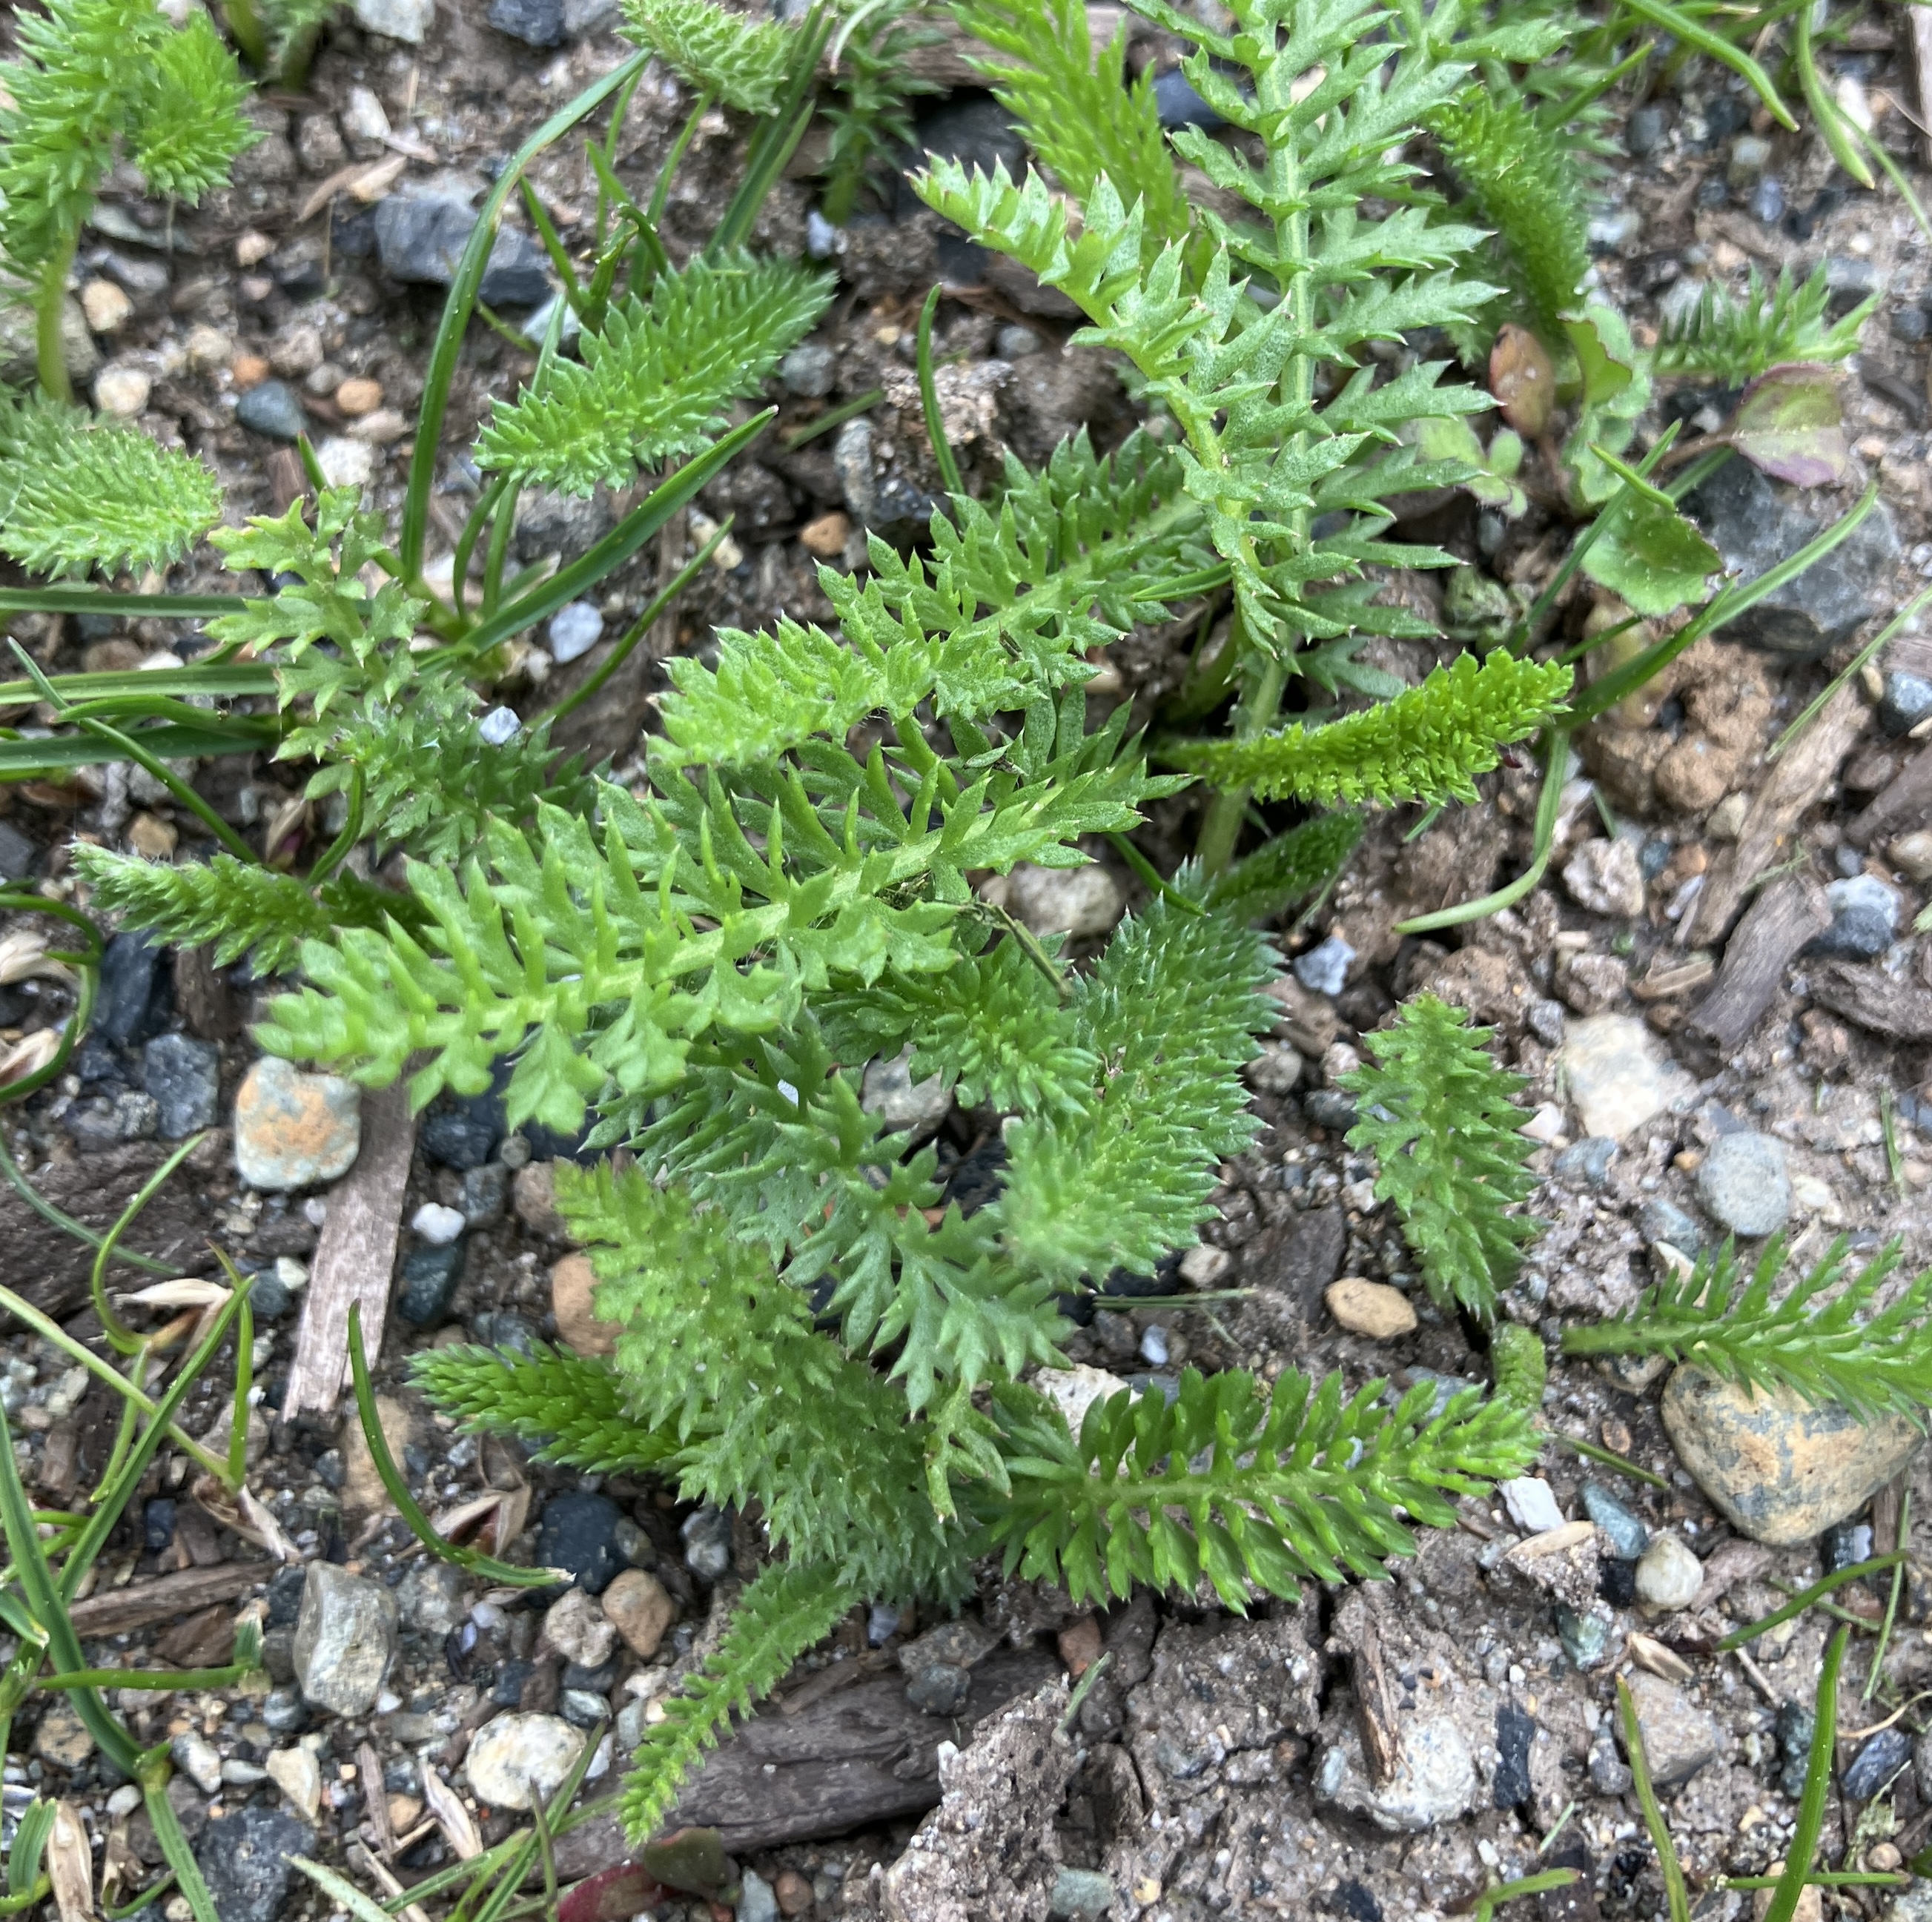
Common yarrow (Achillea millefolium)
95% 일치The plant in the photo most closely resembles common yarrow, Achillea millefolium, a widely distributed perennial in the aster family. It is valued for its fernlike, highly dissected leaves and its long season of interest. While a precise species can only be confirmed with florets or a growth habit over time, the characteristic feathery foliage shown in the image strongly echoes yarrow. If this identification is correct, you have a sturdy, low-maintenance plant that can form the backbone of borders, rock gardens, or drought-tolerant landscapes. Below is a thorough overview of the plant, its features, and how to care for it successfully in a home garden. Description and identification tips - Foliage: The most distinctive feature is the foliage. Yarrow leaves are pinnately divided into many small, narrow lobes that give a feathery, almost fernlike appearance. The leaf segments are typically linear to lanceolate with finely toothed margins. In your photo, multiple stems carry these finely divided leaves, creating a compact clump at the base. - Growth habit: Young plants form a low, tight rosette, and with time they produce upright flowering stems. In a garden setting, mature plants can reach a height of roughly 1 to 3 feet (30 to 90 cm) depending on cultivar and growing conditions. The plant in the image appears to be a compact, rosette-forming specimen, which is typical of many Achillea millefolium individuals when grown in rocky, well-drained soils. - Flowers (not visible in the photo): Yarrow is best known for its flat-topped or slightly rounded clusters (corymbs) of small flowers. Each head is made up of numerous tiny disk florets, often surrounded by a ring of ray florets. White is the classic color, but many cultivars offer pink, red, or yellow hues. The bloom period typically runs from late spring through summer and can extend into early autumn with continued deadheading and favorable conditions. - Habitat and range: Yarrow is native to much of the temperate Northern Hemisphere and has naturalized widely elsewhere. It tolerates a range of conditions but thrives in full sun and well-drained soils. In hot, dry environments it performs very well once established. - Aroma and texture: The leaves and stems have a distinctive scent when crushed, which some gardeners describe as medicinal or herbaceous. The foliage picks up dew and rain, giving the clump a fresh, vibrant look after watering. Care and maintenance - Light: Yarrow loves sun. Aim for at least 6 hours of direct sun per day. In very hot climates it benefits from some afternoon shade, but full sun generally yields the best flowering and a compact habit. - Soil: It prefers well-drained soil. It is tolerant of poor, rocky, or sandy soils and does not require rich, consistently moist substrates. In heavy clay or persistently wet soils, growth can be stunted and root rot may occur. If you have poor drainage, amend the planting area with organic matter and consider raised beds or mounds. - Watering: Once established, yarrow is notably drought-tolerant. Water regularly during the first growing season to develop a strong root system, then switch to infrequent watering. Overwatering or prolonged wet conditions can promote root rots and leaf yellowing. In cooler temperate climates with regular rainfall, supplemental irrigation is rarely needed after establishment. - Fertilization: Yarrow generally does well with little to no fertilizer. A light top-dressing of compost in spring can support healthy growth, but avoid high nitrogen levels which can encourage lush foliage at the expense of flowers and may lead to floppy plants. - Pruning and deadheading: To promote bushier growth and longer flowering, deadhead spent flower clusters regularly. After flowering, you can trim back the flowering stems to encourage a second flush of blooms or to maintain a tidy shape. In cooler regions, some gardeners cut the plants back in late fall to prepare for winter; in milder areas, you can do a light rejuvenation cut in early spring. - Propagation: Yarrow is easy to propagate by division or by seed. Division is the simplest method for larger clumps and is best done in early spring or fall. Gently lift the plant, separate the root clumps, and replant them at the same depth. Seeds can be sown in spring or fall; germination is generally reliable under normal garden conditions. - Spacing and companions: Space plants about 12 to 24 inches apart (30 to 60 cm) depending on the cultivar and desired form. Yarrow pairs well with other drought-tolerant perennials such as lavender, salvia, or coreopsis in mixed borders. It also makes an excellent candidate for rock gardens and wildflower meadows. - Pests and diseases: Yarrow is relatively pest- and disease-resistant. Powdery mildew can occur in humid summers or crowded plantings, so ensure good air circulation and avoid excessive shade. Aphids and mites may appear occasionally, but these are typically manageable with quick sprays of water or insecticidal soap if needed. Good garden hygiene and proper spacing help reduce issues. - Hardiness: Most Achillea millefolium cultivars are hardy across a wide range of zones (generally USDA zones 3–9). They tolerate cold winters and hot summers when grown in appropriate conditions. Some cultivars may differ in height, bloom color, or leaf texture, so it helps to choose a cultivar that matches your site conditions. Cultural and practical uses - Ornament and landscape value: Yarrow is prized for its long bloom period, its architectural foliage, and its ability to fill borders with steady color and texture. It can serve as a focal plant, a low hedge element, or a filler in wildflower and pollinator-friendly plantings. Its drought tolerance makes it a good choice for xeriscapes and low-water-use gardens. - Cut flowers and dried arrangements: The flower heads can be used fresh in cut arrangements or dried for decorative use. The compact, flat-topped inflorescences hold well when dried and can contribute a light, airy note to bouquets. - Ecological role: Yarrow attracts a variety of beneficial insects, including many pollinators. Planting yarrow can support local garden ecosystems by providing nectar across much of the growing season. - Culinary and medicinal notes: Historically, yarrow has been used in folk medicine and as a culinary herb in some cultures. The leaves can impart a bitter, aromatic flavor when used sparingly in certain dishes, and the plant has a long track record in traditional herbal medicine. If you plan to use it medicinally or in food, familiarize yourself with proper identification and consult reliable sources, especially since some people may have sensitivities or interactions with other medicines. Always ensure correct species identification before foraging or consumption. Potential look-alikes and how to distinguish them - Other feathery leaf perennials: There are several garden plants with finely divided leaves that could be mistaken for yarrow, such as certain species of daisies or tansy. To confirm Achillea millefolium, look for the classic flat-topped flower clusters that appear on tall, slender stalks well above the foliage. If you only see leaves, the plant may still be a young yarrow or a related species with similar foliage; an eventual flowering phase will clarify the identification. - If flowers are pink or yellow rather than white: Many cultivated yarrow varieties offer bloom colors beyond white. If you encounter a solid-color inflorescence or a different bloom shape, compare leaf form and growth habit with reputable plant guides for the exact cultivar. Bottom line If this plant is indeed common yarrow, you have a robust, versatile perennial that will reward you with steady greenery, long-lasting blooms, and ecological benefits for pollinators. It prefers sunny, well-drained sites and thrives with minimal maintenance. With a little yearly attention—deadheading spent blooms, dividing clumps every few years, and ensuring good air circulation—you can maintain a healthy, attractive clump that enhances rock gardens, borders, or wildflower meadows. If you are unsure about the exact identification, observing the flowering period and the shape of the inflorescences in the coming season can provide a definitive confirmation. In the meantime, the care practices described here will suit many similar feathery-leaved perennials and help keep your plant happy and resilient.
2026년 4월 12일
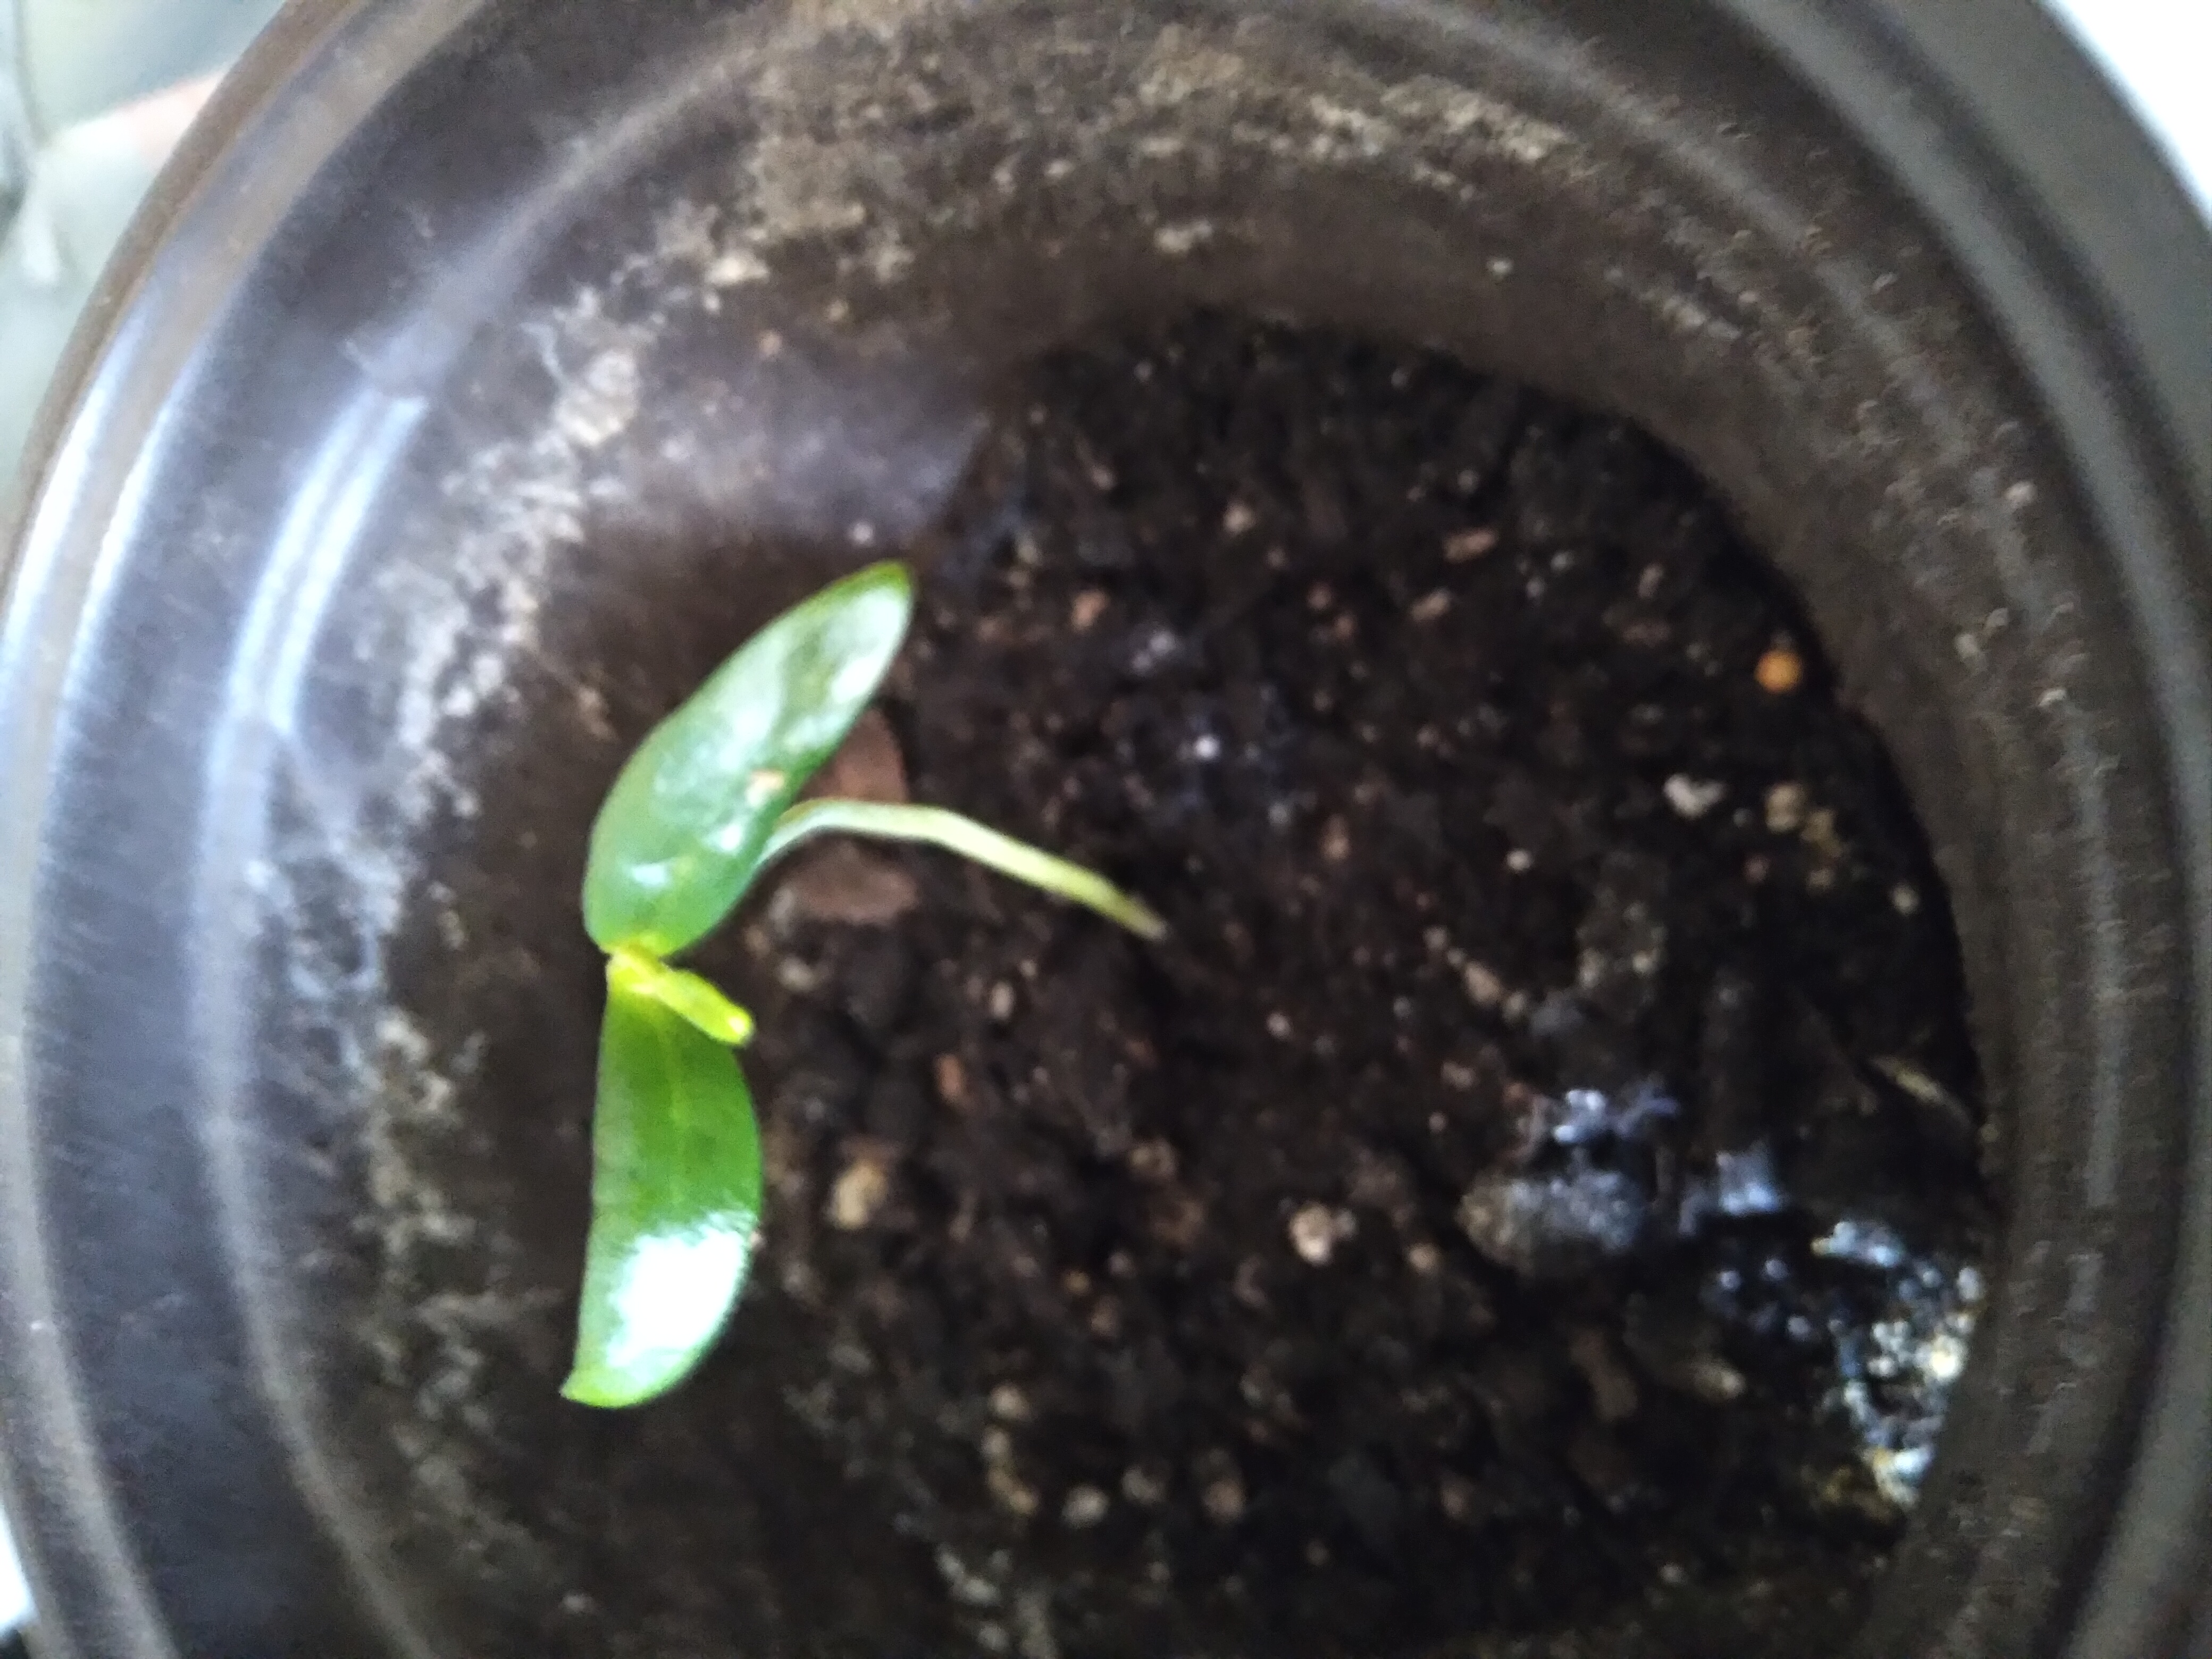
Capsicum annuum (pepper) seedling
95% 일치The plant in the photo appears to be a baby pepper plant (Capsicum annuum), likely a bell pepper or chili pepper seedling. The seedling shows two small, smooth, glossy cotyledon-like leaves at the base and a slender pale-green stem. A first true leaf is starting to form just above, and more true leaves would develop as the plant grows. This is a very common appearance for pepper seedlings purchased from seed or found volunteering in a home garden. While it is difficult to be 100% certain from a single early-stage image, the overall morphology—oval to oblong leaves with entire margins, a delicate thin stem, and the way the leaves sit opposite each other near the top of the stem—fits Capsicum seedlings well. If you are growing it from seed or from a saved pepper, you can expect it to continue developing the classic pepper plant form: a branching, erect, herbaceous plant that will grow more leaves and eventually produce flowers and fruit in warm conditions. Below is a thorough overview of pepper plant traits and care, focusing on this early seedling stage and extending into typical growth and production as it matures. Identity and basic characteristics: Pepper plants belong to the nightshade family (Solanaceae) and are grown as annuals in temperate regions, even though they are perennials in their native warm climates. They prefer warm weather, bright light, and rich, well-draining soil. The leaves are simple, smooth-edged, and glossy, usually green, with an elongated oval or lanceolate shape that broadens toward the tip. Leaves arise alternately along the stem as the plant grows, and each leaf is supported by a short petiole. The plant is typically compact when grown in pots, but depends on variety and pruning. When mature, capsicum plants form flowers (usually white with five petals) that become the edible fruits—peppers that can be green, yellow, orange, red, or even purple depending on variety. Growth stages and morphology: In the seedling stage, Capsicum annuum begins with two cotyledons that emerge from the seed and function as the initial energy source for growth. The cotyledons are relatively smooth and elongated. As the seedling matures, true leaves appear, increasing in size and becoming more distinctly oval and pointed at the tip. The stem remains slender and green, with a tendency to elongate if light is insufficient (a common issue in indoor setups—leggy seedlings). A healthy seedling will display a sturdy stem, a set of true leaves with a vibrant green color, and a growing apical bud that will eventually produce more leaves and flowering shoots. Ecology and native habitat: Pepper plants originate from the Americas and thrive in warm, sunny climates. They require warmth for germination and robust fruit development. In cooler regions, peppers are often grown as annuals or in greenhouses, while in tropical climates they can persist for multiple seasons. They prefer soil that drains well but retains adequate moisture, and they like partially to full sun for optimal growth and fruit set. Care and growing conditions: - Light: Pepper seedlings and young plants need bright light. Outdoors, provide full sun for most of the day. Indoors, place them near a south-facing window or under grow lights for 12–16 hours daily to prevent leggy growth. If leaves appear pale or stretched, increase light intensity or duration. - Temperature: Warmth is essential. Daytime temperatures of about 24–29°C (75–85°F) and nighttime temperatures above 15–18°C (60–65°F) are ideal for peppers. Seed germination requires even warmer soil (around 25–30°C or 77–86°F). Avoid cold drafts, and do not allow the root zone to stay wet in cold conditions. - Soil and potting mix: Use a well-draining, nutrient-rich potting mix. A sterile seed-starting mix is good for germination, but transplant seedlings into a high-quality potting soil with organic matter for ongoing growth. Aim for a slightly acidic to neutral pH, roughly 6.0–7.0. - Watering: Keep the soil consistently moist but not waterlogged. Pepper roots dislike standing water, which can lead to root rot and fungal issues. Water at the base when the top inch of soil feels dry to the touch. In pots, ensure drainage holes are open and consider bottom watering to avoid wetting leaves excessively. - Fertilization: Start with a balanced, water-soluble fertilizer once true leaves appear. A formula such as 10-10-10 or 20-20-20, applied at a quarter to a half strength every 1–2 weeks, supports healthy growth. As plants begin to set fruit, shift to a fertilizer with a modest nitrogen level and higher phosphorus and potassium to encourage flowering and fruiting (e.g., 5-10-10 or a tomato/pepper-specific blend). Avoid over-fertilizing with nitrogen, which can produce lush foliage but few fruits. - Pot size and transplanting: Seedlings in small pots should be transplanted into larger containers when they have 2–3 true leaves or when roots begin to circle the pot. A typical home-pot pepper may do well in 2–5 gallon containers, depending on variety, with adequate staking or support for taller cultivars. Transplanting should be done carefully to minimize root disturbance. - Pruning and training: Early pruning is optional. For many varieties, pinching the apical growth can encourage a bushier plant and more fruiting sites. Once the plant is larger, you can remove some lower leaves and prune to improve airflow and reduce disease risk. For indeterminate or very tall pepper types, staking helps prevent lodging in windy outdoor settings or with heavy fruit loads indoors. - Pollination: In outdoor settings, peppers are pollinated by wind and insects. Indoors or in greenhouses, you may need to gently shake the plant or use a small brush to assist pollen transfer, particularly in crowded or low-air-movement setups. A fan providing light air movement can also help. - Humidity and air circulation: Moderate humidity (40–60%) often helps prevent certain fungal diseases. Ensure good air circulation around the plant to reduce foliage diseases, especially in humid environments. - pests and diseases: Common issues include aphids, whiteflies, spider mites, pepper weevils, and fungal diseases such as powdery mildew or early blight. Manage pests with regular inspection, rinsing off insects with water, introducing beneficial insects if appropriate, and using insecticidal soap or horticultural oils as needed. Practice good sanitation by removing infected leaves and avoiding overhead watering that can promote foliar diseases. For disease prevention, rotate crops if you grow peppers in the same bed, and use clean soil and containers. Care notes specifically for a single early seedling: The image shows a very young seedling with two initial leaves and a delicate stem. At this stage, gentle handling, consistent warmth, and bright light are crucial. Keep the soil evenly moist but not soggy; avoid letting the plant sit in standing water. If the seedling becomes leggy (long internodes with weak growth), it usually indicates insufficient light; increase light exposure and consider using a small grow light to provide more intense, direct light. Once the first true leaves are well formed and the plant looks sturdy, you can begin a light feeding regimen with a balanced fertilizer. As roots develop and the plant grows, you may transplant into a larger pot to accommodate a stronger root system. When moving plants outdoors for summer, acclimate them gradually to stronger light and outdoor conditions to prevent sunburn and transplant shock. Varieties and fruit prospects: Capsicum annuum includes a wide range of peppers, from sweet bell peppers to hot chilies. The care principles described here apply broadly, though specific varieties differ in fruit size, color, and taste. Some peppers begin green and mature to red, yellow, orange, or purple, while others remain green when ripe. Hot varieties contain capsaicin and can be spicy, so handling ripe fruits with gloves is prudent. Fruit production depends on adequate light, warmth, and consistent watering. In containers, regular feeding supports continuous fruit set, but avoid water stress, which can cause blossoms to drop. Harvest and use: When peppers reach a desirable size and color for the cultivar, harvest with clean shears or a sharp knife. Early harvests can encourage continued fruiting in many varieties. Peppers are versatile and can be eaten fresh, roasted, stuffed, or used in countless cuisines. They store well in the refrigerator for several days and can be frozen after blanching or dried for longer-term storage. Nutritionally, peppers provide vitamin C, carotenoids, and a range of antioxidants. Bottom line for this seedling: If you planted a pepper seed or found this little plant in a pot, it is most likely Capsicum annuum. With the right warmth, light, and a steady watering schedule, this seedling will develop into a compact, productive pepper plant. As it matures, you can shape it through light pruning and proper feeding to maximize flowering and fruiting while maintaining plant health. If your goal is a specific pepper variety (such as a sweet bell, jalapeño, or cayenne), you can tailor care to that cultivar’s needs, but the core principles—warmth, bright light, well-draining soil, consistent moisture, and balanced nutrition—remain the same for healthy growth from seedling to fruit-bearing plant.
2026년 4월 10일
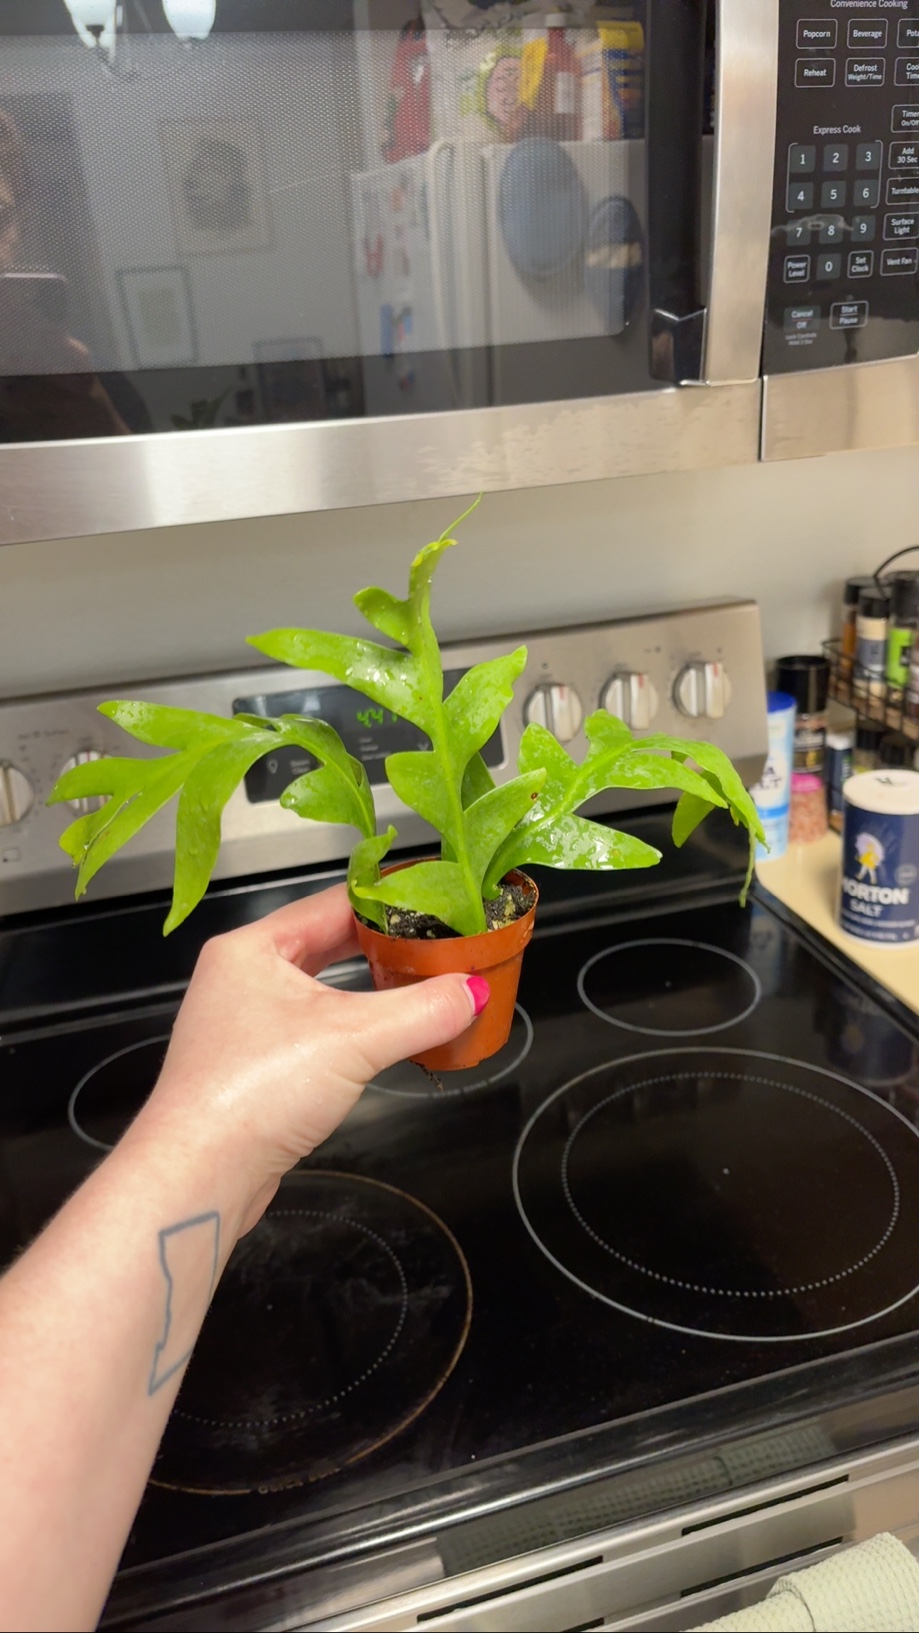
Kalanchoe pinnata (Bryophyllum pinnatum) – a lobed-leaf succulent (likely a kalanchoe/bryophyllum cultivar)
95% 일치What this plant most closely resembles in common houseplant form is a kalanchoe/bryophyllum type, such as Kalanchoe pinnata (often sold as Bryophyllum pinnatum). It is a fleshy, succulent perennial with bright green to lime-green leaves that are arranged on short stems in a rosette-like habit. The leaves in your photo are relatively broad, glossy, and have shallow to moderately deep lobes or undulating margins, giving the foliage a somewhat serrated, fingered look. This general leaf shape and succulent growth habit are characteristic of several kalanchoe/bryophyllum cultivars, many of which share similar care requirements. Because houseplant cultivars can vary a lot in leaf shape, color, and size, this identification is best considered a well-supported guess based on the visible features: a hardy, sun-loving succulent with lobed, fleshy leaves that can tolerate an indoor kitchen environment, and a tendency to form a compact, upright or cascading growth habit depending on light and pot size. If you have a plant that occasionally produces small plantlets along the leaf margins or a more upright rosette with slightly serrated edges, that would further support Bryophyllum/Kalanchoe pedigrees, but even without plantlets, many cultivars of this group look very similar when young. General characteristics - Growth habit: A compact, succulent perennial that forms a rosette of leaves around short stems. In good light it often grows upright with a sturdy but flexible stem; in lower light it may become a bit leggy or sprawling. The stems and petioles are typically thick and can store water, helping the plant survive periods of neglect. - Leaves: Succulent, bright to medium-green leaves that are broad and fleshy. Edges are lobed or wavy, giving a cordate- to oblong-lobed appearance. Leaves are arranged alternately along the stems in a way that creates a lush, cushioned look. The surface is usually smooth and may feel slightly waxy or glossy. - Size: In a small pot like the one shown, the plant is likely to stay relatively compact for a year or two, reaching anywhere from 6 inches to 18 inches tall depending on light and pruning. In optimal conditions it can become larger, with more leaves and a fuller rosette. - Light tolerance: Prefers bright light; can tolerate some direct sun, especially in the morning, but may scorch under intense mid-day sun. Indoors near a bright window is ideal. - Temperature: Likes warmth and does not tolerate frost. Typical indoor temperatures (60–80°F or 15–27°C) are comfortable. - Soil and drainage: Best in a well-draining, sandy or gritty succulent mix. A standard cactus/succulent potting mix with added perlite or pumice works well. Good drainage is crucial to prevent root rot. - Watering: Like most succulents, it prefers a “soak and dry” approach. Water thoroughly when the top 1–2 inches of soil feel dry to the touch, then allow excess water to drain. In winter, water sparingly as growth slows. Avoid letting water sit in the saucer, and ensure the pot has drainage holes. - Humidity: Tolerates average household humidity; high humidity is not essential, and excellent air circulation helps prevent fungal issues. - Fertilizer: During the active growing season (spring and summer), feed lightly with a balanced, water-soluble fertilizer (half strength) every 4–6 weeks. Do not over-fertilize; dormant periods in fall/winter require minimal to no fertilizer. Care and maintenance guide - Light and placement: Place the plant where it can receive bright, indirect light for most of the day. A south or east-facing windowsill is often ideal. If the plant starts to look pale or stretch toward the light (etiolation), consider moving it closer to the light source or supplement with a small grow light. Rotate the pot occasionally to keep growth even. - Watering routine: Check the soil before watering. Let the top inch of soil dry out between waterings. In hotter months or in a dry apartment, you may need to water a bit more frequently, but never keep the soil constantly wet. If the plant is in a very sunny, hot kitchen, the soil may dry out quickly; adjust water accordingly. - Potting mix and repotting: Use a fast-draining mix designed for succulents. If the plant becomes crowded or outgrows its pot, repot in spring into a slightly larger container. When repotting, gently tease apart any roots if they are densely circling the pot, and prune leggy growth to encourage a bushier shape. - Pruning and shaping: Occasional pruning helps maintain a compact shape and prevents plants from becoming leggy. Clip back the tips of the stems to encourage branching. Remove any dead, yellowing, or mushy leaves near the base to keep the plant healthy and attractive. - Fertilizing: Feed during the growing season with a diluted, balanced fertilizer. Avoid heavy fertilization, which can cause leggy growth and reduce the plant’s natural drought tolerance. Do not fertilize in winter when the plant is resting. - Propagation: One of the appealing features of kalanchoe/bryophyllum is its ease of propagation. You can propagate from leaf or stem cuttings. Let cut ends callus for a day or two, then plant in a well-draining medium. Roots typically appear within a few weeks. If your plant has leaf margins that occasionally produce small plantlets (a common trait in many Bryophyllum), those plantlets can be rooted once they detach and touch moist soil. - Pest prevention and treatment: Common pests include mealybugs and scale insects. Wipe leaves with a damp cloth to remove dust and inspect regularly. If pests appear, treat with insecticidal soap or a mild alcohol wipe on affected areas. Ensure good air circulation to discourage fungal problems. - Temperature and humidity considerations: Most indoor environments are suitable. Avoid exposing the plant to freezing temperatures or drafts. If your kitchen vents or air conditioning are strong, provide some protection or place the plant slightly away from direct drafts. - Safety and pet considerations: Kalanchoe species contain compounds that can be toxic to pets if ingested. If you have curious cats or dogs, place the plant out of reach or supervise their interactions. For households with small children, keep it in a location inaccessible to nibblers. - Seasonal behavior: In cooler months, growth slows. Expect minimal watering and light feeding during this rest period. In spring and summer, growth accelerates, and you can resume more regular watering and feeding. Why this plant can be a good choice for indoor growing - Low maintenance: Once established, this type of plant is relatively forgiving. It tolerates a range of indoor conditions and does not require daily care. - Visual appeal: The glossy, fleshy leaves and the potential for interesting leaf shapes (lobed margins, undulations) add texture and color to indoor spaces without being a demanding plant. It can work well as a focal point on shelves, in a kitchen window, or as part of a succulent collection. - Versatility in lighting: While it prefers bright light, it can adapt to a range of indoor lighting conditions, making it suitable for apartments and houses with varying sun exposure. - Propagation ease: For plant lovers who enjoy expanding their collection or sharing plants with friends, this group of plants is easy to propagate from cuttings or, in some cultivars, from leaf margins that produce plantlets. This makes it a satisfying plant for beginners and seasoned growers alike. Common problems and troubleshooting tips - Yellowing or soft, mushy leaves: Often indicates overwatering or poor drainage. Check the soil moisture, inspect the roots if you can, and ensure the pot has drainage holes. Allow the soil to dry out more between waterings and consider refreshing the soil and potting mix. - Edges browning or crispy leaf tips: Might be due to underwatering, low humidity, or overly strong sun exposure. Adjust watering frequency, offer a bit more humidity if the air is very dry, and filter intense sun with a sheer curtain or move the plant slightly away from direct midday sun. - Etiolation (leggy growth): If the plant becomes leggy with long bare stems, it’s a signal that it needs more light. Move it to a brighter spot or provide a supplemental grow light to encourage compact, bushier growth. - Pests: Mealybugs, scale, and spider mites can appear. If you see small bumps or a cottony residue, wipe with isopropyl alcohol on a cotton swab or use a product labeled for succulents. Increase air circulation and avoid overcrowding the plant to reduce pest pressure. Cultural notes and practical tips - The plant thrives with a routine that mimics its natural desert-adapted behavior: bright light, well-draining soil, and a brief, thorough watering followed by drying periods. Resist the urge to keep the soil constantly wet, as this is a common killer of many succulent houseplants. - If you’re new to succulents, start with a small specimen like the one in your photo and observe how your environment affects its growth. You’ll learn how fast your plant uses water, when it needs more light, and how to adjust your care schedule seasonally. - If you want a fuller look, you can pinch back the top growth to encourage branching. For a taller, more upright appearance, allow new growth to extend and lightly prune to shape as needed. - Consider combining this plant with other succulents that have similar light and water needs for a visually appealing, low-maintenance display. In summary, the plant pictured most closely matches a lobed-leaf kalanchoe/bryophyllum type (most likely Kalanchoe pinnata or a closely related cultivar). It is a succulent with fleshy, lobed leaves, adapted to bright light and well-draining soil. Care involves bright light, careful watering (let the soil dry between waterings), a sandy/succulent potting mix, and occasional pruning. It tolerates typical indoor temperatures and moderate humidity. With minimal fuss, this plant will produce attractive foliage and, in some cases, plantlets along the leaf margins, making it a versatile and rewarding choice for kitchens, living rooms, or office spaces. Regular observation will help you fine-tune water, light, and feeding to keep the plant healthy and looking its best.
2026년 4월 10일
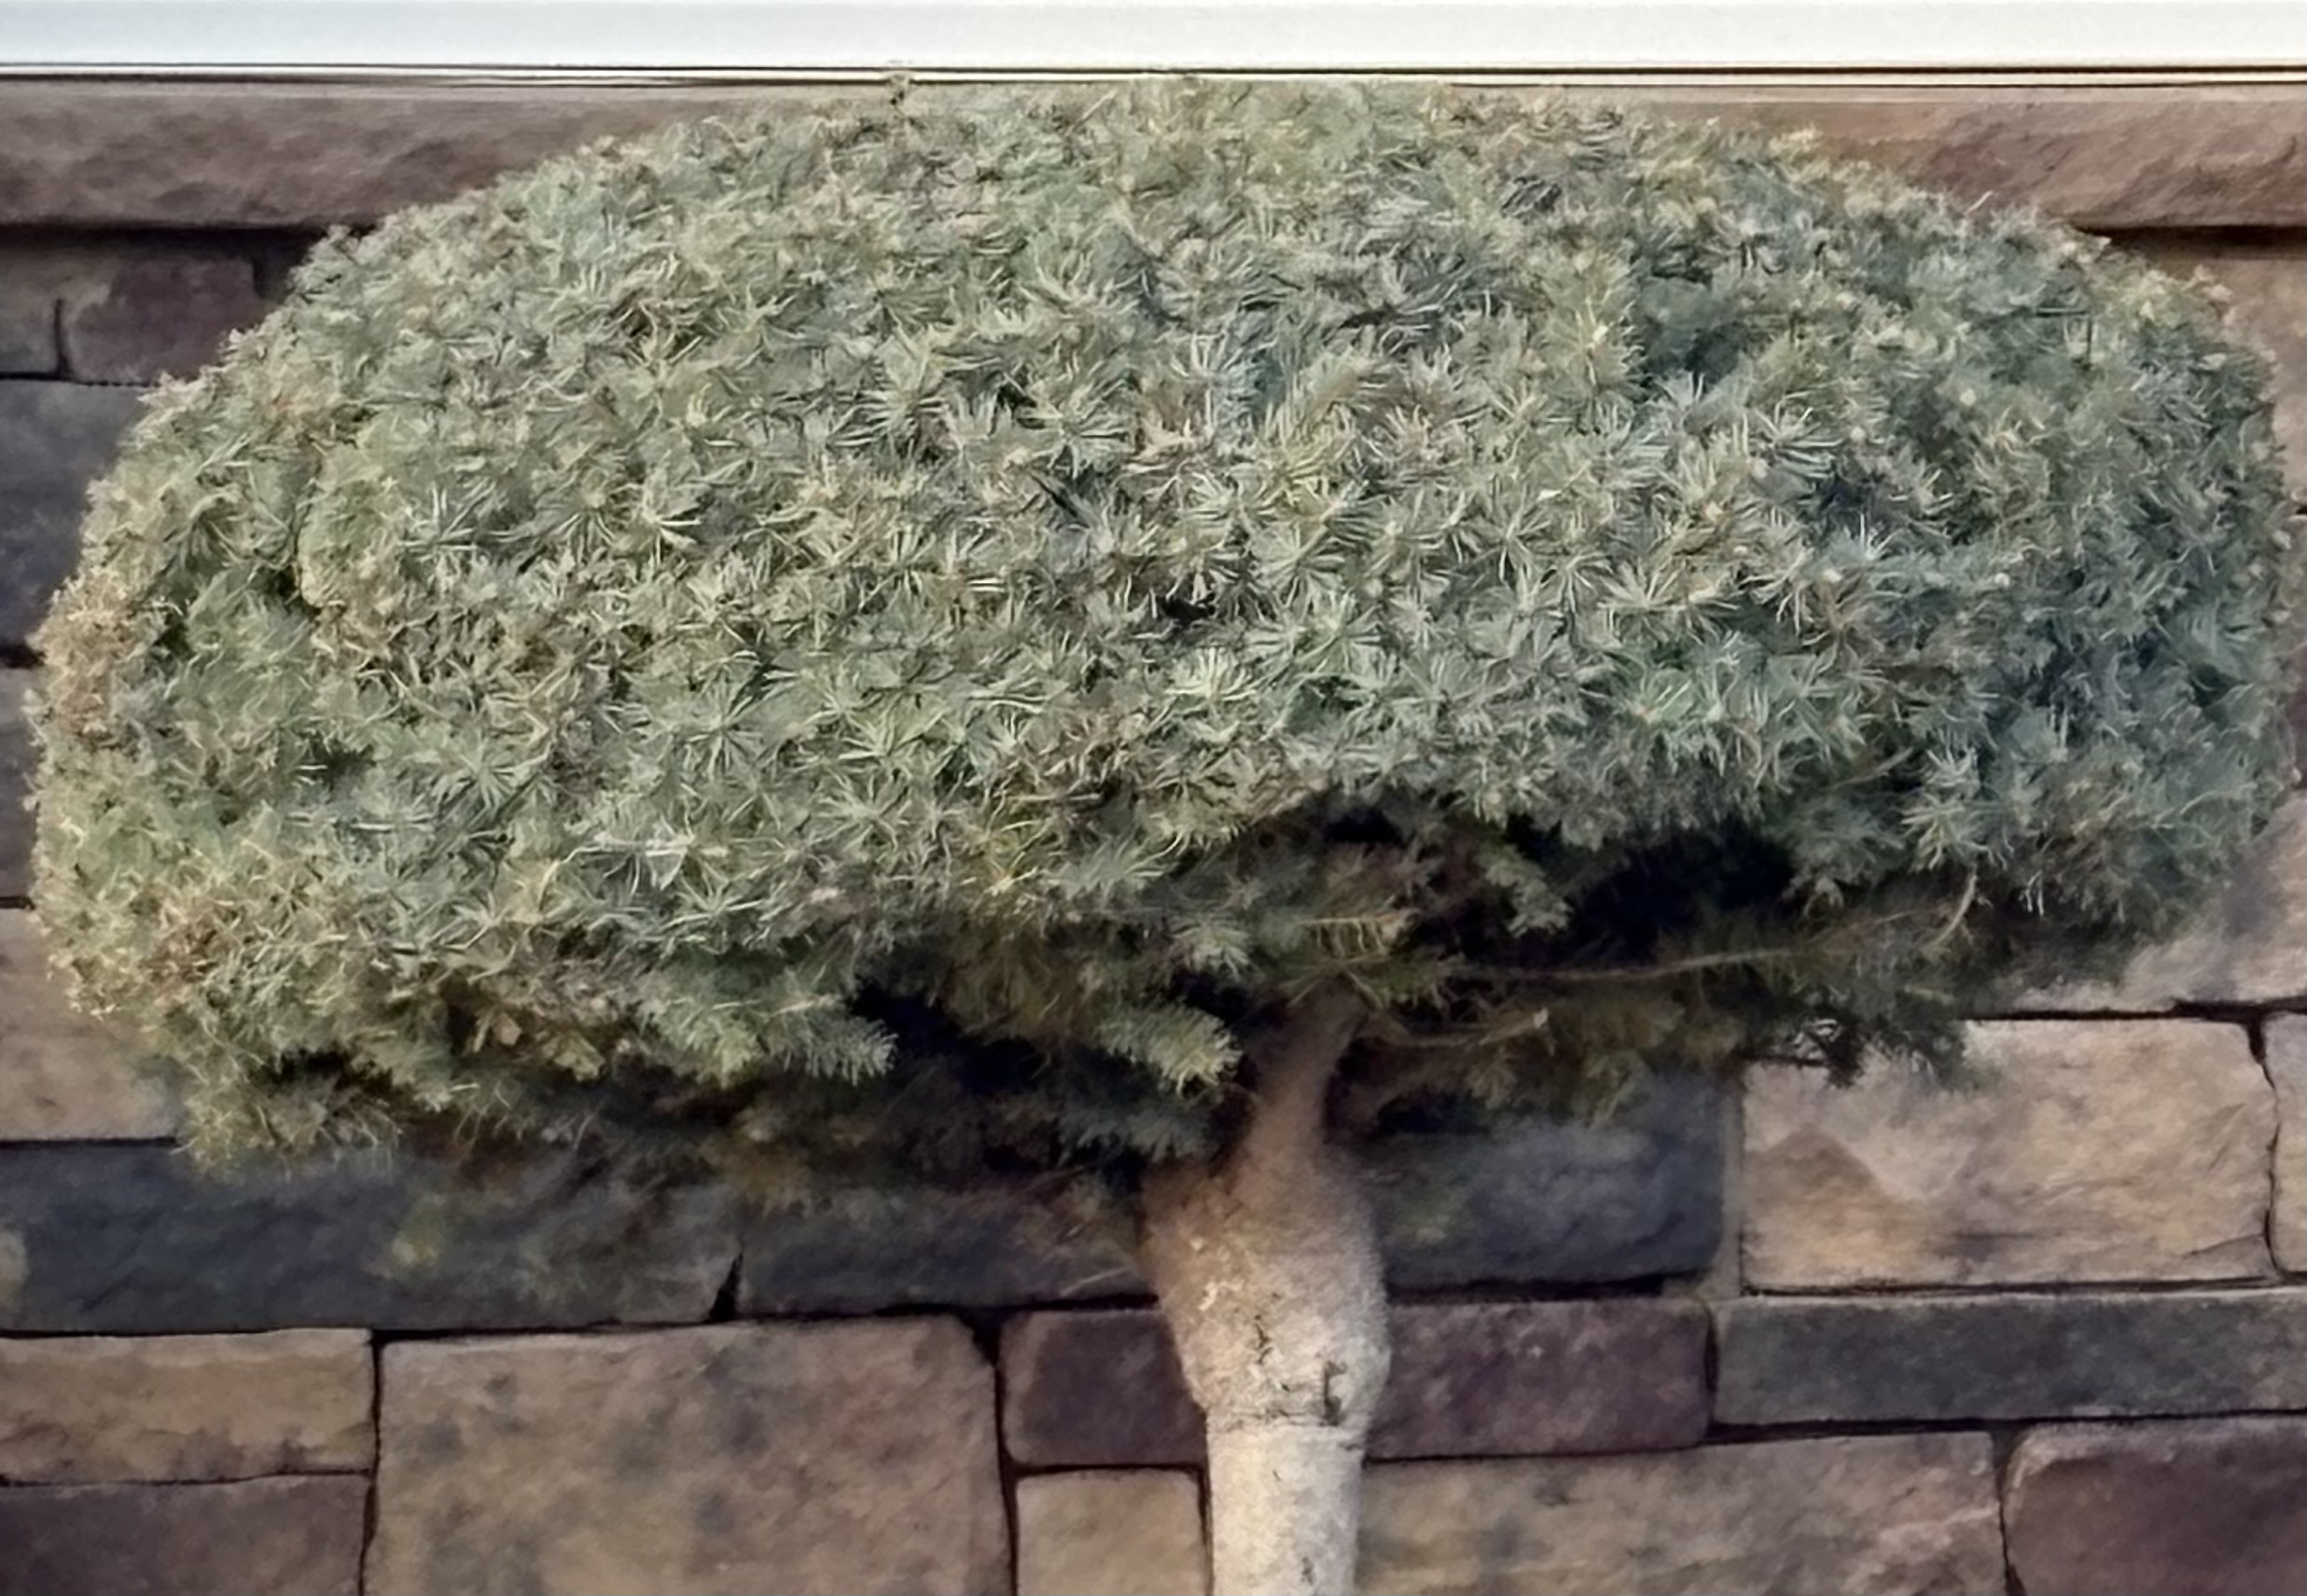
Dwarf Juniper topiary (likely Juniperus sp.)
95% 일치The plant in the photo appears to be a dwarf juniper trained as a small tree, with a single light-gray trunk and a broad, rounded crown densely packed with bluish-green, needle- or scale-like foliage. The leafy mass is very full and even, giving the plant a mushroom-like umbrella shape that is commonly seen in ornamental junipers used as focal points in gardens. Junipers (Juniperus) are evergreen conifers in which foliage can be either slender needles or flattened scales; many garden cultivars display a dense, compact growth habit with a bluish or gray-green color when mature. The plant in the image shows juvenile foliage (which may be more needle-like or star-shaped in close view) that remains attractive throughout the year, resisting leaf drop in winter. The trunk is relatively smooth, pale gray to tan, with a rougher bark near the base; the canopy sits high enough above the trunk to create a clear silhouette typical of a standard or clump-style topiary. The overall size in the photo suggests a small landscape specimen rather than a large tree, though junipers can be long-lived and gradually increase in height if allowed to grow. Distinctive features to help identify junipers include the evergreen, evergreen-like texture, the fan- or ribbon-like branch arrangement, and the bluish-green color of the foliage, which often carries a slight waxy bloom that gives the plant a frosted appearance. The plant’s most appealing aesthetic is its uniform, cushiony dome that remains intact through seasons, provided it is kept free of overgrowth and dehydration. From a horticultural perspective, this form is highly valued for creating a focal point in mixed borders, lining driveways, or serving as a low screen. The plant's care requirements reflect its tolerance for sun and drought and its preference for well-drained soil. When growing conditions are favorable, junipers are moderately fast-growing, though the exact rate depends on cultivar, climate, and pruning. For this reason, consistent, light shaping is often preferred to let new growth appear in a controlled manner rather than heavy, abrupt trimming that can stress the plant. In terms of potential variability, note that junipers vary widely in leaf texture (needle-like versus scale-like) and growth habit. In hot, dry climates, blue-green junipers like the pictured plant may hold color more vividly and resist drought better than greener cultivars; in cooler or damper environments, provide protection if late-spring frosts are common. Overall, the plant is a robust, hardy evergreen that tolerates pruning into formal shapes and can function as a sculptural element in landscape design. Care and cultivation: Light and site: Junipers crave full sun—ideally at least six hours of direct sunlight each day—for best color, density, and branching. In shade, growth slows, foliage often becomes thinner, and the color may dull. Soil and drainage: They prefer well-drained soils; they do not tolerate heavy, waterlogged conditions, which can lead to root rot. A sandy loam with moderate organic matter is ideal; in clay soils, improve drainage with raised beds or by amending the soil with organic matter and coarse sand. Watering: Established junipers are relatively drought-tolerant; they should be watered deeply but infrequently rather than with light, frequent irrigation. In hot, windy, or dry periods, water more thoroughly, allowing the top several inches of soil to dry out between waterings. New plantings require more frequent moisture until the root system becomes established, typically during the first growing season. Mulching: A 2–3 inch layer of organic mulch around the base helps retain soil moisture, regulates temperature, and suppresses weeds; keep mulch a couple of inches away from the trunk to avoid rot. Fertilization: Apply a light, balanced fertilizer (for example, a slow-release product with equal or slightly higher phosphorus and potassium than nitrogen) in early spring. Avoid high-nitrogen fertilizers, which can push excessive soft growth that is more susceptible to pests and winter burn. Pruning and shape: Junipers tolerate pruning well and are commonly shaped into spheres, cushions, or standards. For a dome-shaped topiary, selectively remove growth along the outer edges to maintain a symmetrical silhouette, using clean, sharp tools to avoid ragged cuts. The best time to prune is in late winter to early spring before new growth begins (or after new growth in late summer in some climates). Do not cut into the hard wood of older branches, as junipers can respond poorly to severe cuts. Watering after pruning helps the plant recover; avoid heavy pruning in extreme heat or drought. If the crown becomes too sparse or uneven, light, selective thinning can refresh vigor and improve air circulation; remove dead or diseased shoots promptly. Disease and pests: Junipers are relatively pest-resistant but can be affected by scale insects, spider mites, and in some climates by juniper blight or gummosis if conditions are overly damp or crowded. Good air circulation, avoiding overhead watering, and proper spacing help reduce disease risk. Regular inspection helps catch pests early; horticultural oils or systemic insecticides can be used if infestations are severe, following label directions. Propagation: Junipers are commonly propagated by cuttings or layering, though rooted cuttings can take time to establish, especially in cooler climates. For cuttings, use semi-hardwood material in late summer, remove lower leaves, dip in rooting hormone, and keep in a warm, humid environment until roots form. Pests and problems: Typical symptoms of stress include browning tips along the canopy, thinning of the interior growth, or yellowing foliage. These may indicate too much sun exposure in a sensitive cultivar, drought stress, or poor drainage leading to root problems. In heavy soils or overly wet climates, ensure proper drainage; prune away dead branches, and adjust watering and fertilization accordingly. Longevity and maintenance: Junipers can live for decades and even centuries in favorable conditions. The bonsai-like stem in your image suggests patience in shaping, as the trunk forms slowly and the crown expands gradually with careful pruning. If you want to maintain a compact, topiary-like form, schedule annual pruning sessions in late winter or early spring; if you prefer a looser natural look, prune only to remove dead wood and to maintain balance as the plant grows. Landscape uses: This form is popular as a specimen plant, a focal point in a rock garden, or a stand-alone accent near doors or entryways. It can be combined with low-growing groundcovers to emphasize contrast in texture and color. In terms of indoor use, junipers generally perform best outdoors; if used indoors, ensure bright light, good ventilation, and avoid overly dry indoor air. Some small cultivars can be grown in bright, cool rooms or sunrooms, but be mindful that indoor conditions may not closely mimic the plant’s native environment, potentially causing slower growth, pale color, or stress. Summary: The plant pictured appears to be a dwarf juniper topiary, a hardy evergreen conifer known for its dense, bluish-green foliage and a rounded crown atop a stout trunk. It is well-suited to sun-drenched landscapes with well-drained soil and benefits from light, regular pruning to keep its dome shape. Its drought tolerance, low maintenance, and sculptural silhouette make it a favorite for modern landscape design, where it can serve as a sculptural focal point, accent plant, or topiary specimen. With proper care—sufficient sun, drainage, judicious pruning, and occasional feeding—this plant will reward years of year-round color and structure.
2026년 4월 4일
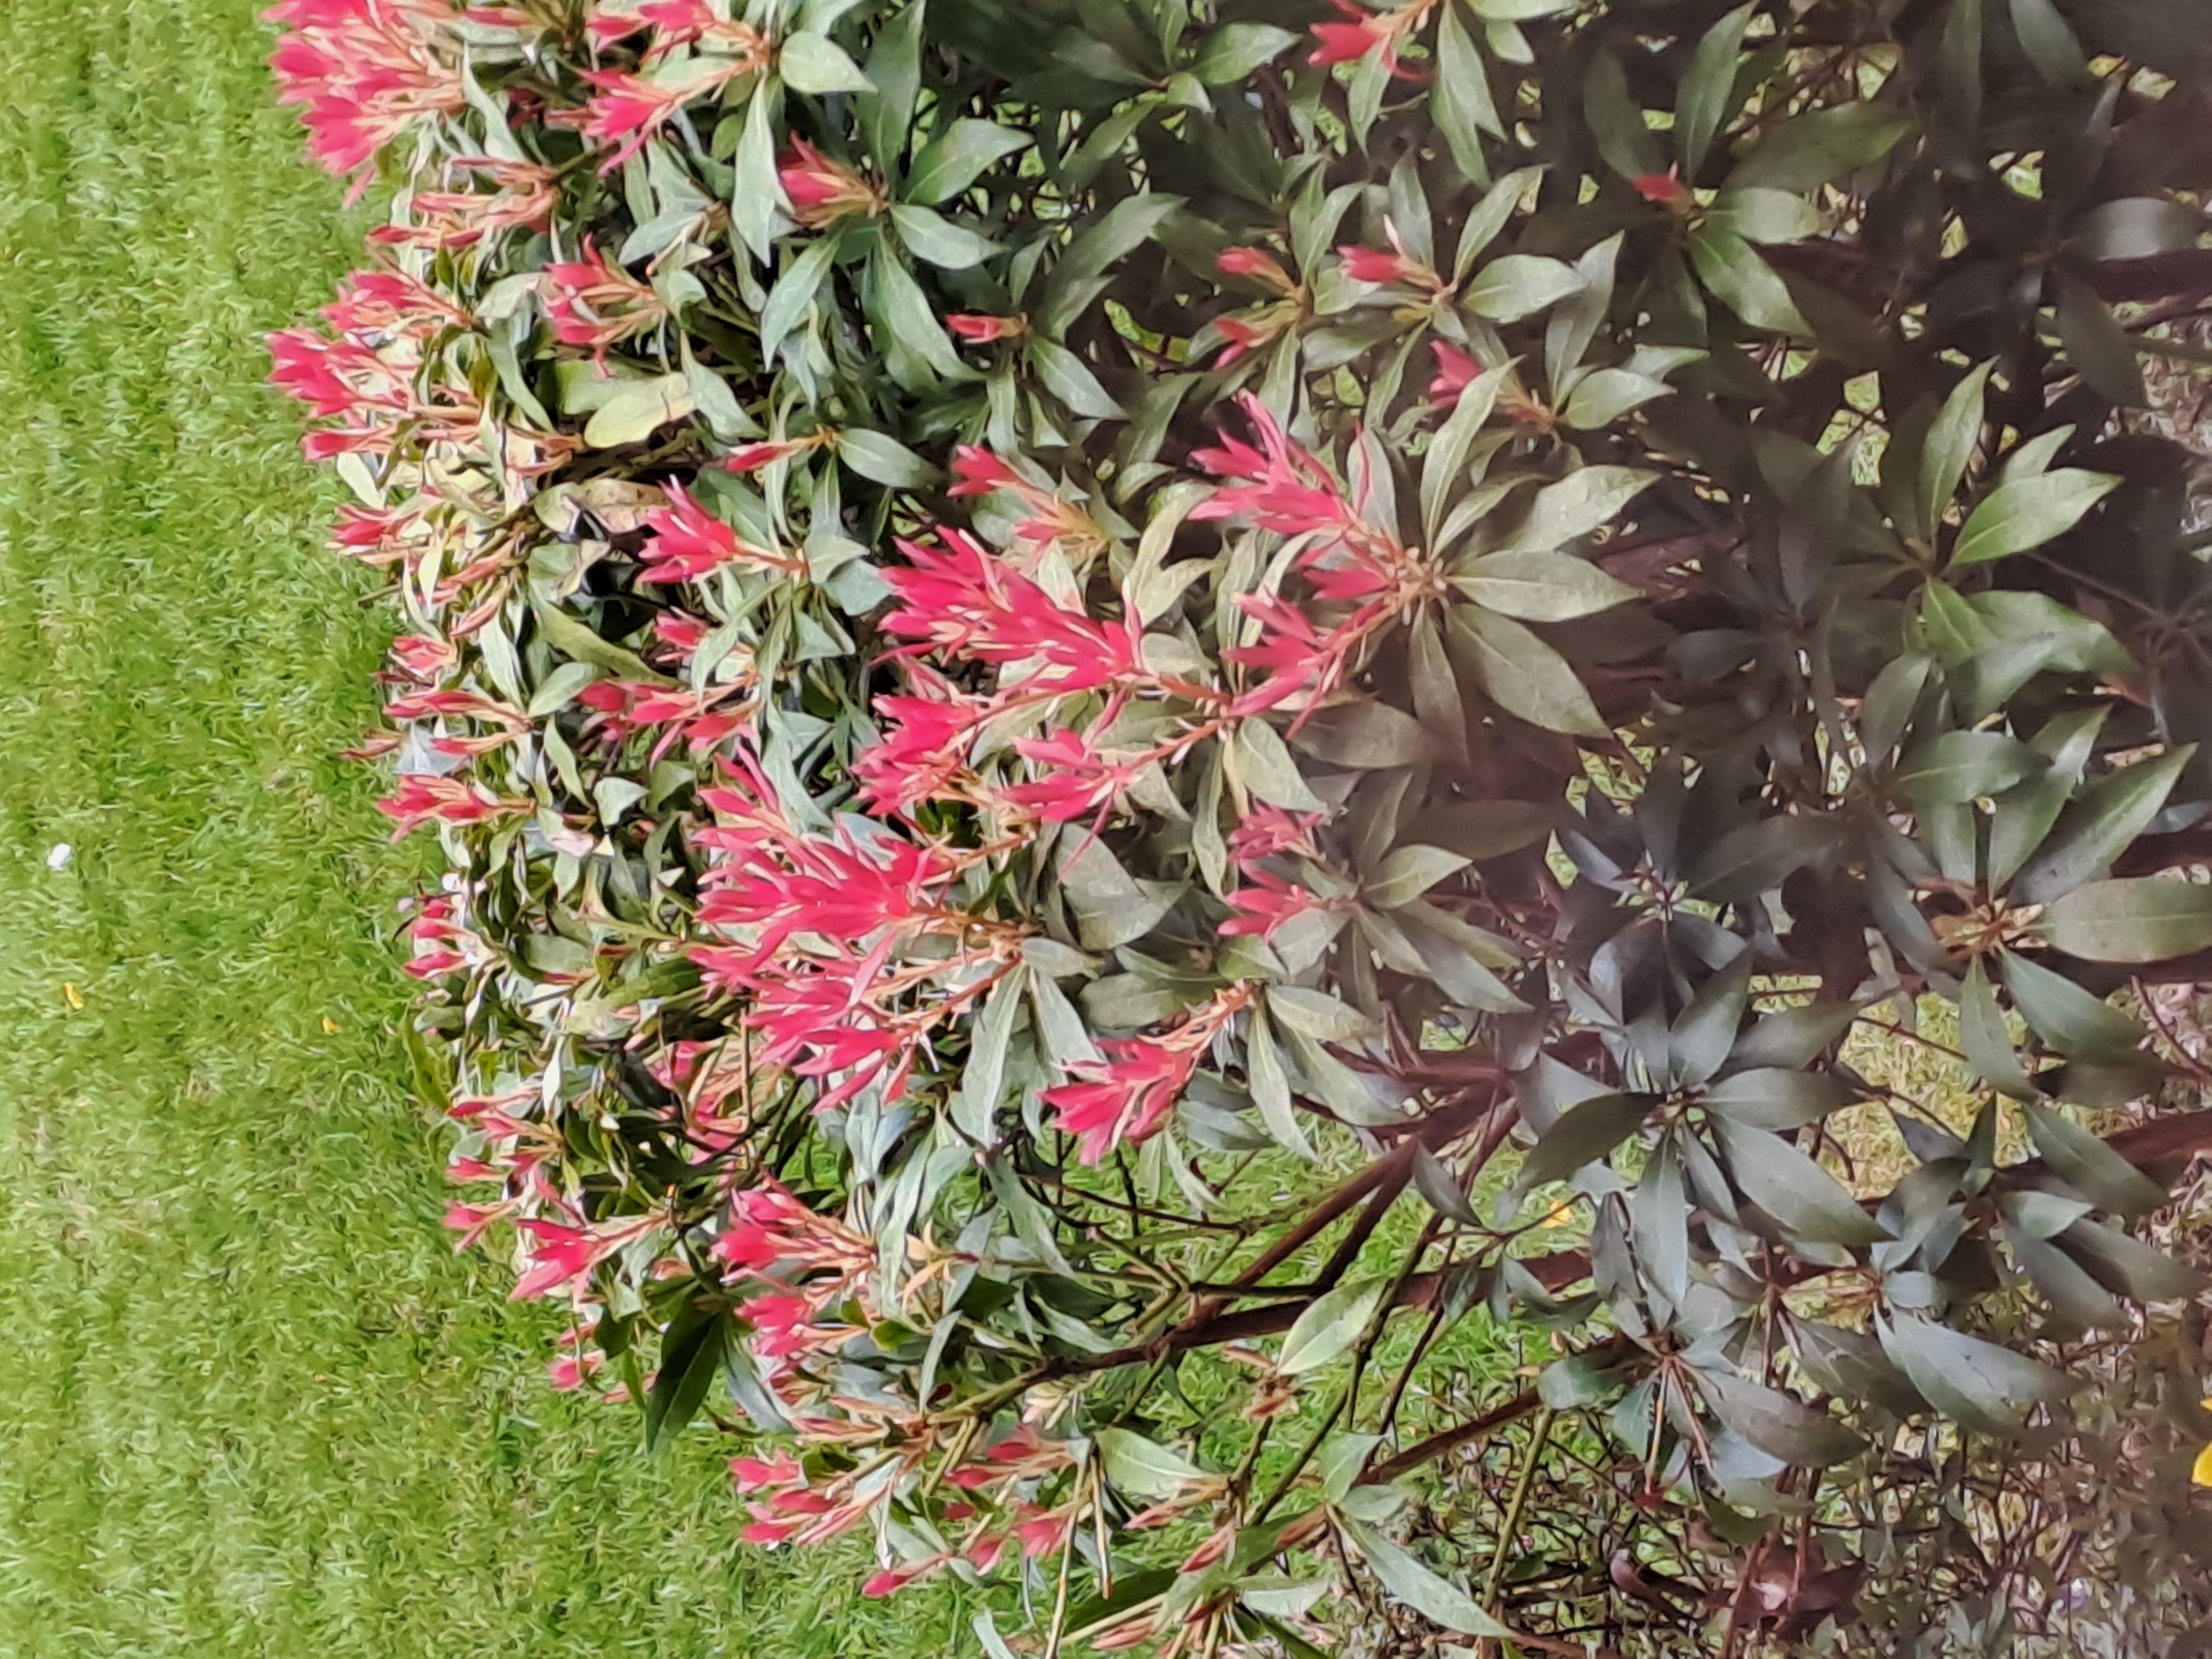
Red Tip Photinia (Photinia × fraseri 'Red Robin')
95% 일치Identification and general description: The plant in the photo is a Red Tip Photinia, most commonly grown as an evergreen hedge or ornamental shrub. Its botanical name is Photinia × fraseri, with the popular cultivar 'Red Robin' being the one most often seen in gardens and landscapes. This shrub forms a dense, upright to rounded bush with sturdy stems and a lush canopy. The foliage is glossy and evergreen, featuring two distinct types of leaves across the year. Mature leaves are a deep, dark green and relatively small (roughly 2–4 inches long). The real spectacle, however, is the new growth: each spring the tips erupt with bright red to pinkish-red leaves that stand out against the dark backdrop of older foliage. Over the season these new leaves gradually mature to green, creating a striking, two-tone appearance that remains visible throughout the year. In late spring to early summer, tiny white flowers appear in loose panicles along the shoots, adding a delicate, ornamental touch before fruiting occurs. The overall effect is a plant that provides vibrant color in spring and steady evergreen structure year-round, making it a popular choice for hedges, screens, and specimen plantings. Cultural characteristics and growth habit: Red Tip Photinia is a fast-growing, evergreen shrub. In ideal conditions, it can reach heights of 8–12 feet (2.4–3.7 meters) or more, with a spread of 8–12 feet, though in gardens it is often kept smaller with regular pruning. It tolerates a range of soil types and climate zones but performs best in full sun to light, dappled shade and prefers well-drained soil. Its leaves become less prone to sun scorch when grown with adequate moisture and in a location that receives sufficient light. The plant is fairly hardy in temperate climates but can be damaged by severe frost or strong, drying winds; in very cold regions it may lose some foliage during winter, though the red flush typically returns with new growth in spring. Care and maintenance: light, water, soil, and pruning considerations - Light: Photinias prefer full sun to partial shade. In cooler, temperate regions, full sun is ideal for the most intense red flush in spring. In very hot, sun-drenched climates, some afternoon shade can help prevent leaf scorch and maintain foliage health while still allowing color development. - Soil and planting site: They are adaptable to a wide range of soils, but the soil should be well-drained. A slightly acidic to neutral pH is often best; in alkaline soils some iron chlorosis can occur, which may show as yellowing leaves with green veins. If chlorosis is a concern, improve drainage, consider amending with organic matter, or use iron chelates as recommended by local horticultural guidelines. - Watering: Establishment requires regular, deep watering. Once established, Red Tip Photinia is fairly drought-tolerant but will perform best with consistent moisture, especially during prolonged hot or dry periods. Avoid waterlogged soil, which can promote root rot and fungal problems. Mulching around the base helps conserve moisture and maintain even soil temperatures. - Fertilization: Apply a balanced, slow-release fertilizer in spring to support new growth and overall vigor. Follow label directions to avoid over-fertilizing, which can cause excessive tender growth that is more susceptible to pests and diseases. If the plant shows signs of nutritional deficiencies (such as pale new growth or chlorosis in iron-poor soils), test the soil and adjust the program accordingly. A light top-dress of compost in spring can also benefit the plant. - Pruning and shaping: Regular pruning is common and beneficial for maintaining a compact, dense hedge or shrub. The best time to shape is late winter to early spring, before new growth starts, so the plant can flush with bright red shoots in spring. Light, frequent shearing can keep a formal hedge neat, but avoid heavy pruning in late summer or fall, as tender growth may not harden off before cold weather. - Pruning for health: Remove dead, diseased, or crossing branches to improve air circulation and reduce disease risk. Prune out any diseased shoots promptly, especially if leaf spot or blight symptoms appear, to prevent spread. - Pests and diseases: Fire blight (Erwinia amylovora) is a notable concern with Photinia. It can cause oozing, brown, wilted shoots that bend in a shepherd’s crook shape. If you observe symptoms, prune out affected shoots well below the symptomatic area and dispose of them (do not compost). Maintain good air circulation, avoid overhead watering, and practice clean pruning tools between cuts. Leaf spot (Entomosporium maculatum) can also affect Photinia, producing small red or brown spots on the leaves. Remove affected leaves and consider fungicidal treatment if infestations persist. Other potential issues include scale, aphids, and spider mites; keep an eye on new growth, spray with appropriate horticultural oils or insecticidal soaps if necessary, and promote plant vigor through proper watering and nutrition to reduce susceptibility. - Mulching and weed control: A 2–3 inch layer of organic mulch helps regulate soil moisture, suppress weeds, and protect shallow roots. Keep mulch several inches away from the trunk to prevent rot and pest harboring. - Propagation: Red Tip Photinia can be propagated by semi-hardwood cuttings taken in late summer or early autumn. Use rooting hormone and a well-draining rooting medium, and maintain high humidity around cuttings until roots form. Rooting can take several weeks to a couple of months depending on conditions. Grafting is not typically necessary for this cultivar. - Longevity and use: In landscapes, Photinia × fraseri ‘Red Robin’ is valued for its dramatic red flush and year-round structure. It works well as a formal hedge, a backdrop plant, a focal specimen, or as a privacy screen. In containers, it can be grown as a small tree or columnar hedge, though container plants generally require more frequent watering and attention to nutrient needs. Special considerations and regional notes: In regions with cool, damp springs, the flush of red growth can be delayed or reduced, and the plant may be more prone to leaf spot diseases if air circulation is poor. In warm climates, provide enough space for air movement and avoid excessive pruning that would disrupt the natural flush cycle. Because Photinia is widely used as a hedge, repeated heavy pruning can stress the plant and invite disease; therefore, balanced, consistent pruning that maintains form without removing too much wood at once is recommended. In areas where fire blight is a known problem, selecting resistant cultivars or implementing strict hygiene and pruning practices is wise. Toxicity and safety: Photinia is not commonly listed as highly toxic to humans or pets, but, as with many ornamental shrubs, ingestion of plant parts can cause mild GI upset. It’s wise to keep young children and pets from chewing on the foliage and to wash hands after pruning. If you suspect ingestion of a large amount, contact a medical professional or veterinarian for guidance. In summary: The plant in your photo is a Red Tip Photinia, renowned for its striking red-new-growth display against evergreen dark-green leaves. With proper sun, well-drained soil, and regular pruning, it provides reliable beauty and structure for years. It benefits from thoughtful water and fertility management, routine inspection for pests and diseases, and timely pruning to maintain form and encourage fresh red growth each season. For many gardeners, this plant offers an eye-catching, low-maintenance solution for hedging, screening, or a bold focal point in a mixed border.
2026년 3월 26일
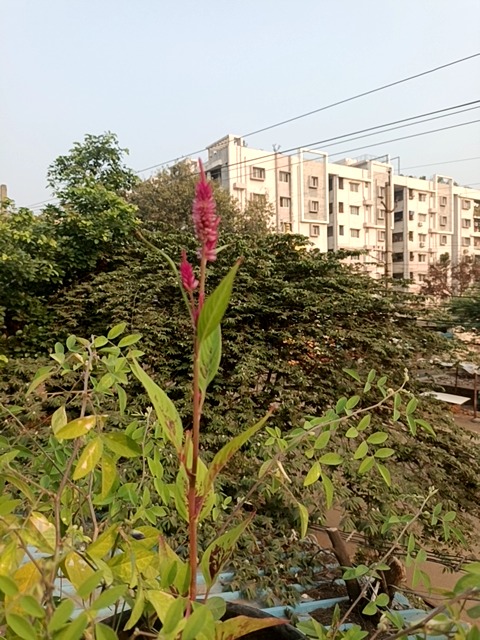
Foxtail Amaranth (Amaranthus spp.), likely Amaranthus cruentus/caudatus
95% 일치From the photo, the plant appears to be an amaranth (family Amaranthaceae), most likely a foxtail type of Amaranthus. The upright red-tinged stem supports simple, lanceolate leaves that are bright to medium green, with a smooth margin and a slight gloss. At the apex, a dense, pinkish inflorescence rises as a compact spike. This combination—an erect, unbranched stem, alternating leaves, and a densely clustered terminal inflorescence with pink/magenta tones—is characteristic of foxtail amaranths (often labeled as Amaranthus cruentus or Amaranthus caudatus varieties). In cultivation, these plants are grown both as ornamentals and as leafy greens or grain crops, but in a street or balcony setting they most commonly serve as colorful annual ornamentals. The plant in the image looks like a young, self-contained plant that could grow taller in ideal conditions, with the inflorescence developing into more pronounced catkins or foxtail-like plumes later in the season. This identification is consistent with Amaranthus spp. widely used in warm climates and adaptable to disturbed urban soils. It is worth noting that many amaranth species hybridize, so the precise species can be tricky to confirm from a single photo; however, the overall morphology strongly supports Amaranthus and specifically the foxtail growth form. Overview and botanical context: - Growth habit: Annual to short-lived perennial in warm regions, typically reaching around 0.5 to 2 meters tall depending on cultivar and growing conditions. The stem is often sturdy and can take on a reddish or purplish hue, especially near the base or on exposed stems. - Leaves: Alternate, simple leaves with smooth edges, commonly 6–15 cm long, narrow to broad lanceolate in shape. Petioles are usually short or indistinct, and leaf surfaces are green with possible red or bronze tints on sun-exposed parts. - Inflorescence: Amaranth inflorescences are dense, spike-like clusters of tiny flowers. In foxtail types, the inflorescences rise as upright, compact plumes that can range from greenish to pink, magenta, or reddish depending on cultivar and light exposure. The flowers are small and numerous, and seeds form in late stages of bloom. - Flowers and foliage: Flowers are inconspicuous but collectively create striking color and texture. Foliage can be tall and lush, contributing a dramatic backdrop for the vivid floral display. - Habitat and natural history: Amaranthus spp. are native to the Americas and widely naturalized worldwide in warm, frost-free climates. They tolerate a range of soils, though well-drained, fertile soil favors a richer bloom. They are known for their resilience and ability to reseed, especially in sunny, disturbed areas. Key ornamental and culinary uses: - Ornamental value: The vivid pink-purple inflorescences add vertical accent and color contrast in borders, containers, or late-summer/fall displays. They pair well with sun-loving annuals and grasses, and they can be combined with other drought-tolerant plants for a striking, heat-tolerant garden feature. - Edible uses: Many amaranth species produce edible greens (amaranth leaves) and edible seeds (amaranth grain). Leaves are a staple in many cuisines for their high vitamin and mineral content; seeds can be ground into flour or cooked similarly to quinoa. In urban or ornamental settings, the emphasis is usually on aesthetics, but culinary use is an option if the plant is grown specifically for leafy greens or grain. Care and cultivation notes (approximately 1000 words of guidance): - Light and temperature: Amaranths thrive in full sun. Provide at least 6 hours of direct sunlight daily for best bloom and robust growth. They prefer warm temperatures and can struggle in cool or short-season climates. Frost will damage or kill the plants, so in temperate regions they are grown as annuals or started indoors and transplanted after danger of frost. - Soil: They are relatively tolerant of a range of soil types, but perform best in well-drained soil that’s rich enough to support steady growth. A slightly acidic to neutral pH (about 5.5 to 7.5) is generally suitable. Heavy clay soils should be amended with organic matter to improve drainage. - Watering: Keep the soil evenly moist during establishment. Once established, amaranth is fairly drought-tolerant, but regular watering improves leaf and flower production. Avoid waterlogged conditions, which can promote root rot and other problems. - Fertilization: A balanced approach works well. Apply a general-purpose fertilizer or incorporate compost to improve soil organic matter. Avoid excessive nitrogen; very lush leafy growth can delay flowering and may reduce the length and vibrancy of inflorescences. In container culture, feeding once every 3–4 weeks during the growing season is usually sufficient. - Spacing and support: If you’re growing multiple plants, space them about 12–24 inches apart (30–60 cm), depending on the expected mature size of the variety. Tall, upright amaranths may benefit from staking or support to prevent lodging in windy conditions, especially when laden with blooms. - Pruning and training: Pinching the tips when plants are young can encourage branching and a bushier habit, which can lead to more flower clusters and a denser plant. Removing spent inflorescences as they fade can encourage continuous flowering in some cultivars and improve appearance. - Propagation: Amaranth is easily propagated by seeds. For ornamentals, you can sow directly outdoors after the last frost date or start indoors 4–6 weeks before the last frost and transplant seedlings. Seeds germinate quickly, usually within 5–10 days at 20–25°C (68–77°F). Harvesting seeds from ornamental plants will lead to self-seeding; if you don’t want volunteers, deadhead or collect seeds promptly. - Pests and diseases: Common pests include aphids, thrips, caterpillars, and beetles. They can be managed with insecticidal soap, neem oil, or encouraging natural predators. Powdery mildew and other fungal diseases can affect crowded plantings or poor airflow; ensure good spacing and air circulation, water at the base to keep foliage dry, and apply appropriate fungicides if needed. Regularly inspect for signs of disease or pest pressure and address promptly to prevent spread. - Maintenance: Remove lower leaves if they yellow or become leggy to maintain a tidy appearance and reduce disease risk in humid conditions. For prolonged color, deadhead spent blooms; some varieties still bloom vigorously even after flowering begins, while others may slow down if their seed heads mature. - Pod and seed safety: The seeds are tiny and can germinate readily if dropped in garden beds. If you do not want volunteer plants, remove seed heads or dispose of them before they mature. In containers, you can simply clip the flowering stem after bloom to encourage a fresh flush of new growth. - Companion planting: Amaranth pairs well with other sun-loving annuals like marigolds, zinnias, and sunflowers. Its bold vertical form complements grasses such as fountain grasses or millet, creating a dynamic, warm-season palette. In edible-garden settings, interplant with tomatoes or peppers where the height and color can be used to create a layered structure. - Varietal considerations: Because Amaranthus spp. encompasses many forms, the exact care can vary slightly depending on cultivar. Foxtail amaranths (Amaranthus spp.) are particularly prized for upright, tufted plumes and a relatively compact habit. Some varieties are bred specifically for larger seed crops, others for ornamental display; assume a tall, robust plant for the pictured growth form and adjust pruning and staking accordingly. Ecological and practical considerations: - Self-seeding: Amaranthus can reseed readily in favorable climates, especially in warm, sunny sites with minimal competition. If you’re growing a non-native or ornamental cultivar, you may want to manage reseeding to avoid unwanted spread in natural areas. Deadheading or collecting seeds before shed can help limit volunteers. - Invasiveness: In some warm regions, amaranth can naturalize beyond the cultivated area. If you notice the plant thriving beyond your garden beds or appearing in cracks and disturbed ground, you may want to pull out stray seedlings to prevent them from becoming invasive in your local ecosystem. - Nutrition and soil health: In addition to ornamental value, amaranth greens are highly nutritious in many cuisines, rich in vitamins A and C, iron, and calcium. In a kitchen garden, you can rotate amaranth with other crops, using the plant’s deep roots to help break up compacted soil in some cases. - Safety considerations: For most people, amaranth is safe to handle. If you have a history of allergies to related plants or pollen sensitivities, be mindful of pollen production during bloom. There are no known common toxicities associated with handling amaranth, but always wash hands after pruning or harvesting and avoid ingesting large quantities of raw plant material if not prepared properly. In summary: - The plant in your photo is best described as a foxtail-type amaranth (Amaranthus spp.), likely a ornamental cultivar such as Amaranthus cruentus or Amaranthus caudatus in its upright form. It features a red-tinged stem, green lanceolate leaves, and a prominent pinkish inflorescence at the stem tip. - It is an adaptable warm-season annual that values full sun, well-drained soil, and regular but balanced moisture. It responds well to light pruning and staking, and it can be grown from seed with straightforward care. - Beyond its striking appearance, amaranth also offers edible greens and potential grain seeds, making it a versatile plant for gardeners who appreciate both aesthetics and function. With thoughtful care—adequate sun, modest feeding, timely deadheading, and pest monitoring—this plant can provide a dramatic vertical accent in beds and containers throughout the warm months, then seed-free or seed-spreading behavior can be managed as desired.
2026년 3월 26일
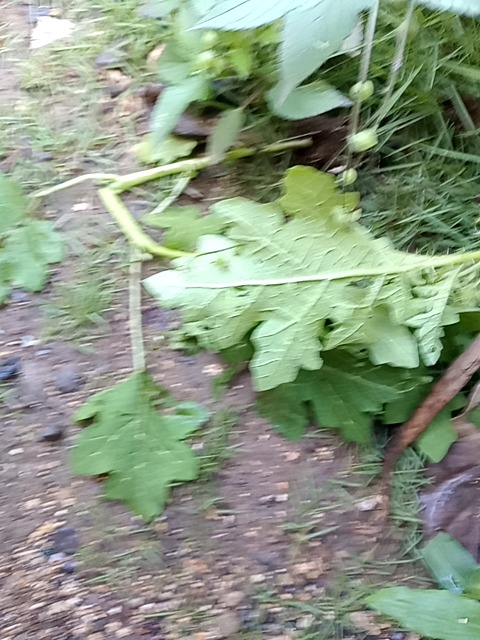
Grape vine (Vitis sp.)
95% 일치Based on the visible features in the photo, the plant appears to be a grape vine (Vitis species), a deciduous climbing or sprawling vine known for its large, lobed leaves arranged alternately along a woody or herbaceous stem. The leaves shown are broad and palmately lobed with irregular, deep sinuses, which is characteristic of many grape varieties. The stem appears green and flexible, suggesting a young vine or a plant that has recently grown and spread along the ground, possibly with tendrils or a light climbing habit. While the photo provides a good hint, identifying the exact species or cultivar from leaves alone can be tricky, since wild grape species and many cultivated grape varieties share similar leaf shapes. If you have access to the plant during fruiting, or can share a photo of the tendrils, bark, or grape clusters, that would help confirm the ID more precisely. For now, this description treats it as a grape vine, which is a reasonable and commonly encountered plant with this leaf morphology. Description and key characteristics - Leaves: Deciduous, broad, and alternately arranged along the stem. Leaves are typically lobed (often 3–5 lobes) with serrated margins and prominent veins radiating from the petiole. The leaf surface is usually medium to dark green, sometimes with a slightly glossy or matte finish depending on age and variety. - Vines and habit: Grapevines are climbing or trailing woody plants that produce flexible stems. When young, stems are green and can sprawl along the ground or be trained onto a trellis or support. Mature vines develop a woody framework. The plant in the photo shows a creeping habit rather than a fully upright, woody shoot, which is common in many garden situations where vines are not fully trellised. - Growth environment: Grapevines prefer a sunny position with well-drained soil. They tolerate a range of soil types but perform best in fertile, loamy soils with good drainage. They often spread vigorously if unconfined, forming dense canopies and, over time, a substantial root system. - Reproduction and fruit: Grapevines produce grapes in clusters when mature. Each fruiting cycle depends on the cultivar and climate. The fruiting organs are not visible in your image, but the presence of a grape vine is typically associated with small, inconspicuous flowering clusters that give way to berries later in the season. - Additional features: Many grape varieties produce tendrils opposite the leaves that help the vine climb supports. The color of new growth is often light green, becoming more woody and brown with age. Care and cultivation (general guidelines) - Site and training: If you want to encourage fruit production and a neat appearance, provide a sturdy support structure such as a trellis, arbor, or sturdy fence. Grapevines respond well to training and pruning. A sunny location that receives at least 6–8 hours of direct sunlight per day helps maximize fruit set and sugar content. - Soil preparation: Prepare well-drained soil rich in organic matter. Incorporate compost or well-rotted manure to improve soil structure and fertility. Grapevines tolerate a range of pH levels but generally prefer a slightly acidic to neutral pH (around 6.0–7.0). - Watering: Water deeply and regularly while establishing, but avoid waterlogging. Once established, grapes benefit from deep, infrequent watering rather than frequent light watering. In particularly hot or windy conditions, supplemental irrigation may be needed to maintain steady growth and fruit development. - Mulching: Apply mulch (straw, wood chips, or compost) around the base of the plant to conserve moisture, suppress weeds, and stabilize soil temperatures. Keep mulch a few inches away from the trunk to prevent rot. - Feeding: Grapevines typically don’t require heavy feeding if soil is reasonably fertile. In early spring, a balanced fertilizer or a compost/top-dress can support new growth. Avoid excessive nitrogen late in the growing season, which can delay ripening and reduce fruit quality. - Pruning and maintenance: Pruning is the key to good grape production and health. In most temperate regions, pruning is done during the dormant season. The goal is to balance fruiting canes (which bear fruit) with vegetative shoots that restore the plant’s structure for next year. Training methods vary (cordon, cane pruning, etc.), so choose a method appropriate for your climate and space. Remove weak or diseased wood and keep an open canopy to improve air circulation and reduce disease pressure. - Pest and disease management: Grapevines are susceptible to several pests and diseases, including powdery mildew, downy mildew, botrytis (gray mold), phylloxera, grape leafhoppers, and various beetles. Good cultural practices—sunlight exposure, air movement through proper pruning, and clean- up of fallen leaves—reduce risk. If problems arise, use appropriate horticultural oils, sulfur or copper-based fungicides (where permitted), or targeted organic or synthetic controls. Insect monitoring and regular scouting are essential for early intervention. - Harvesting: Grapes are typically harvested when they reach the desired sweetness and flavor, which is cultivar- and climate-dependent. Brix measurements or taste tests are common ways to determine readiness. Harvesting at the right time is important for flavor and storage quality. After harvest, berries can be eaten fresh, dried into raisins, or used for juice and winemaking depending on the cultivar. Propagation and regenerative potential - Propagation by cuttings: Grapevines are commonly propagated from hardwood cuttings taken in winter or from green cuttings in late spring. Desired wood is cut into sections that include a few buds, then rooted in a moist, well-drained medium. With proper moisture and warmth, cuttings will form roots and eventually establish new vines. - Layering: A simple way to propagate is to bend a low-growing stem to the soil, cover a portion with soil while still attached to the parent plant, and wait for it to root. Once rooted, it can be separated and transplanted. - Seed propagation: It is possible but less reliable for fruit quality and may require several years to reach fruiting, if it fruits at all. Most gardeners prefer vegetative propagation to preserve cultivar traits. Uses, benefits, and cautions - Edible fruit: Grapes are a global staple, with varieties suited for fresh eating, drying (raisins), juice, and wine production. The flavor, texture, and color of grapes vary widely among cultivars and growing conditions. - Ornamental value: Even when not fruiting, grapevines can be attractive due to their lush foliage, seasonal color changes, and the architectural lines they provide on fences or trellises. - Cautions: If the plant is a wild grape or a less familiar cultivar, taste or harvest only ripe, fully colored fruit to avoid sourness or unpalatability. Be mindful of potential pesticide exposure on home-grown vines and follow local guidelines for handling and processing fruit. In some climates, young vines can be susceptible to sunburn on leaves; providing some shade during the hottest part of the day for new growth can help establish resilience. A note on identification and next steps - If you have access to the plant in fruit or with tendrils, posting a photo of the fruit clusters or the tendril structure can help confirm the ID with higher confidence. Additionally, close-ups of the leaf underside, leaf petiole, and bark on older wood can aid differentiation among Vitis vinifera cultivars and wild grape species. - If you discover that the plant is not a grape (for example, if the leaves are from a totally different plant form), you can share another photo showing a broader view of the plant, including the growth habit, flowers, and any fruiting structures, so an alternative identification can be offered and tailored care guidance provided. In summary The plant in your photo most closely resembles a grape vine (Vitis sp.) due to its large, lobed leaves and creeping/vining habit. Grapevines are versatile, long-lived plants that can be grown for fruit, shade, or ornamental purposes. They require a sunny site, well-drained soil, and regular but not excessive watering, along with diligent pruning and training to keep the plant healthy and productive. With proper care, grapevines can provide years of harvest and visual appeal, whether you’re growing them for fresh grapes, winemaking, or decorative landscaping. If you can confirm the fruit or provide additional photos, I can refine the identification and tailor the care recommendations even more precisely.
2026년 3월 24일